
Restoring a pair of white shoes is a discipline, not a guessing game. It requires an understanding of the materials—the specific weave of a knit upper, the unique rubber compound of a midsole, the delicate nap of suede—and the precise techniques needed to treat them. Rushing the process with harsh chemicals or improper tools is the fastest way to cause irreversible damage.
This guide moves beyond temporary fixes. We will detail the professional methods for assessing, cleaning, and preserving your footwear. Mastering these fundamentals allows you to achieve a crisp, factory-fresh appearance consistently, without compromising the structural integrity of your shoes.
Why Material-Specific Care is Critical
Footwear is an investment; proper maintenance is the mechanism that protects it. This principle has fueled a significant market. The global shoe care industry reached USD 4.47 billion in 2024 and is projected to climb to USD 7.23 billion by 2032. This growth isn't arbitrary; it reflects a culture of individuals dedicated to preserving their valued footwear. North America, with a dominant 44.25% revenue share, is a major driver, heavily influenced by discerning sneaker enthusiasts.
Consider this: an estimated 70% of initial wear and tear—scuffs, dirt, and oxidation—is most visible on white shoes. Market analysis, which can be explored on Data Bridge Market Research, supports what specialists have long known: using generic, low-quality cleaners can accelerate material degradation by up to 3x.
At Gold Standard, we approach footwear care as a craft. It is the distinction between a shoe that lasts one season and one that becomes a cornerstone of a collection for years. Adopting a specialist’s mindset means prioritizing the long-term health of the material over a fast, damaging solution.
Assembling a Professional Restoration Kit
Before addressing specific materials like leather, canvas, or mesh, we must first assemble the correct tools. Any successful restoration begins with the right equipment. Having these items prepared ensures you can address any stain or scuff safely and effectively.
Below is a breakdown of the essential tools for a professional-grade setup.
Your Essential Footwear Restoration Toolkit
| Tool | Primary Application | Gold Standard Recommendation |
|---|---|---|
| Soft to Medium Bristle Brush | Gently lathering cleaner on uppers (canvas, leather, mesh) without snagging or abrading delicate surfaces. | Gold Standard Premium Soft Bristle Brush |
| Stiff Bristle Brush | Scrubbing ingrained dirt and grime from durable rubber midsoles and outsoles. | Gold Standard Premium Double-Sided Brush (utilize the stiff bristle side) |
| Premium Shoe Cleaner | Creating a controlled foam to lift contaminants from the material's pores without relying on harsh chemicals. | Gold Standard All-Natural Shoe Cleaner |
| Microfiber Towel | Blotting away excess moisture and cleaner residue without leaving lint or causing micro-scratches. | A high-quality, absorbent microfiber towel. |
These four core components form the foundation of any serious footwear care regimen. They provide the versatility to handle diverse materials and soil levels, ensuring you always have the appropriate tool for the task.
Know Your Material: A Tailored Approach to Cleaning
Applying a single, universal cleaning method to all white shoes is one of the fastest ways to cause damage. Different materials react uniquely to water, agitation, and cleaning agents. A successful restoration always begins with a thorough assessment of the shoe's construction.
This is the core of professional footwear care: diagnosing the material before prescribing the treatment. From the porous fibers of canvas to the delicate surface of suede, each material requires a distinct strategy to lift dirt without causing permanent harm.
The following decision tree provides a framework for selecting the correct approach, from simple surface cleaning to more advanced restoration techniques, based on your shoe's material and condition.
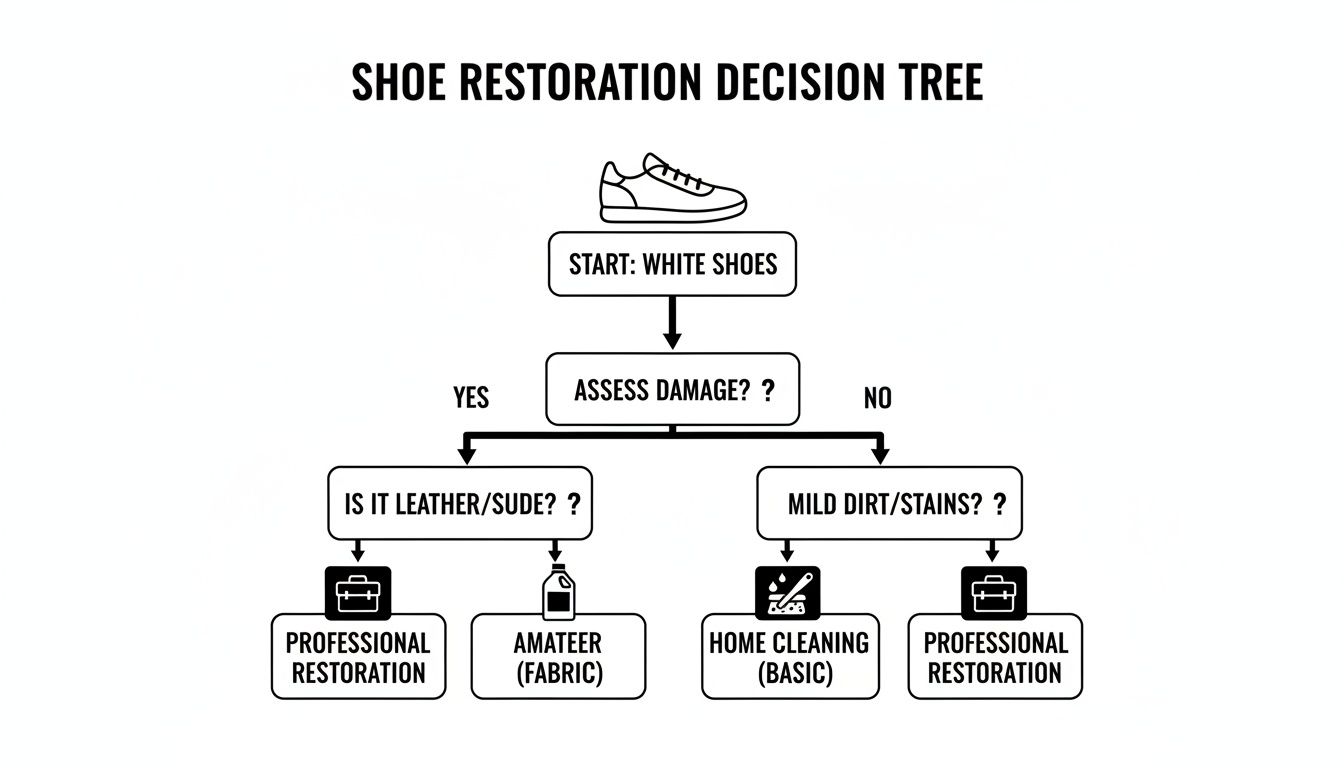
This chart illustrates the critical importance of matching the cleaning method to the material. It is the key to avoiding common, costly mistakes that can permanently damage an otherwise restorable pair of shoes.
Cleaning White Canvas and Mesh
Canvas and mesh are woven textiles, which means dirt and grime readily penetrate their fibers. The objective is to use a cleaning solution that can infiltrate these fibers, lift the contaminants to the surface, and allow for their removal without oversaturating the material.
Begin by using a medium-bristle brush to remove all loose, dry debris. This crucial preparation step prevents turning surface dust into a muddy paste once liquid is introduced. Pay close attention to the seams, where dirt tends to accumulate.
Next, generate a controlled foam using a premium shoe cleaner. The Gold Standard method involves applying the cleaner to a wet brush, not directly onto the shoe. This technique provides precise control over moisture levels and facilitates the creation of a rich, effective lather.
Work the foam into the canvas or mesh using small, circular motions. The foam encapsulates the dirt particles, lifting them from the fibers. For a grass stain on a white canvas shoe, you would concentrate the lather on the stain, allow the foam to work, and then blot the area clean with a microfiber towel.
Expert Insight: Never submerge canvas or mesh footwear in water. This waterlogs the fibers, weakens the adhesives bonding the upper to the sole, and can lead to separation over time. A controlled, foam-based cleaning is always the safer, more effective method.
Restoring White Leather Shoes
White leather offers a classic, clean aesthetic but is highly susceptible to scuffs, creases, and discoloration. Unlike textiles, leather is a skin; it must be both cleaned and conditioned to maintain its suppleness and prevent cracking.
Start by removing the laces and performing a thorough dry brushing with a soft-bristle brush to eliminate surface contaminants without causing micro-scratches on the finish.
Apply a small amount of a quality cleaner to your soft brush and gently work it into the leather. The lather will begin to lift scuffs and dirt. For more stubborn marks on the toe box or heel, you may need to apply slightly more pressure, but avoid aggressive scrubbing.
One of the greatest risks with white leather is dehydration. After cleaning, wipe away all residue with a clean, damp microfiber towel. It is critical to follow this with a leather conditioner. This step replenishes the natural oils and protects the material from future damage. The principles for treating premium automotive leather are analogous; you can adapt professional tips for cleaning white leather for footwear with excellent results.
Tackling White Suede and Nubuck
Suede and nubuck are among the most challenging materials to maintain. Their characteristic velvety texture is delicate and easily damaged by excess water or improper brushing. The strategy must always be dry-first, with minimal use of liquids.
For routine cleaning, a dedicated suede brush and eraser are your primary tools.
- Use the crepe or rubber side of the brush to gently lift surface marks and restore the material's nap.
- For more stubborn spots, use a suede eraser to gently crumble away the stain.
- Finish by brushing the entire shoe in a single direction with the bristle side to achieve a uniform, pristine appearance.
If a liquid cleaner is the only viable option for a deep stain, extreme caution is necessary. Apply a minuscule amount of foam from a cleaner like the Gold Standard All-Natural Shoe Cleaner to a soft brush, dab it onto the affected spot, and blot immediately with a microfiber towel. Do not rub. The goal is to let the foam lift the stain and have the towel absorb it before it penetrates the suede.
Reviving Rubber Midsoles and Outsoles
The soles of your white shoes endure the most abuse. Clean uppers paired with a dirty midsole detract from the overall aesthetic. Fortunately, rubber is a durable material that can withstand more assertive cleaning methods.
A stiff-bristle brush is the ideal tool for this task. Apply your cleaner directly to the brush and scrub the midsole and outsole vigorously. The stiff bristles will penetrate textured surfaces and remove ingrained dirt that softer brushes cannot reach.
After a thorough scrubbing, wipe the soles clean with a microfiber towel. For a professional-grade result, use a fine-detail brush (an old toothbrush is suitable) to clean the hard-to-reach grooves in the outsole. This attention to detail distinguishes a quick wipe-down from a true restoration.
Advanced Solutions for Stubborn Stains and Yellowing
At times, standard cleaning protocols are insufficient. You may be faced with a deeply set stain or yellowed sole that requires a more advanced approach. This is where we transition from basic cleaning to true restoration, tackling issues that often lead others to discard their shoes—deep-set oil stains, dye transfer, and the pervasive oxidation of rubber soles.
These next-level techniques demand patience and precision, but they can salvage footwear that might otherwise be considered a total loss.
The Science Behind De-Yellowing Rubber Midsoles
There is little more frustrating than clean uppers on a yellowed midsole. This is not merely dirt; the primary cause is a chemical process called oxidation. Exposure to oxygen and UV radiation alters the rubber’s chemical composition, resulting in a yellow tint.
To counteract this, we must reverse the process. Specialists employ a de-yellowing agent—often referred to as "sole sauce"—which is typically an oxidizing formula. When this agent is combined with a UV light source (direct sunlight is effective), it chemically reverses the oxidation, drawing the yellow pigment out of the rubber and restoring its original white color.
Precision is paramount.
- Isolate the Area: This agent is formulated for rubber only. Use high-quality painter's tape to meticulously mask off any adjacent leather, suede, or canvas to prevent damage to the uppers.
- Apply a Thin, Even Coat: Use a small brush to apply a consistent layer across the midsole. Applying thick, uneven clumps will result in a patchy, inconsistent finish.
- Controlled UV Exposure: Wrap the treated area in clear plastic film to prevent the agent from drying out prematurely. Then, expose the shoes to direct sunlight for 30-60 minute intervals. Monitor the progress frequently.
This is not always a single-application process. Severely yellowed soles may require multiple treatments to return to their original factory-white condition.
This technique exemplifies why a specialist’s mindset is essential. It is not about brute force but about understanding the material’s science and using a controlled chemical reaction to achieve a specific result. Rushing this process or applying excessive heat can cause more damage.
Attacking Stubborn Stains by Material
When a general cleaner proves ineffective, a spot-treatment strategy is required. The key is to match the cleaning agent to both the specific stain and the shoe's material. Applying an inappropriate product can permanently set a stain.
For Oil and Grease on Suede and Nubuck
Oil is the nemesis of suede. It penetrates the porous material, leaving a dark, saturated stain. The objective is not to scrub but to extract the oil.
Begin by covering the spot with cornstarch or talcum powder. Allow it to sit for several hours. The powder will act as an absorbent, drawing the oil out of the suede’s deep pores. After sufficient time has passed, gently brush the powder away with a suede brush. If a faint mark persists, a suede eraser can often break up the remaining residue.
For Ink Marks on Leather
An ink mark on white leather requires immediate action. Apply a small amount of isopropyl alcohol to a cotton swab and dab it directly onto the ink. Gently blot the area with a clean cloth—never rub, as this will spread the ink. The alcohol works to dissolve the ink, while blotting lifts it away.
After the ink is removed, it is crucial to follow up with your standard cleaner and then apply a quality leather conditioner to restore the moisture stripped by the alcohol.
For Dye Transfer on Canvas and Mesh
Dye transfer from denim onto white canvas footwear is a common issue. For this, a targeted cleaning paste is effective.
Mix a small amount of our Gold Standard All-Natural Shoe Cleaner with a few drops of water to create a thick consistency. Apply this paste directly onto the dye transfer and let it sit for approximately 15-20 minutes. Then, use a medium-bristle brush to gently agitate the area and lift the stain before wiping it clean.
For more in-depth techniques, consult our complete guide on how to remove shoe stains.
Stain Removal Guide by Shoe Material
This table provides a quick-reference guide for tackling the most common and difficult stains based on your shoe's material. Consider it an emergency protocol for footwear preservation.
| Stain Type | Canvas and Mesh | Leather | Suede and Nubuck | Rubber Soles |
|---|---|---|---|---|
| Grass | Spot-treat with a paste of cleaner and water. Use a medium brush. | Wipe immediately. Use a leather-safe cleaner on any remaining residue. | Use a suede eraser. Avoid water as it can set the stain. | Scrub with cleaner and a stiff-bristle brush. |
| Oil/Grease | Apply cornstarch to absorb, then clean with a degreasing agent. | Wipe excess immediately. Use a specialized leather degreaser. | Cover with cornstarch for hours, then brush off. Do not use water. | A magic eraser or a strong cleaner can lift surface grease. |
| Ink | Blot with isopropyl alcohol on a cotton swab. Test an inconspicuous spot first. | Dab with isopropyl alcohol on a cotton swab, blot, then condition. | Professional cleaning is recommended; DIY is very risky. | Isopropyl alcohol or a magic eraser often works well. |
| Scuffs | A medium-bristle brush and cleaner paste should lift most scuffs. | Use a dedicated leather cleaner and a soft cloth. | A suede brush or eraser can buff out light scuffs. | A magic eraser is the most effective tool for scuff marks. |
| Mud | Let it dry completely, then brush off the excess before cleaning. | Let it dry, flake off, then wipe clean with a damp cloth. | Let it dry, brush off with a suede brush. Avoid wet cleaning. | Simply wipe or scrub off with your standard cleaning solution. |
Remember, the keys to successful stain removal are prompt action and the correct, material-specific technique.
The Finish Line: Drying, Reshaping, and Protecting Your Footwear
An impeccable cleaning can be nullified by improper post-cleaning procedures. The drying, reshaping, and protecting phase is not an afterthought; it is what separates an adequate cleaning from a professional restoration. This is where you solidify the shoe’s final shape, feel, and long-term durability.
Common mistakes at this stage, such as applying direct heat or allowing mildew to form, can ruin your hard work.
The Art of a Proper Air Dry
A critical rule: never apply direct heat to wet footwear. Using a machine dryer, placing shoes near a radiator, or leaving them in direct sun will cause irreparable damage. High heat warps rubber, dissolves adhesives, and makes leather brittle and prone to cracking.
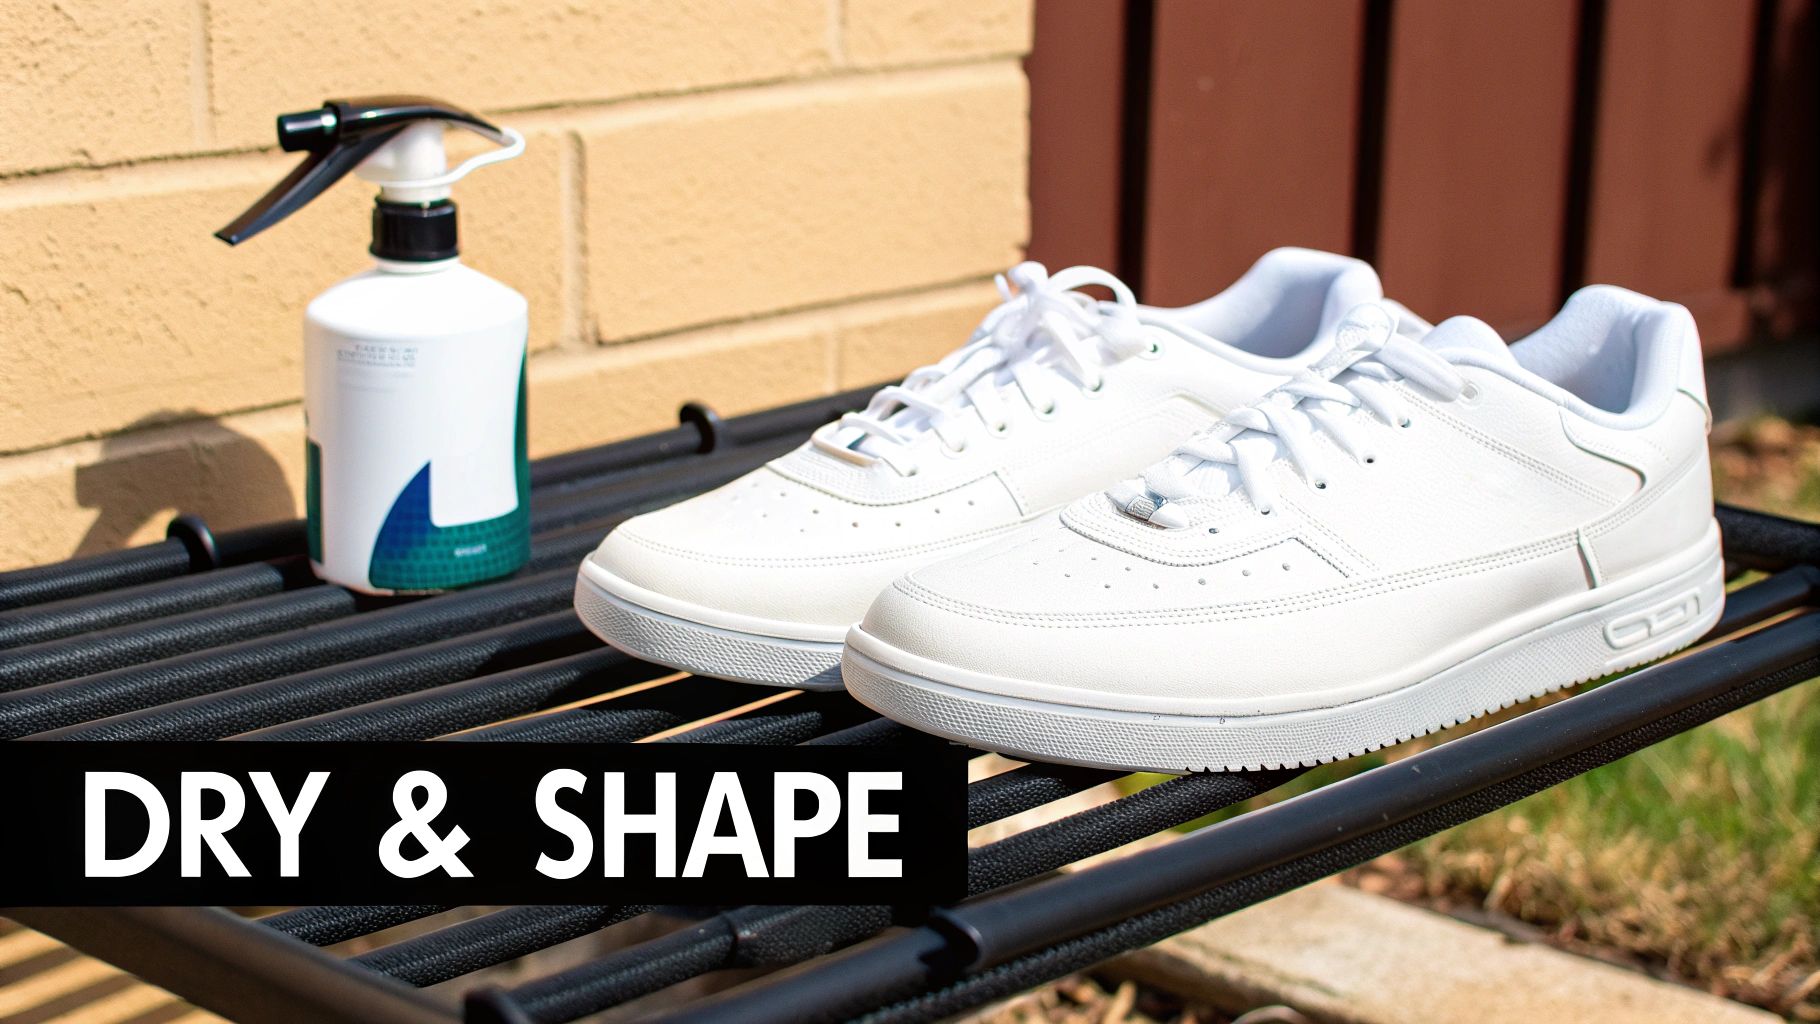
The only correct method is cool, indirect air drying.
- Select the Right Location: Find a well-ventilated indoor area, away from direct sunlight or heat sources. A utility room or a corner with a fan is ideal.
- Disassemble Components: Always remove insoles and laces. These must dry separately to allow for complete air circulation throughout the shoe's interior. This step accelerates drying and is the best defense against mildew.
- Promote Airflow: Prop the tongue of the shoe open to maximize airflow to the interior, where odor-causing bacteria thrive.
Proper drying is about patience. It allows moisture to evaporate slowly and evenly, preserving the integrity of the shoe’s materials. Rushing the process with heat will shorten the footwear's lifespan. For a more detailed protocol, see our full guide on the best way to dry wet sneakers.
Reshaping for Structural Integrity
As footwear dries, its materials naturally contract. Without internal support, canvas uppers can wrinkle, knit fabrics can collapse, and leather can form deep creases. Reshaping is therefore essential for maintaining the shoe’s original, factory structure.
The superior tool for this purpose is a pair of adjustable cedar shoe trees.
- Optimal Form: They provide a firm, consistent shape that mimics a foot, preventing the shoe from deforming as it dries.
- Moisture Absorption: Cedar naturally absorbs residual moisture from the shoe's interior.
- Odor Neutralization: The aromatic oils in cedar help neutralize odors.
If shoe trees are unavailable, tightly stuffing the shoes with un-inked paper towels or newspaper is a viable alternative. Ensure the material is packed firmly into the toe box and replace it if it becomes saturated.
Applying a Protective Barrier
Once your shoes are completely dry and reshaped, the final step is protection. This proactive measure simplifies all future cleanings and is a hallmark of professional care.
A high-quality spray like the Gold Standard All-Natural Water and Stain Repellent creates an invisible, breathable barrier over the material. This shield prevents dirt, water, and other contaminants from penetrating the fibers. Spills will bead up and roll off rather than becoming set-in stains.
This is an investment in the longevity of your footwear. The growth of the global shoe care market from USD 4.7 billion in 2023 to a projected 7.3 billion by 2032 reflects a growing understanding that proper maintenance is more economical and sustainable than frequent replacement.
A Proactive Maintenance Routine for White Shoes
The most effective restoration is the one that is never needed. The single greatest improvement you can make is shifting from a reactive mindset to one of proactive, daily care. This does not require a significant time commitment but rather the cultivation of small, consistent habits that prevent dirt from becoming ingrained. This is how you restore white shoes—by ensuring they rarely require intensive restoration in the first place.
The Immediate Post-Wear Wipe-Down
The 15-minute window after removing your shoes is critical. Fresh dirt sits on the surface, easily removed. If left for several hours, it begins to bond with the material, exponentially increasing the difficulty of future cleaning.
Establish a quick "triage" routine. Keep a microfiber towel and a soft brush near your entryway to make it habitual.
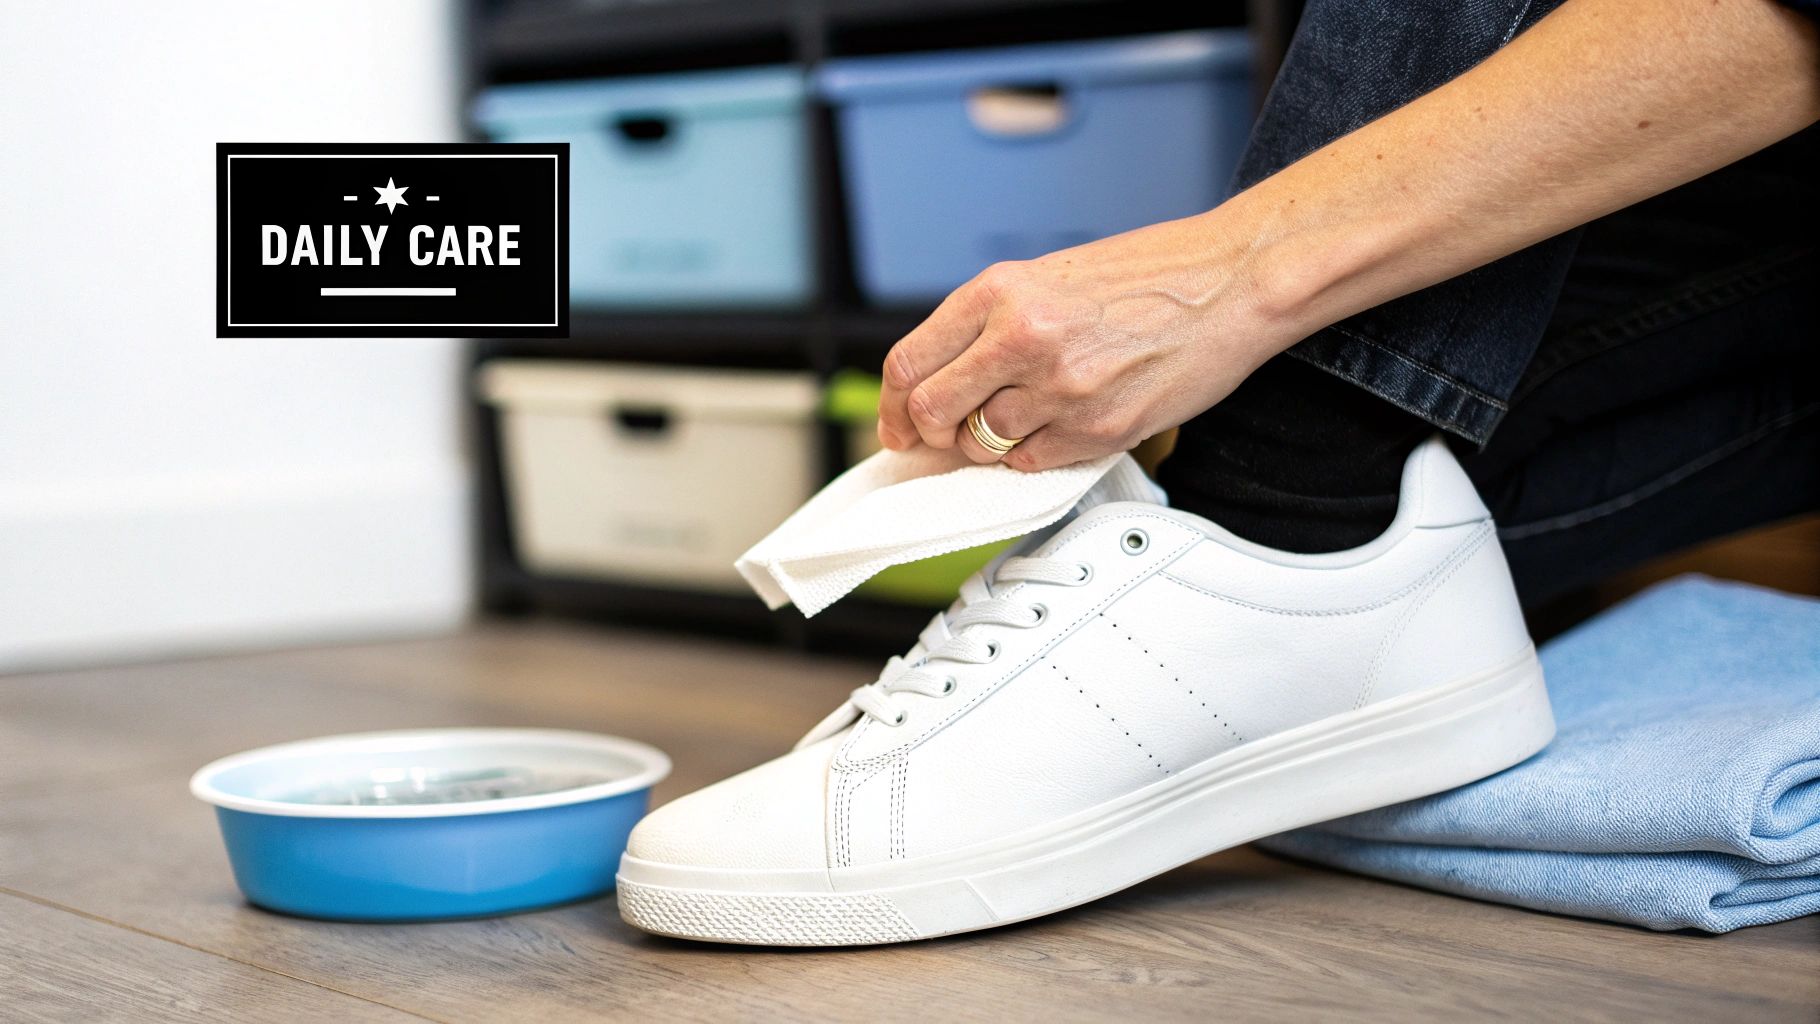
- Dry Brush the Uppers: Perform a quick, gentle brushing of the shoe’s main body. This removes loose dust and surface debris before it can work its way into the canvas or leather grain.
- Wipe the Midsoles: Use a slightly damp microfiber towel to wipe down the rubber or foam midsoles. This is where scuffs and smudges first appear; immediate removal prevents them from becoming permanent marks.
This entire process takes less than 60 seconds but can significantly extend the time between deep cleanings.
Proactive care is preventative maintenance. It is analogous to daily dental hygiene, which prevents the need for major procedures. The same logic applies to preserving your footwear.
Smart Storage to Prevent Degradation
Storage is as critical as cleaning. Tossing white footwear into a pile is a recipe for damage. The primary environmental threats during storage are dust, sunlight, and humidity.
Proper storage protocols defend against all three.
- Avoid Direct Sunlight: UV radiation is the primary cause of oxidation, the chemical reaction that causes yellowing in white rubber and fabrics. Always store shoes in a cool, dark location away from windows.
- Control Humidity: A damp, humid environment promotes mildew growth and can break down the adhesives in your shoes. A climate-controlled room is ideal.
- Use Shoe Trees: Cedar shoe trees are essential. They perform three functions: maintaining the shoe's shape, absorbing residual moisture from your feet, and preventing the uppers from creasing and collapsing.
Lace Care for a Finished Look
Pristine shoes with dirty laces present an incomplete restoration. Laces are magnets for dirt and must be treated as a separate component in your cleaning regimen.
For a quick refresh, remove the laces and hand wash them in a small bowl with water and a few drops of a quality shoe cleaner. Agitate them, rinse thoroughly with cool water, and hang to air dry. Never place them in a machine dryer, as the high heat will damage the plastic aglets.
For a more comprehensive breakdown of these techniques, explore our complete guide on how to keep white sneakers white.
By integrating these simple, proactive steps into your routine, shoe care ceases to be a chore and becomes a discipline. That is the expert approach—and it is what will keep your white shoes in pristine condition for years to come.
Frequently Asked Questions About Restoring White Shoes
Even with a detailed guide, questions will arise. Having addressed thousands of footwear care inquiries, we have compiled the most common questions and provide our direct, field-tested answers.
Correcting these details is what distinguishes a professional-grade finish from a costly mistake.
Can I Use Bleach to Whiten My Shoes?
Unequivocally, no. Bleach is a harsh, corrosive chemical that will cause significant damage. It is known to cause a permanent, unsightly yellowing on rubber and plastic components—the exact opposite of the desired outcome.
On canvas, bleach degrades the fibers, making them brittle and susceptible to tearing. The only proper method for whitening is to use a pH-balanced, material-safe cleaner designed to lift contaminants without destroying the shoe's structure.
Is it Safe to Put My Sneakers in the Washing Machine?
Placing footwear in a washing machine is a high-risk gamble that we strongly advise against. The combination of prolonged soaking, a violent tumbling cycle, and high heat is a formula for disaster.
This process is notorious for dissolving the adhesives that bond the shoe's components, leading to sole separation. It can also permanently warp the shoe's shape and ruin delicate materials. A careful, manual cleaning is always the superior and safer method.
Expert Takeaway: Manual cleaning provides complete control over pressure, moisture, and the cleaning agents used. A washing machine subjects your shoes to indiscriminate, damaging forces. You would not treat a valued possession in this manner.
How Do I Fix Yellowed Soles?
The yellow tint on rubber soles is caused by oxidation, a natural reaction to oxygen and UV light over time. While complete reversal is not always possible, significant improvement can be achieved with the correct technique.
You will need a specialized de-yellowing agent, often marketed as "sole sauce." These products utilize UV light (sunlight is effective) to initiate a chemical reaction that reverses the yellowing. It is imperative to follow the product's directions precisely and to use painter's tape to protect the uppers, as the agent should only be applied to rubber.
How Often Should I Deep Clean My White Shoes?
This depends entirely on wear frequency and environment. For footwear in regular rotation, a comprehensive restoration every 4-6 weeks is a sound guideline.
However, the key is preventative maintenance. A quick wipe-down of the uppers and midsoles after each wear can dramatically extend the interval between deep cleanings. If a major spill occurs, address it immediately before the stain has time to set.
For a restoration that respects the material and revives its original appearance, you need tools you can trust. Gold Standard provides the premium, all-natural products necessary to clean, protect, and maintain your collection with professional precision. Explore our complete shoe care systems at https://gold-standard-approved.myshopify.com.