
Your sneakers are an investment in technology, design, and personal style. Preserving that investment requires a methodical approach, not just a casual scrub. A professional-grade shoe cleaning kit for sneakers is a system of specialized tools and solutions designed to safely and effectively maintain the complex materials that make up modern footwear. It’s the critical difference between surface-level cleaning and archival-level care.
Anatomy of a Professional Sneaker Cleaning Kit
Understanding the function of each tool transforms cleaning from a chore into a technical skill. Every component in a well-designed kit is engineered for a specific material and task. This isn't about simply removing dirt; it's about a systematic process that respects the materials science behind your footwear.
The global shoe care market reached USD 4.47 billion in 2024, projected to hit USD 7.23 billion by 2032. This growth is driven by informed consumers who recognize their sneakers as assets worth protecting—a principle central to our work at Gold Standard. With North America comprising 44.25% of that market, the demand for expert-level care is clear.
The Foundation of an Effective Clean
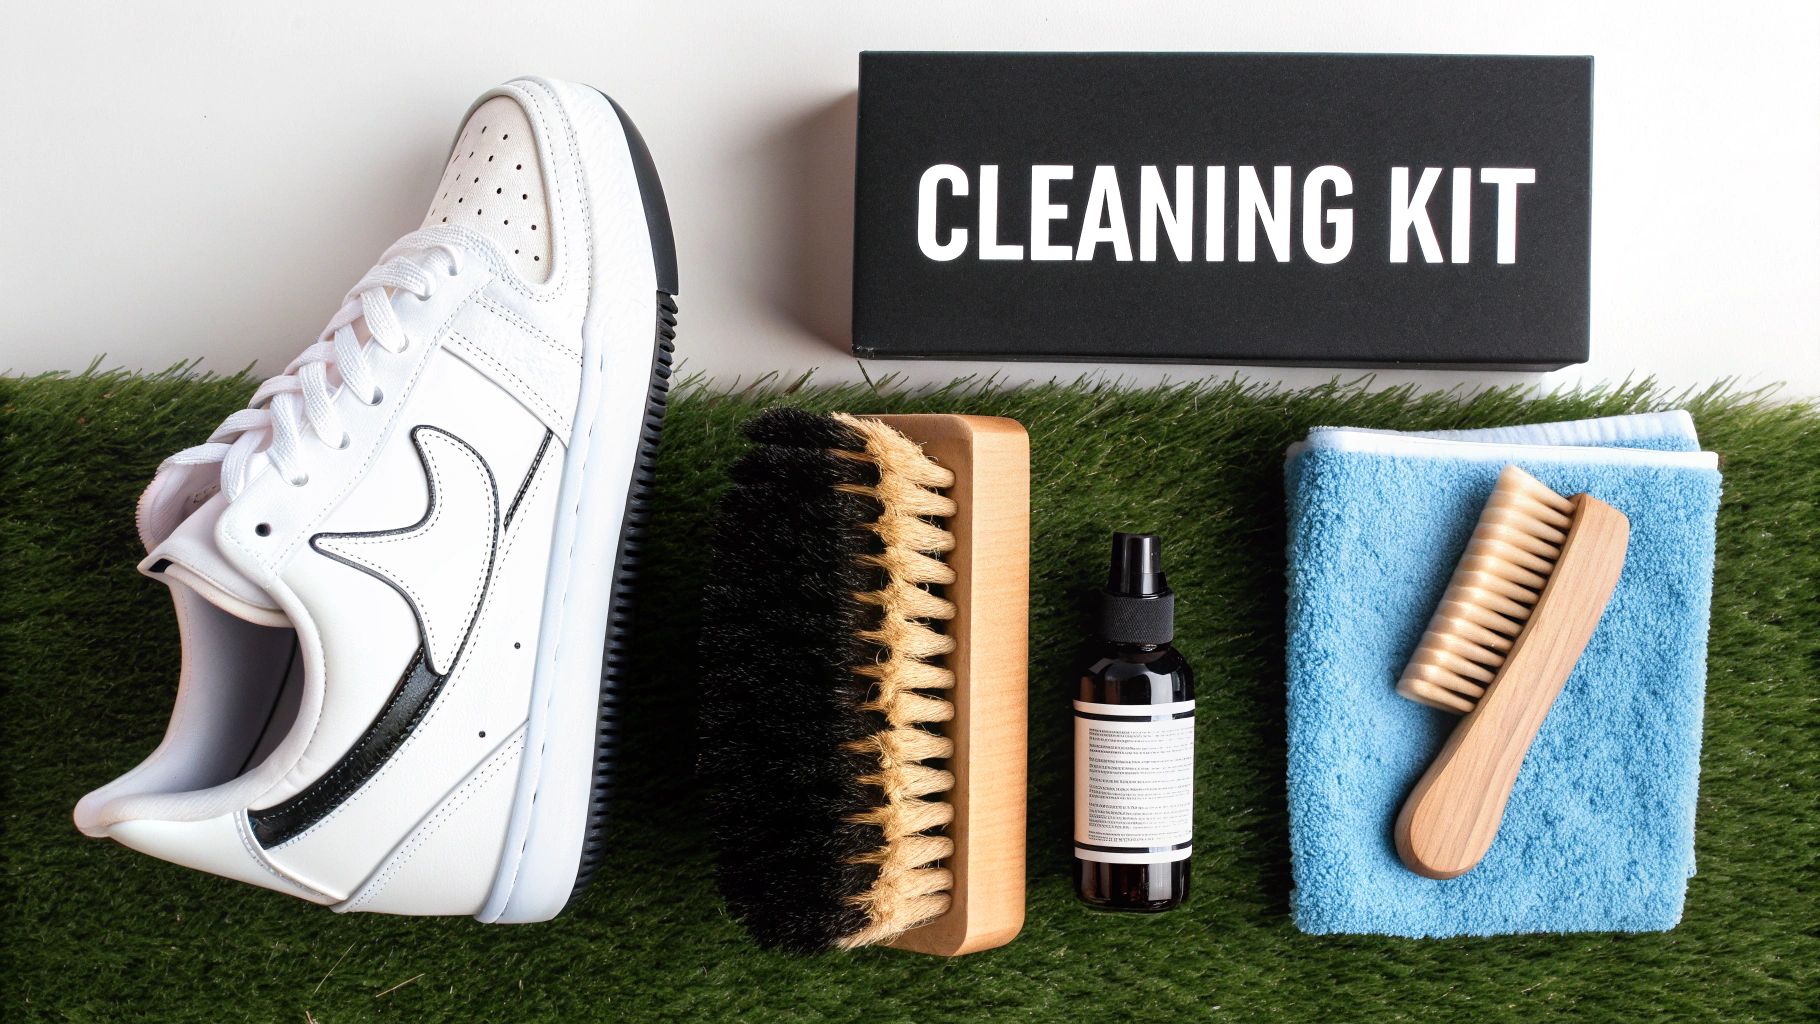
A premium kit is defined by the quality and specificity of its components. Generic tools and harsh, multi-purpose chemicals can inflict more damage than the original grime. Here’s what distinguishes a professional-grade system:
- pH-Neutral Cleaning Solution: An effective cleaner must be strong enough to break down dirt and oils but gentle enough to be chemically inert to the materials it treats. Our solution is formulated to lift contaminants without using harsh solvents that can yellow plastics, fade dyes, or degrade the adhesives bonding your uppers to the soles.
- Material-Specific Brushes: Applying the same brush to a leather upper and a rubber outsole is a critical error. Different materials require different levels of abrasion. A complete kit provides the correct tool for every surface of the shoe, preventing irreversible damage.
- High-GSM Microfiber Towel: An ordinary cotton rag is insufficient. A high-GSM (grams per square meter) microfiber towel is engineered for maximum absorption and softness, designed to lift away soiled lather and moisture without leaving lint or causing micro-scratches on sensitive surfaces.
Why Brush Selection Is Non-Negotiable
Using the wrong brush is the most common and damaging mistake we observe. Applying a stiff-bristle brush—designed for a durable midsole—to a delicate suede or knit upper will cause permanent damage in the form of abrasion, pulls, and scuffs. This is precisely why a professional kit includes a range of brushes for specific applications.
A dedicated shoe cleaning kit for sneakers is built on the principle of specialization. Each brush, from soft hog hair for delicate uppers to stiff synthetic bristles for outsoles, is selected to apply the correct mechanical action without compromising the material it's treating.
Let's examine the role of each tool. This table details the components of the Gold Standard kit and explains their essential function in achieving a flawless clean.
Kit Components and Their Purpose
| Component | Material | Primary Use | Why It's the Professional Choice |
|---|---|---|---|
| Cleaning Solution | pH-Neutral, Biodegradable Formula | Deep cleaning all common footwear materials | Gentle on glues, dyes, and delicate fabrics. Formulated to break down dirt and grime effectively. |
| Soft Bristle Brush | Genuine Hog Hair | Uppers (leather, suede, mesh, canvas, knit) | Natural fibers are soft and flexible, dislodging dirt without scratching or pilling the surface. |
| Medium Bristle Brush | Synthetic | Midsoles, general-purpose applications | Balances effective scrubbing power with material safety for versatile, all-around use. |
| Stiff Bristle Brush | Synthetic | Outsoles, durable rubber components | Firm bristles provide aggressive cleaning action to remove impacted dirt, mud, and grit. |
| Microfiber Towel | High-GSM Microfiber | Drying and final polishing | Ultra-absorbent and non-abrasive, lifting moisture and contaminants without leaving lint or residue. |
Each component works in concert to deliver a safe, repeatable, and effective result. This material-first approach is what separates a basic kit from a professional one.
The soft-bristle brush, crafted from natural hog hair, is the correct tool for cleaning delicate uppers. Its fibers are pliable enough to navigate the grain of leather or the weave of canvas without abrading the surface. Conversely, the stiff-bristle brush is engineered for the tough, non-porous surfaces of your midsoles and outsoles, where significant scrubbing force is required. For a more detailed analysis, see our guide on the best sneaker cleaning kit components.
Ultimately, investing in a proper kit provides control and precision. To inform your selection, it's wise to consult current sneaker cleaning kit reviews. With the right tools and knowledge, you can maintain your entire sneaker rotation to the highest standard for years to come.
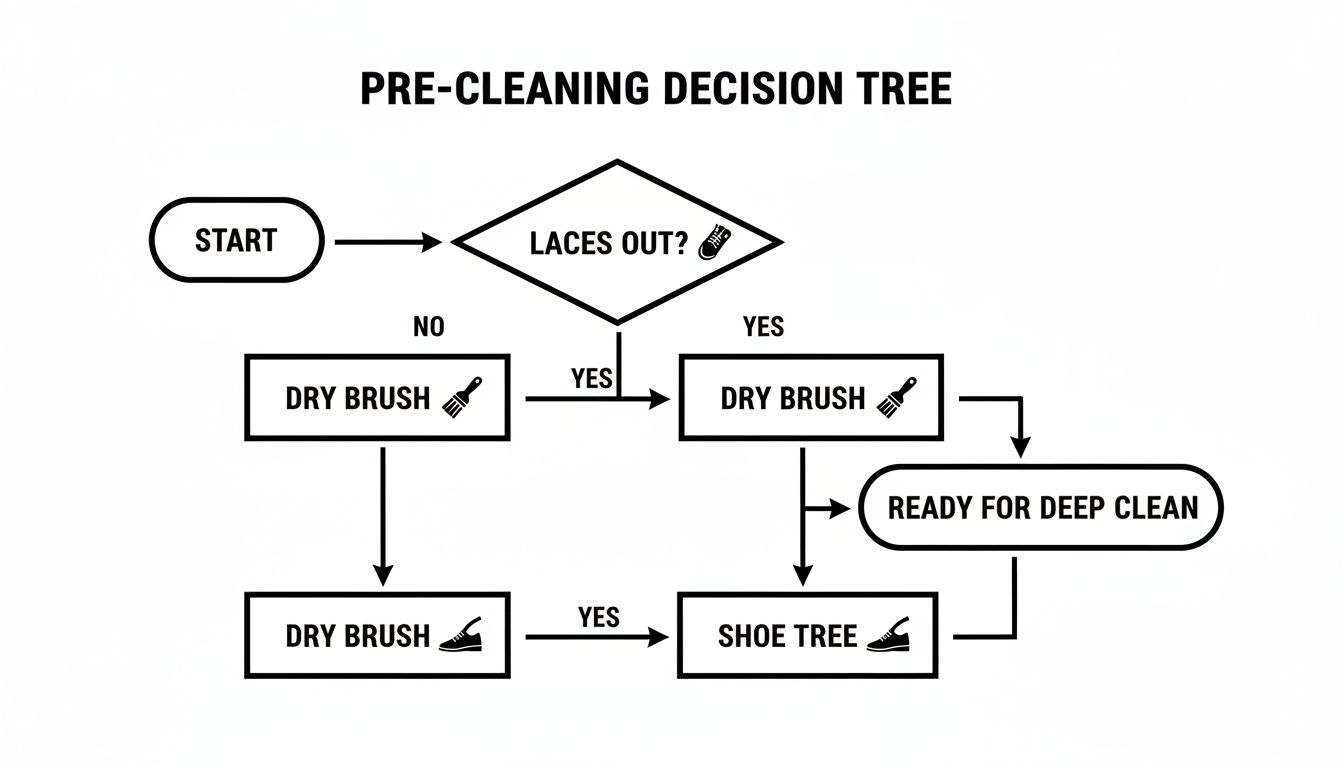
Pre-Cleaning Protocol: A Non-Negotiable First Step
Initiating cleaning by immediately applying a liquid solution is a fundamental error. This approach grinds loose particulates deeper into the material's fibers, turning a simple cleaning into a complex restoration. Any professional will confirm that proper preparation is the most critical phase of the process.
This is not superfluous work. It is the footwear equivalent of a surgeon's pre-operative prep—a series of methodical steps that prevent damage and ensure a superior result.
Remove Laces and Insoles
First, remove the laces and, if possible, the insoles. Cleaning around these components is inefficient and guarantees you will miss the dirt and bacteria accumulating in and around the eyelets and interior. It also prevents discoloration of the laces.
Submerge the laces in a small bowl with a few drops of the Gold Standard cleaning solution and agitate them by hand. Set them aside to air dry while you address the shoe itself.
You wouldn't paint a wall without first sanding and priming it. The same principle applies here. Skipping the dry brush means you are creating an abrasive paste of dirt and cleaner, not cleaning your shoes.
The Critical Dry Brush
Before any liquid is introduced, take a medium-bristle brush and conduct a thorough dry brushing of the entire shoe—uppers, midsole, and outsole. The objective is to dislodge and remove all loose, surface-level debris like dust, dried mud, and grit.
This step is critical because once a liquid is added, these loose particles become a slurry. As you scrub, this abrasive mixture can create micro-scratches on smooth leather or cause pilling on knit textiles. A comprehensive dry brush clears the field, allowing the cleaning solution to work on what it was designed for: embedded stains and grime.
Establish a Solid Cleaning Foundation
The final preparatory step is to give the shoe structural integrity. Cleaning a flimsy, hollow sneaker is ineffective. You cannot apply consistent pressure, and you risk deforming the toe box or heel counter during the cleaning process.
This is where a shoe tree becomes an essential tool.
- Cedar Shoe Trees: The ideal choice for leather footwear. They maintain the shoe's intended shape and absorb residual moisture and odor from the interior lining.
- Plastic Shoe Trees: An excellent all-around option. They are lightweight and provide the necessary solid form for effectively cleaning mesh, knit, or canvas sneakers.
Inserting a shoe tree creates a firm, stable surface to work against, simulating a foot inside the shoe. This allows for even pressure application without creasing or damaging the sneaker's silhouette. It makes the entire process more efficient and yields a far more professional result.
With preparation complete, you are ready to begin the material-specific cleaning process.
A Material-Specific Approach to Sneaker Cleaning
There is no universal method for cleaning a sneaker. Treating a delicate suede upper with the same technique used on a durable rubber outsole will result in irreversible damage. The key to maintaining a diverse collection is adapting your technique to each material's specific properties.
This is not about acquiring a dozen different cleaners. It is about understanding how one well-formulated solution, combined with the correct tools and techniques, can be applied effectively across various materials.
Before beginning, ensure you have completed the foundational pre-cleaning protocol.
Do not skip these steps. Removing laces, performing a thorough dry brush, and inserting a shoe tree prevents cross-contamination and maintains the structural integrity of the footwear during cleaning.
Cleaning Smooth and Tumbled Leather
Leather is a porous material. It can dry out, absorb stains, and be damaged by harsh chemicals. For smooth or tumbled leather uppers, the objective is to lift dirt from the grain without stripping the material's natural finish.
Use your soft hog-hair brush. Apply a small amount of Gold Standard solution and water to the bristles, then work it into the leather using small, controlled circular motions. The goal is not to scrub aggressively but to allow the foam to lift contaminants from the pores.
Once the foam has lifted the grime, wipe it away immediately with a microfiber towel. Allowing soiled suds to dry on the surface will redeposit the dirt, negating your work.
Handling Suede and Nubuck With Precision
Suede and nubuck are among the most delicate materials in footwear. They are highly susceptible to damage from excess moisture and aggressive handling. The governing principle is simple: less is more. Saturating suede will lead to water stains and a stiff, cardboard-like texture.
A standard wet-scrubbing technique is incorrect for these materials.
- Begin Dry: Before introducing any liquid, use a dedicated suede brush or eraser to address surface-level dirt. This step alone can resolve many issues and will restore the material's nap (its characteristic soft, fuzzy texture).
- Spot-Treat with Minimal Moisture: For persistent spots, apply a minimal amount of cleaning solution to your soft brush—never directly to the shoe. Gently blot or tap the affected area. Aggressive scrubbing will permanently mat the fibers.
- Restore the Nap: After the treated area has completely air-dried, use the dry suede brush to gently groom the fibers in a single direction. This final step restores the material’s uniform, velvety finish.
When cleaning suede, you are not scrubbing; you are gently persuading the dirt to release its grip. Patience and a light touch are your most important tools. Heavy-handedness will only push the stain deeper and damage the delicate fibers.
Understanding the material composition of modern footwear, such as the PEBA/EVA foam blends in performance runners (like those detailed in this New Balance Rebel V5 review), is crucial. Every material requires a specific, informed approach.
Restoring Canvas and Woven Textiles
Materials like canvas, Primeknit, and mesh are highly porous. Their woven structure readily traps dirt deep within the fibers. These textiles are significantly more absorbent than leather, necessitating a modified approach.
For these materials, a more generous ratio of solution to water is appropriate. Using the soft or medium brush, work the cleaner into a substantial lather with consistent back-and-forth motions. This technique helps the solution penetrate the weave and dislodge trapped particulates.
After scrubbing, blot the area firmly with your microfiber towel. The objective is to absorb as much of the soiled lather as possible to prevent it from settling back into the material as it dries. A complete video demonstration of these techniques can be found in our guide on how to clean sneakers at home.
Sneaker Cleaning Quick Reference by Material
This chart provides a quick reference to ensure you are using the correct tools and techniques for each material.
| Material | Brush Type | Solution Application | Key Technique | Drying Method |
|---|---|---|---|---|
| Leather | Soft Hog Hair | Standard (a few drops on wet brush) | Gentle, circular motions | Wipe clean, air dry |
| Suede/Nubuck | Suede Brush | Minimal (damp brush only, for spots) | Dry brush first, then blot stains | Air dry completely, then brush nap |
| Canvas/Mesh/Knit | Soft or Medium | More generous amount for lather | Back-and-forth scrubbing | Blot dry thoroughly, then air dry |
| Rubber/Soles | Stiff Bristle | Apply directly to wet brush | Vigorous, firm scrubbing | Wipe clean |
This reference covers the fundamentals. The core principle is consistent: gentle on uppers, firm on soles.
Tackling Rubber Midsoles and Outsoles
This is the only area where aggressive cleaning is not only acceptable but necessary. Midsoles and outsoles are engineered for durability and can withstand a more robust approach. It is time to employ the stiff-bristle brush.
These components are typically made from dense rubber or foam compounds resistant to scratching. Apply the solution directly to the stiff brush and scrub vigorously. Use firm pressure to remove scuffs, grass stains, and impacted grime from the street.
The stiff bristles are designed to penetrate the complex tread patterns and textures of an outsole. Once complete, simply wipe the area clean with your towel. A clean, bright midsole can dramatically restore the overall appearance of the sneaker.
Mastering the Details: Midsoles, Laces, and Final Touches

The distinction between an adequate clean and a professional restoration lies in the details. After restoring the uppers, focusing on the often-neglected areas—midsoles, laces, and the critical drying process—is what elevates the final result.
This meticulous approach is gaining traction. The dedicated sneaker care service market was valued at USD 200 million in 2023 and is projected to reach nearly USD 480 million by 2032. This reflects a growing understanding among consumers that proper maintenance is an essential part of ownership. For a complete analysis, see the full market report.
Restoring Your Midsoles
The midsole is the workhorse of the sneaker, absorbing constant impact and abrasion. A soiled midsole detracts significantly from the appearance of an otherwise clean shoe. Fortunately, its durable construction allows for more intensive cleaning.
Select your stiff-bristle brush. Its firm bristles are ideal for working into the texture of foam or rubber to lift out stubborn dirt. Apply a small amount of the Gold Standard cleaning solution to the wet brush and scrub with firm, steady pressure around the entire perimeter of the midsole.
Do not hesitate to apply significant manual force. You will see the grime lift and emulsify into the foam. A final wipe with your microfiber towel will reveal a crisp, clean surface. Using the right tool is paramount, which is why we've detailed how to choose the best shoe cleaning brush for each part of your sneaker.
Bringing Laces Back to Life
Dingy laces against a clean upper create a discordant look that signals an incomplete job. Laces must be washed separately. While machine washing may seem convenient, it leads to frayed threads and damaged aglets (the plastic tips).
A simple hand-washing method is superior.
- Create a Soaking Solution: Fill a small bowl with warm water and a few drops of our cleaning solution.
- Submerge and Agitate: Place the laces in the solution and rub them together between your hands to work the cleaner into the fibers.
- Allow to Dwell: For heavily soiled laces, allow them to soak for 20-30 minutes.
- Rinse and Dry: Rinse thoroughly under cool water until all suds are gone, then hang to air dry.
This technique restores their appearance without causing damage. Never place laces in a machine dryer; the heat can shrink the material and melt the aglets.
A common mistake is rushing the drying process with a hairdryer or radiator. Direct heat is the enemy of sneaker longevity—it can warp materials, weaken adhesives, and cause leather to crack. Patience is the final, and most crucial, tool in your kit.
The Art of Proper Drying
The drying stage is as critical as the cleaning itself. Improper drying can negate your efforts and cause permanent damage.
The cardinal rule is simple: avoid direct heat at all costs.
The correct method is to allow the sneakers to air dry in a well-ventilated room, away from direct sunlight or heat sources. Re-insert your cedar or plastic shoe trees to help them maintain their shape and to draw moisture from the interior lining. This is essential for preventing the toe box from collapsing as the materials dry and constrict.
Allow a minimum of 8-12 hours for drying. For highly absorbent materials like canvas or knit, a full 24 hours may be necessary. Once they feel completely dry to the touch, perform a final buff with a clean microfiber towel. This removes any final residue and restores the natural luster to leather surfaces, creating a factory-fresh finish.
Common Sneaker Cleaning Mistakes to Avoid
In an effort to quickly clean footwear, many turn to shortcuts that can cause irreversible damage. As material specialists, we have seen the unfortunate consequences of well-intentioned but misguided cleaning attempts.
Even with a professional sneaker cleaning kit, understanding what not to do is as crucial as knowing the correct procedures. Your sneakers are composed of complex, engineered materials that can be permanently compromised by the wrong approach.
The Problem with Household Cleaners
Using household cleaning agents—dish soap, all-purpose sprays, or bleach—is one of the most destructive habits. These products contain harsh surfactants and chemicals formulated for durable, non-porous surfaces like ceramic and metal, not for delicate footwear materials.
On leather, they strip essential natural oils, leading to dryness, brittleness, and cracking. On textiles like canvas or suede, they can cause chemical burns and discoloration, often resulting in a permanent yellow or dingy hue. The adhesives and dyes used in sneaker construction are not designed to withstand such aggressive chemical agents.
Why the Washing Machine Is Not a Solution
Placing sneakers in a washing machine is a high-risk gamble. The combination of prolonged water submersion, high temperatures, and the violent tumbling action of the wash cycle creates a trio of threats to your sneaker's structural integrity.
Here is a breakdown of the damage that occurs:
- Adhesive Degradation: The heat and water saturation weaken and dissolve the glues bonding the upper to the midsole, often causing sole separation.
- Material Deformation: The physical forces of the spin cycle can warp the shoe's shape, collapsing the toe box and deforming the heel counter permanently.
- Structural Failure: The violent motion can cause delicate stitching to fray or snap. Sensitive foam composites can shrink or become misshapen.
Your sneakers are built from specialized materials bonded with specific adhesives. Subjecting them to the brutal cycle of a washing machine is a recipe for disaster, breaking down the very structure that holds them together.
The perceived convenience does not justify the high probability of ruining your footwear. A methodical hand-cleaning is the only method that ensures both safety and control.
The Dangers of Rushing the Drying Process
Patience is a virtue, particularly during the drying phase. After investing time and effort in cleaning, rushing the final step with high heat can undo all your work.
Applying direct, high heat from a hairdryer, radiator, or intense sunlight is extremely damaging. This can make leather brittle and cracked, melt or warp synthetic fibers, and cause the rubber compounds in soles to become tacky or deformed.
The correct and only safe method is natural air drying in a cool, well-ventilated location. Inserting shoe trees will help maintain the shape and wick moisture from the interior. While it requires more time, it is the only way to guarantee the longevity of your sneakers.
A Few Questions We Hear All the Time
Even with a comprehensive guide, specific questions will arise during the cleaning process. As material experts, we've addressed nearly every conceivable scenario. Here are our answers to the most common inquiries.
How Often Should I Clean My Sneakers?
The optimal cleaning frequency is dictated entirely by wear. There is no single correct answer, but we can provide a logical framework.
For daily-wear sneakers, a light maintenance routine every 1-2 weeks is advisable. This includes a quick wipe-down of the midsoles and a dry brushing of the uppers. A full, deep clean using a shoe cleaning kit for sneakers should be performed every 4-6 weeks, or immediately following significant soiling.
For sneakers in a wider rotation or those reserved for special occasions, a light cleaning after every few wears is sufficient. The most important principle is to address stains and dirt immediately. The longer a contaminant is allowed to sit, the deeper it will set into the material's fibers.
Can One Kit Be Used for All Different Shoe Materials?
Yes, provided it is a high-quality, versatile kit designed with material science in mind. The key is not owning numerous specialized solutions, but rather knowing how to adapt your technique for the material at hand. A premium system like Gold Standard is engineered for this exact purpose.
- Our pH-neutral solution is formulated to be safe and effective on a wide range of materials, from durable leather and delicate suede to modern knits and classic canvas.
- The graduated set of brushes (soft, medium, stiff) are the primary tools for adapting your approach. They allow you to apply the correct level of mechanical agitation to the specific part of the shoe being cleaned.
The kit provides the necessary tools; your knowledge of material-specific techniques is what enables its universal application.
My Sneakers Look Clean, but How Do I Address Odor?
Odor control is a critical aspect of footwear care that is often overlooked. A visually clean shoe that retains odor is only partially maintained. A proactive approach is necessary.
The demand for effective solutions is significant. The shoe cleaning and deodorizer market was valued at USD 437.67 million in 2024 and is projected to grow to USD 721.12 million by 2032. This trend reflects the integration of sneakers into daily fashion and a growing consumer awareness of proper maintenance. You can explore these market dynamics in the full shoe care industry analysis.
Proper sneaker maintenance extends beyond the surface. Odor must be addressed, as the bacteria that cause it can also degrade the shoe's internal materials over time.
To combat odor, always allow your sneakers to air out completely after each wear. Do not store them in a sealed bag or a dark, humid environment. Cedar shoe trees are highly effective, as the wood naturally absorbs moisture and has antimicrobial properties. For persistent odor, a quality deodorizing spray can neutralize the odor-causing bacteria directly.
Is It Better to Spot-Treat or Clean the Entire Shoe?
Spot-treating is an effective strategy for addressing minor spills or scuffs between full cleanings. It is an excellent way to maintain a sharp appearance without undertaking the entire process.
However, there is a caveat, particularly with absorbent materials like suede, nubuck, or light-colored canvas. Cleaning only one spot can result in a "watermark" or an overly clean patch that stands out from the surrounding material.
To avoid this, the technique of "feathering" is employed. Use a damp brush or cloth to gently blend the cleaned area outward into the surrounding material. This creates a gradual transition rather than a hard line. Once dry, the entire area should appear uniform and natural.
At Gold Standard, we believe that expert knowledge is the most valuable tool in any enthusiast's arsenal. Our products are engineered to provide you with the means to care for your collection with professional precision and confidence.
Ready to implement these techniques? Explore the Gold Standard collection today.