
Before attempting to clean suede sneakers, it is critical to understand the material itself. This is not canvas or standard leather. Proper suede care requires a specific methodology, beginning with dry methods—a specialized brush and eraser—to address surface-level particulates and scuffs. Only when these foundational steps prove insufficient should a targeted foam cleaner be considered.
Why Suede Requires a Specialized Approach
Suede's unique properties stem from its origin. Unlike full-grain leather, which is derived from the tough outer layer of the animal hide, suede is crafted from the softer, inner split. This process creates the velvety, napped texture that defines the material.
However, this prized texture is also its primary vulnerability. Suede is highly porous, with an open fiber structure that readily absorbs water, oils, and environmental contaminants. This is why a single drop of liquid can leave a prominent dark mark and why conventional all-purpose cleaners will cause irreversible damage.
The Material Science of Suede Damage
When suede becomes saturated, its delicate fibers absorb moisture, causing them to swell. Upon drying, these fibers stiffen and clump together, resulting in a hard, crunchy texture that compromises the material's integrity and feel. The application of harsh detergents is even more detrimental; they strip the natural oils from the hide, leading to desiccation, brittleness, and eventual cracking. This is why a material-specific cleaning protocol is not a mere recommendation—it is a requirement for preservation.
Key characteristics that differentiate suede from other sneaker materials include:
- High Absorbency: Its sponge-like structure facilitates rapid absorption of liquids, leading to discoloration and watermarks.
- Delicate Nap: Aggressive scrubbing or using an improper brush can permanently flatten, abrade, or tear the fine fibers, destroying the material's signature texture.
- Chemical Sensitivity: Common household cleaners are unsuitable. They can leave behind a tacky residue that attracts more dirt or, in more severe cases, cause chemical burns that alter the dye.
The prevalence of suede sneakers is notable. Industry analysis shows that without proper care protocols, routine exposure to urban environments can reduce the functional lifespan of suede footwear by up to 50%.
The foundational principle of suede care is to always begin with the least aggressive method. A dry brush and a suede eraser are the first line of defense. Adhering to this hierarchy of treatment will prevent the most common cleaning-related damage.
Learning how to clean suede is an exercise in precision, not power. Mastering these fundamental techniques will protect your investment and maintain the aesthetic and structural integrity of your footwear for years.
Assembling Your Suede Cleaning Toolkit
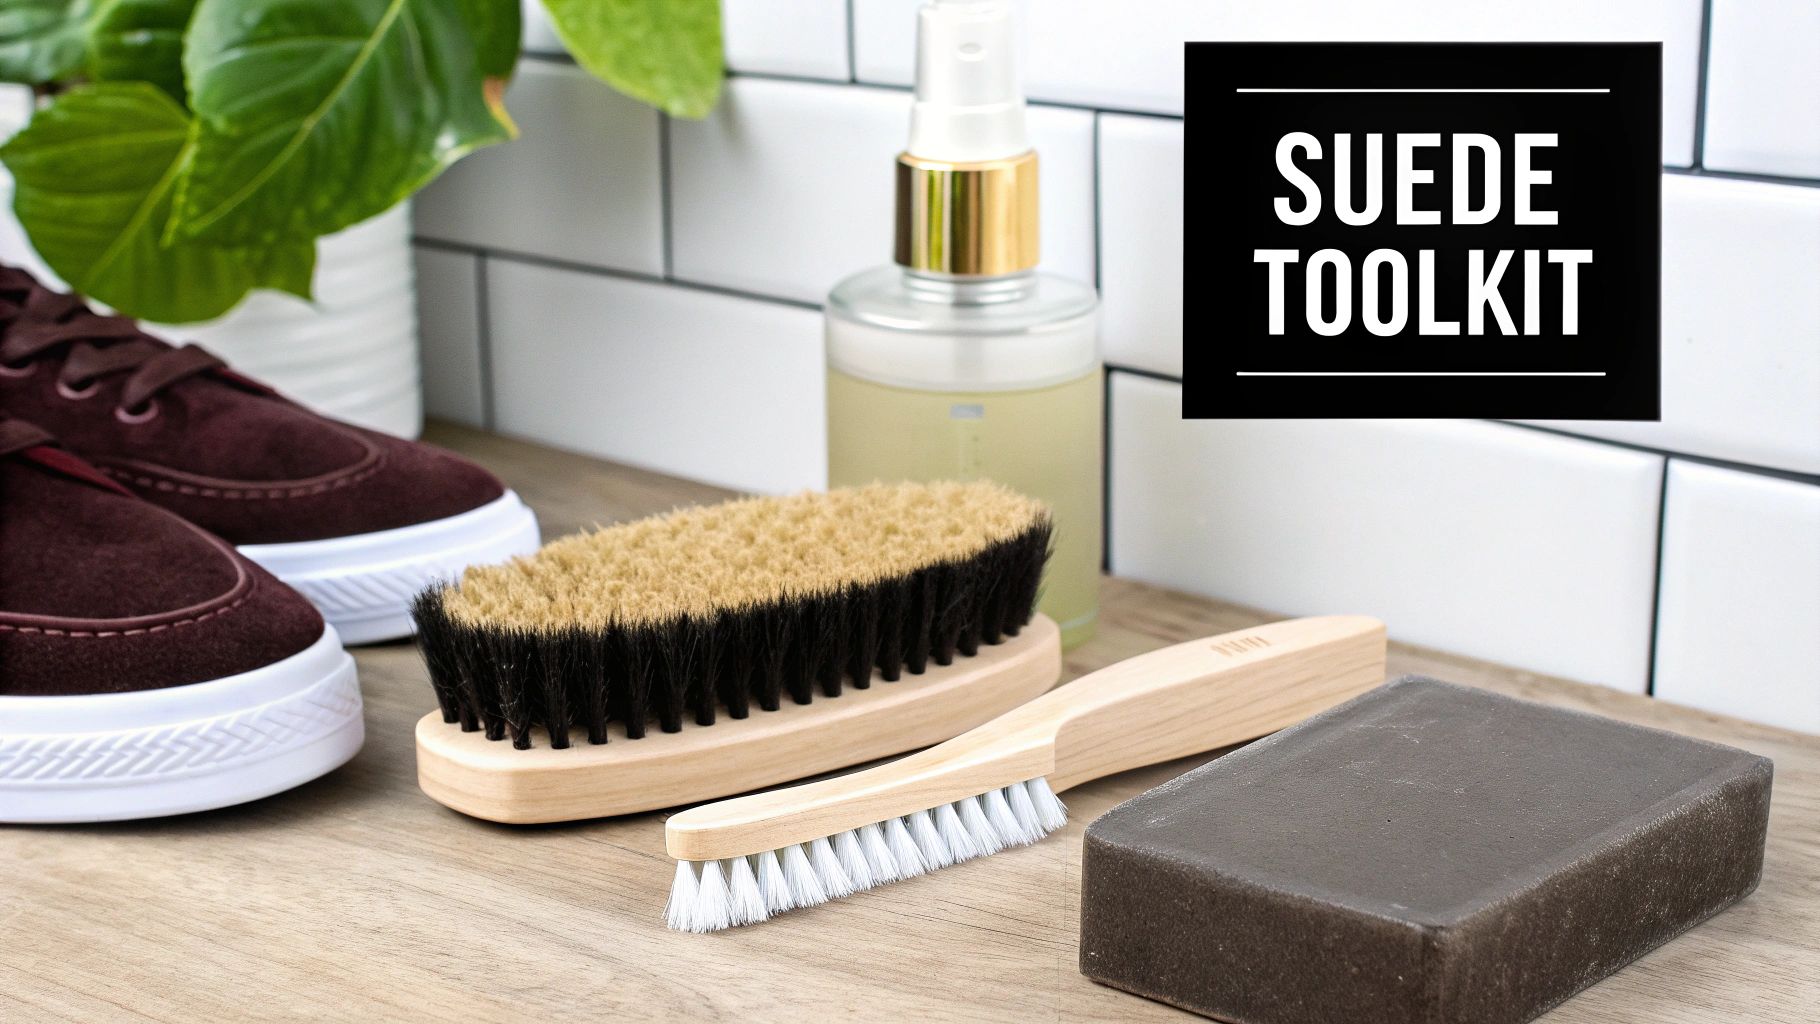
Before commencing any cleaning procedure, it is imperative to assemble the correct tools. This is a common point of failure. Attempting to service a delicate material like suede with improvised or inappropriate implements is a primary cause of permanent damage.
A professional-grade toolkit is not an accessory; it is a necessity. Each tool is engineered for a specific function, working in concert to lift contaminants and restore the material's nap without inflicting harm. The logic is simple: you would not use a kitchen knife as a screwdriver. The same principle applies here. Investing in the correct equipment is the most effective way to prevent costly mistakes.
The Essential Suede Cleaning Arsenal
A well-curated set of tools is the difference between a successful restoration and a permanent blemish. The following are non-negotiable components for any serious suede owner.
| Tool | Primary Function | Application Protocol | Gold Standard Recommendation |
|---|---|---|---|
| Suede Brush | Restores the nap; removes surface debris. | The first and last step in any cleaning regimen. | Seek a dual-sided brush with brass/rubber and nylon/horsehair bristles for versatility. |
| Suede Eraser | Lifts localized scuffs, spots, and shiny marks. | For targeted treatment of dry stains and abrasions. | A dedicated suede eraser block is essential. |
| Cedar Shoe Trees | Maintain shape; absorb moisture and odor. | Insert prior to cleaning and throughout drying/storage. | Always select 100% natural cedar for its superior moisture-wicking properties. |
| Suede Cleaner | Deep cleans stains intractable by dry methods. | For set-in dirt, water marks, and lipid-based stains. | Gold Standard Suede & Nubuck Foam Cleaner |
| Microfiber Towel | Blotting moisture; wiping away residue. | Used during wet cleaning and final drying stages. | A clean, high-GSM towel prevents lint transfer. |
With these tools, you are equipped to manage the vast majority of scenarios, from light dust accumulation to more significant spills.
Why a Specialized Cleaner is Non-Negotiable
There are instances when dry methods are insufficient. However, using dish soap, laundry detergent, or a generic multi-purpose spray is a critical error. These cleaners contain harsh surfactants that strip natural oils from the suede, leaving it stiff, brittle, and discolored. Furthermore, they often leave behind a sticky residue that functions as a magnet for future dirt.
This is precisely why a formula like the Gold Standard Suede & Nubuck Foam Cleaner is the correct choice. It is engineered to generate a controlled foam that lifts dirt particles from the suede's nap without over-saturating the material. This targeted application minimizes moisture exposure, preventing the formation of water marks while performing a deep clean that preserves the suede's inherent softness.
For a comprehensive overview of a complete cleaning system, see our analysis of the best sneaker cleaning kit, which details how these components work synergistically.
The cardinal rule is to begin with the least aggressive method. A quality toolkit provides a graduated response, allowing you to escalate from a light brushing to a deep clean only when necessary.
The Foundational Dry Cleaning Method
The first and most important rule of suede care is to always start dry.
Water is the primary antagonist to suede's delicate texture until all preliminary steps are complete. This dry-cleaning method is your first line of defense and the correct procedure for handling surface-level dust, dirt, and minor scuffs without risking damage. Mastering this technique is the single most critical skill for maintaining the appearance of suede sneakers.
This non-invasive approach resolves the majority of common maintenance issues, reducing the frequency with which wet cleaning methods are required.
Step 1: Prepare the Sneaker for a Stable Clean
Before a brush touches the suede, the sneaker must be stabilized. Attempting to clean a limp, empty shoe is ineffective, leading to uneven pressure and potential material damage.
The solution is to insert a pair of quality cedar shoe trees. This is not an optional step for a professional result. Shoe trees fill out the sneaker, replicating the form of a foot and creating the necessary tension across the upper for effective cleaning. This ensures consistent, even pressure from the toe box to the heel counter.
Step 2: The Initial Brush-Off
With the shoe trees in place, the cleaning can begin. The objective of this first pass is to gently lift and sweep away loose particulates—dust, dried mud, surface grit—residing on top of the suede's nap.
Using a dedicated suede brush, employ light, consistent strokes, always moving in the same direction to follow the natural grain of the nap. This motion dislodges debris without embedding it deeper into the fibers. Ensure the entire surface is addressed, with particular attention to seams and crevices where dirt accumulates.
The most common error is applying excessive force with the brush initially. Suede is a delicate material. Aggressive scrubbing will flatten the nap or cause permanent abrasion. Let the bristles perform the work, not brute force.
Step 3: Resetting the Nap for a Uniform Finish
After the initial cleaning pass, the suede's nap may appear uneven. This is expected. The next step is to reset these fibers to restore the material's classic, velvety texture.
Now, you will brush against the grain using short, quick, flicking motions. This action lifts the matted-down fibers, reviving the plush appearance and feel. Work methodically in small sections to ensure a uniform finish across the entire shoe. This two-step brushing technique—first with the grain to clean, then against it to restore—is the cornerstone of proper suede maintenance.
Step 4: Targeting Scuffs with a Suede Eraser
For more persistent marks, such as light scuffs or shiny spots from compression, a brush may be insufficient. The suede eraser is the designated tool for this task. It works by creating controlled friction that gently crumbles and lifts the localized stain from the suede fibers.
The correct procedure is as follows:
- Isolate the mark. Focus exclusively on the specific scuff or shiny area.
- Apply targeted pressure. Rub the eraser directly onto the spot with firm, controlled movements. You are treating the problem area, not the entire shoe.
- Modulate pressure. Begin with moderate pressure and increase as needed for tougher marks. The eraser will produce small shavings, indicating it is working correctly.
- Brush away residue. Once the mark is gone, use your suede brush to sweep away all eraser debris. Follow with a final light brushing of the area to blend the nap with the surrounding suede.
Mastering this dry-cleaning process is fundamental to long-term suede care. By following these steps, you can effectively address over 80% of routine cleaning needs, postponing the need for more intensive wet cleaning and preserving the footwear's optimal condition.
Advanced Stain Removal for Suede
There will be occasions when dry methods are insufficient. You will inevitably encounter more formidable challenges: water spots from a sudden downpour, lipid-based stains from food, or crystalline salt lines from winter conditions.
In these situations, a more targeted strategy is required. This does not involve "washing" the sneakers (a practice to be avoided at all costs). Rather, it involves precise spot-treatment designed to lift the stain without damaging the suede. The objective is to extract the contaminant from the fibers, not drive it deeper.
How to Address Water Marks and Salt Lines
Counterintuitively, the most effective remedy for a water stain involves a minimal amount of water. The dark rings are formed by mineral deposits left behind as the water evaporates, disrupting the suede's nap. The goal is not to "remove" the stain but to blend its edges seamlessly into the surrounding material.
- Evenly Dampen: Lightly dampen a clean suede brush. The brush should be moist, not dripping.
- Blend Outward: Gently brush a micro-thin, even layer of moisture over the entire affected panel, working from the center of the stain outward.
- Blot and Dry: Immediately press a clean microfiber towel onto the area to absorb excess moisture. Allow the sneaker to air dry completely, away from any direct heat sources or sunlight.
For alkaline salt lines from de-icing products, the approach is similar but incorporates a mild acid. Create a solution of one part white vinegar to two parts water. Sparingly dab this solution onto the salt line with a clean cloth to dissolve the crystals, then follow the same blending and drying protocol described above.
Eradicating Oil and Grease Stains
Oil is suede's most formidable adversary. It penetrates quickly and can cause permanent darkening if not addressed immediately. As soon as an oil or grease stain occurs, the singular goal is absorption.
Apply cornstarch or talcum powder directly onto the fresh stain, covering it completely. Allow it to sit for several hours, or preferably overnight. The powder will act as a poultice, drawing the oil out of the suede's pores. Once sufficient time has elapsed, simply brush the powder away with your suede brush. This process may need to be repeated for severe stains.
Pro Tip: Always test any cleaning solution on an inconspicuous area first, such as the inside of the tongue or the heel collar. This simple precaution can prevent a catastrophic color-bleeding event.
This flowchart provides a visual decision-making guide for initial dry-cleaning approaches.
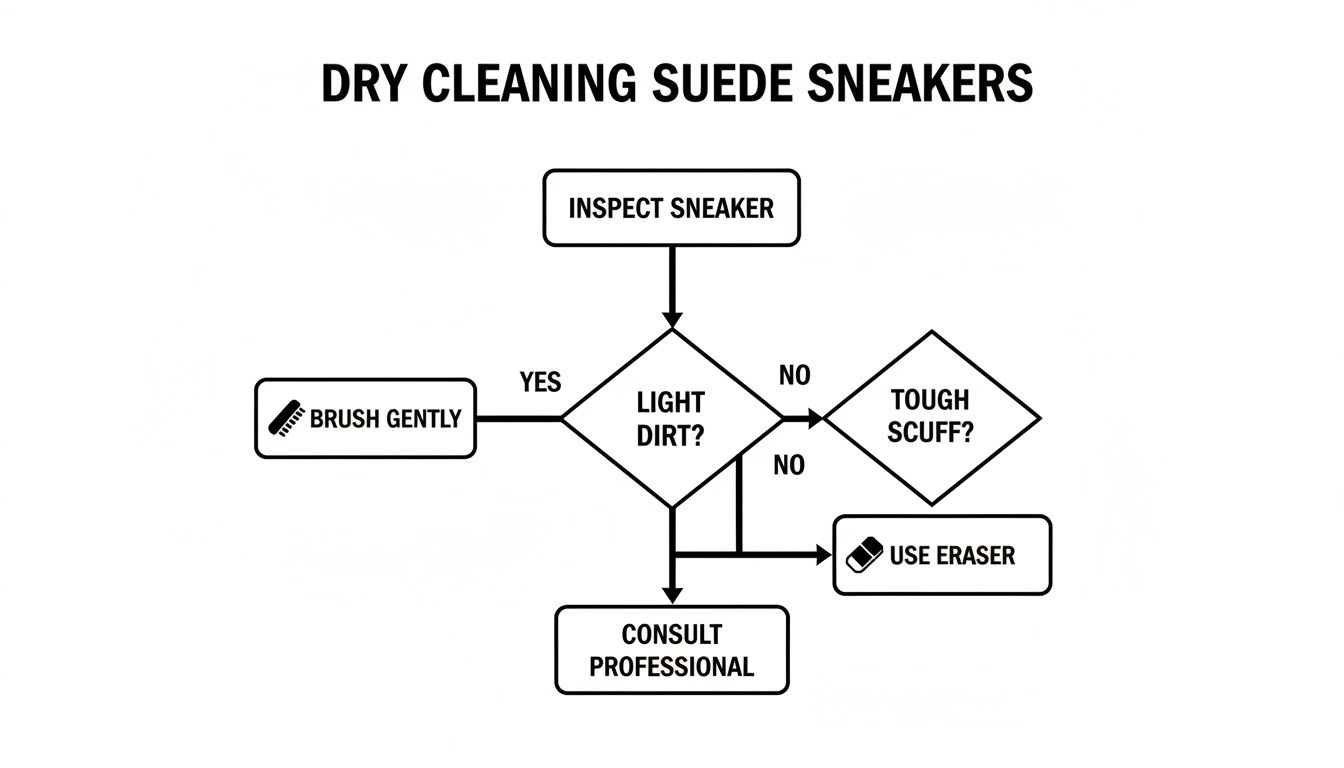
As illustrated, the nature of the mark dictates the initial tool—a brush for loose debris, an eraser for embedded scuffs.
Treating Ink and Other Difficult Stains
An ink stain can seem like a total loss, but immediate action can yield positive results. A quality suede eraser, applied with firm and steady pressure to a fresh ink mark, can often lift a significant amount of the pigment from the surface fibers.
For situations where dry methods fail, a specialized cleaner is required. The Gold Standard Suede & Nubuck Foam Cleaner is engineered for these scenarios. Its foaming action penetrates the nap to lift stains without the risks associated with liquid saturation.
Apply a small amount of foam to the stain, gently agitate it with a soft brush in small circular motions, and then wipe away the foam and lifted grime with a clean microfiber towel. This provides the necessary cleaning power without compromising the material's integrity. For a more exhaustive guide on stain removal, consult our comprehensive resource on how to remove shoe stains.
Drying and Finishing for a Professional Result
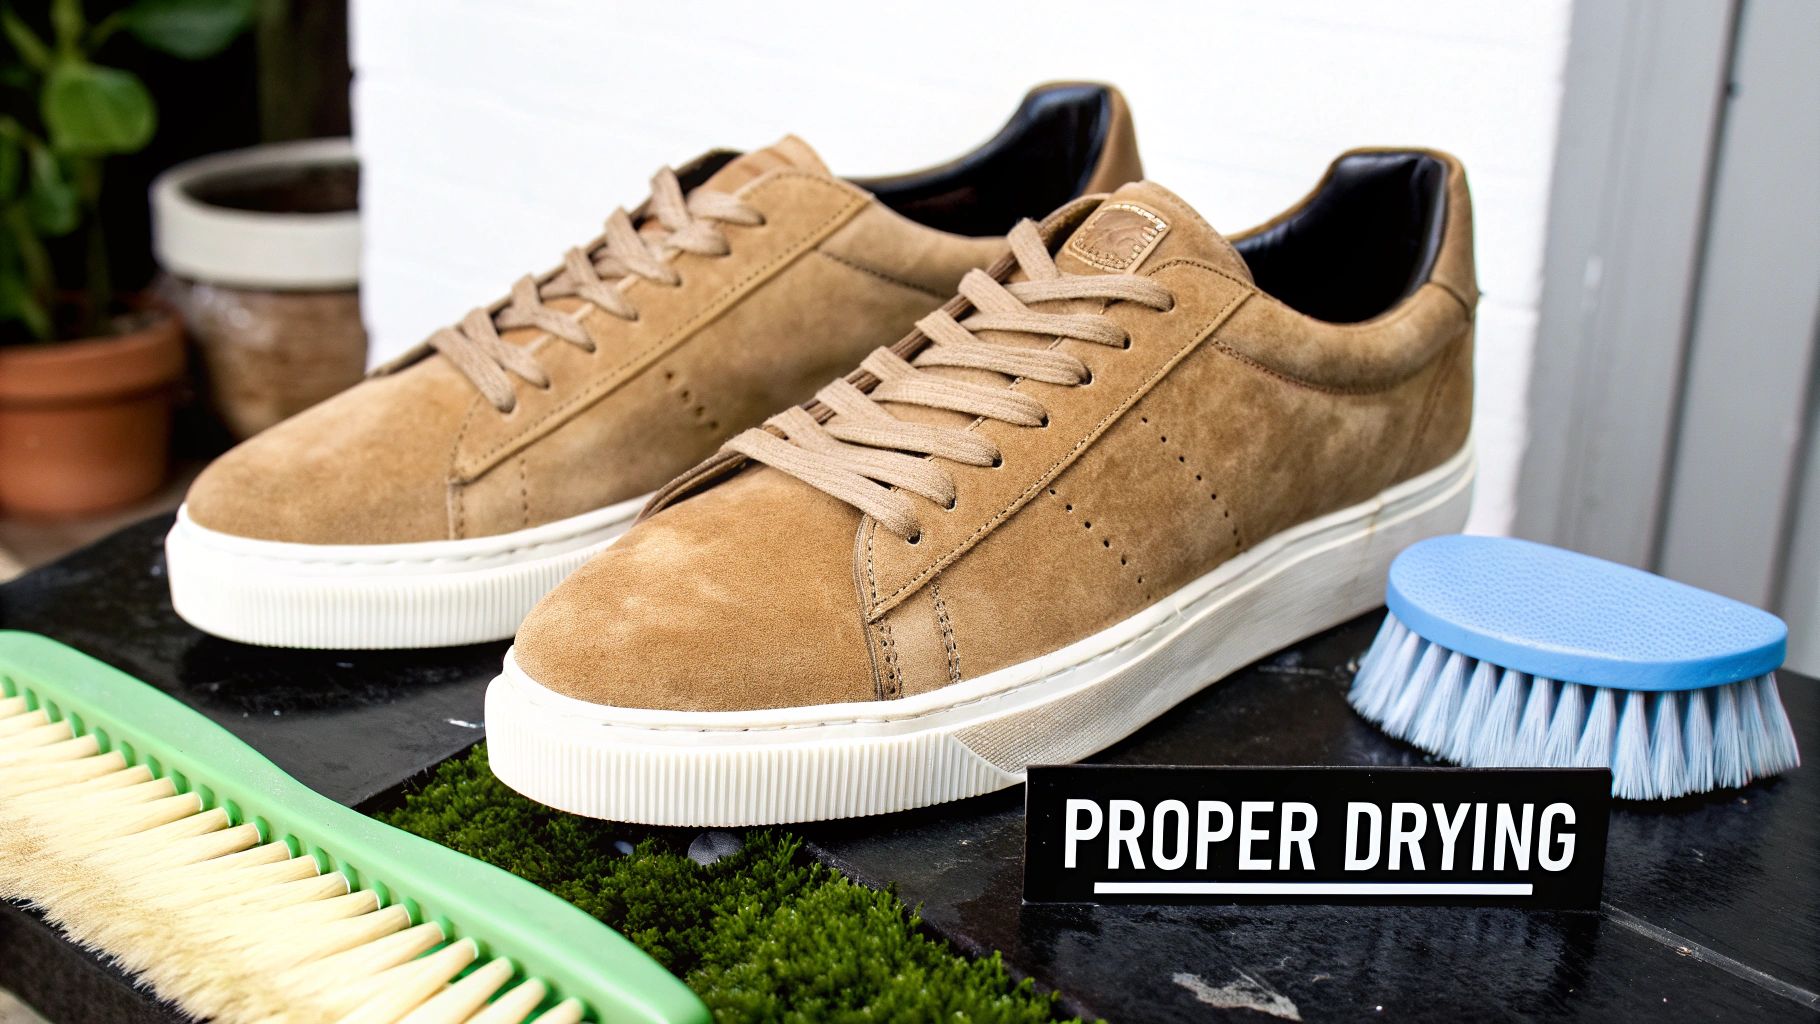
Successful stain removal is only half the battle. The drying and finishing phase is as critical as the cleaning process itself. It is at this stage that many well-intentioned cleaning efforts fail, resulting in irreversible damage.
Improper drying is the leading cause of stiff, brittle suede, prominent watermarks, and permanent structural warping. When the delicate protein fibers of suede are saturated and then exposed to high heat, they shrink, harden, and can fracture. Executing this final stage correctly is what separates a professional restoration from an amateur attempt.
The Correct Air-Drying Protocol
Patience is the operative principle for drying suede. The cardinal rule is to avoid direct heat at all costs. This means no hairdryers, radiators, or sunny windowsills. Intense heat effectively "cooks" the hide, rendering it brittle and prone to cracking.
Instead, adhere to this proven air-drying method:
- Stuff the Interior: Immediately after cleaning, fill the sneakers with crumpled unprinted paper or paper towels. This serves two functions: it wicks moisture from the interior and, crucially, helps the sneaker maintain its original shape as it dries.
- Insert Shoe Trees: For superior results, replace the paper with a pair of cedar shoe trees after approximately one hour. Cedar is hygroscopic, naturally absorbing moisture and odor while providing the ideal structure to prevent creasing and collapse.
- Select a Suitable Location: Place the sneakers in a cool, dry area with good air circulation. Keep them away from direct sunlight. Proper ventilation is essential for preventing mildew growth and ensuring the suede dries evenly.
Allow a minimum of 24 hours for the sneakers to dry completely. Attempting to accelerate the process with heat is the fastest way to ruin them.
Reviving the Suede Nap
Once the sneakers are completely dry to the touch, the suede will likely feel somewhat stiff and appear flat. This is a normal consequence of wet cleaning. The final, critical step is to "reset" the nap to restore its soft, velvety texture.
Using your suede brush, gently brush the entire sneaker in one direction to begin lifting the fibers. Then, reverse direction and brush against the grain using short, brisk strokes. This back-and-forth motion effectively revives the matted-down fibers, restoring a plush, uniform appearance.
Focus on any areas that were spot-treated to ensure they blend seamlessly with the rest of the shoe. This final brushing is the key to achieving a factory-fresh finish.
Proactive Protection and Long-Term Maintenance
Reactive cleaning addresses problems after they occur. A professional approach, however, is proactive. The objective is not merely to clean sneakers after they become soiled, but to prevent soiling from happening in the first place. This is achieved by creating a barrier between the suede and environmental contaminants before the first wear.
This is the secret to extending the lifespan of your footwear. Consistent, preventative care will maintain their condition far more effectively than any intensive cleaning session. It is exponentially easier to maintain a clean pair of sneakers than to restore a heavily damaged one.
Creating an Invisible Shield
The single most important preventative measure for suede is the application of a high-quality protector spray. This creates a hydrophobic barrier on the surface of the suede, repelling water, dirt, and oil before they can penetrate and stain the delicate fibers. Without this protection, the sneakers are highly susceptible to environmental damage.
For this critical application, we recommend the Gold Standard Premium Sneaker Protector Spray. Its advanced formula provides robust protection without occluding the suede's pores or altering its natural texture. When applied correctly, liquids will be observed beading up and rolling off the surface. You can see how our premium sneaker protector spray functions to safeguard your collection.
Proper application is straightforward:
- Start with a clean surface. Always apply to completely clean, dry sneakers. Applying protector over existing dirt will seal it in.
- Maintain distance. Hold the can approximately six to eight inches from the sneaker.
- Apply even coats. Use a smooth, sweeping motion to apply a light, uniform layer. Do not saturate any single area.
- Allow to cure. Let the sneakers air dry for a minimum of 24 hours in a well-ventilated space. This allows the protective barrier to fully bond with the fibers.
A common mistake is over-application. A single, heavy coat can darken the suede and cause stiffening. It is always preferable to apply two light coats, with adequate drying time between them, than one saturated coat.
Building a Simple Maintenance Routine
Once the protective barrier is established, a simple and consistent maintenance routine will preserve the sneakers' condition. This does not require a significant time commitment.
- Routine Brushing: After every few wears, perform a quick brushing with a suede brush. This removes surface dust and debris before it can become embedded in the nap.
- Proper Storage: Store sneakers in a cool, dry place away from direct sunlight, which can cause fading. Using cedar shoe trees during storage helps maintain shape and absorb residual moisture.
- Daily Inspection: When removing your shoes, conduct a quick visual inspection. Early detection of a minor scuff allows for immediate removal with a suede eraser, preventing a larger issue.
This proactive mindset is universal to preservation, analogous to how one might care for vintage graphic t-shirts; gentle handling and preventative measures are key to longevity.
Empirical data supports this approach. Research indicates that a quality waterproofing spray can reduce water-related damage to suede by up to 75%. While 55% of sneaker consumers own suede footwear, only 30% regularly utilize a protector spray—a simple, critical step that is too often overlooked.
Suede Care FAQ: Expert Answers
Even with a solid maintenance protocol, questions arise. Suede can be a challenging material, and understanding how to troubleshoot specific issues is essential. Here are our answers to the most common questions we receive.
Can I Use Soap and Water on Suede?
No. Standard soap and excessive water are incredibly damaging to suede. Suede's porous nature means it will absorb the water, leading to stiffening and water spots upon drying. Household soaps contain harsh detergents that strip the natural oils from the hide, causing it to become brittle, fade, and eventually crack. Only use a dedicated suede foam cleaner, and only after dry methods have been exhausted.
How Do I Fix Suede That Has Hardened?
Hardened or matted suede is typically the result of water damage. Once the sneaker is 100% dry, use a firm suede brush to vigorously work the affected area. Brush in multiple directions—up, down, and side to side—to break up the stiff, clumped fibers and revive the nap. For particularly stubborn areas, carefully introduce a small amount of steam. Hold the sneaker a safe distance (10-12 inches) over steam from a kettle for a few seconds at a time. The steam helps relax the fibers, making them more pliable for a subsequent round of brushing.
Can I Put Suede Sneakers in a Washing Machine?
Under no circumstances. A washing machine will destroy suede footwear. The combination of total water saturation, the aggressive tumbling action, and harsh laundry detergents will result in irreversible discoloration, shrinkage, and a complete loss of texture. Furthermore, the heat and moisture can dissolve the adhesives used in the shoe's construction, causing sole separation. Manual cleaning is the only acceptable method.
Suede care is a matter of finesse, not force. The correct tools and a patient, methodical approach will always yield superior results to a machine. Hand-cleaning provides the control necessary to lift dirt without damaging the material.
How Often Should I Clean and Protect My Suede?
Frequency depends on wear and environmental conditions. A light brushing after every two to three wears is an excellent habit to prevent dirt accumulation. A deep clean should only be performed as needed to address specific spots or stains. Protection should be applied before the first wear. Re-apply a quality protector spray every one to two months of regular use, or more frequently in wet climates. Proactivity is paramount.
At Gold Standard, we understand that caring for your footwear is an investment in quality. Our products are formulated to deliver the professional-grade results your collection deserves.
Ready to provide your suede with the ultimate defense? Explore the Gold Standard Premium Sneaker Protector Spray and keep your footwear in pristine condition.