
Think of a quality boot leather protector as an invisible, breathable shield for your footwear. It forms a barrier on the surface of the leather, repelling moisture, salt, and everyday grime before they can penetrate and damage the hide's natural structure. It’s not an accessory; it’s an essential component of proper footwear maintenance.
Why Protecting Your Boots Is a Foundational Step in Footwear Care
A pair of well-made leather boots is an investment in function, style, and comfort. Protecting that investment from day one is the foundation of a care routine that determines whether they last for a single season or for years to come.
Leather is a porous, organic material. Like any skin, it is inherently vulnerable to environmental damage when left untreated.
- Moisture Damage: Water is leather's primary adversary. When leather becomes saturated and then dries, its natural oils are drawn to the surface and evaporate. This process strips the leather of its inherent flexibility, leaving the fibers brittle, stiff, and prone to cracking.
- Salt Stains and Corrosion: Road salt is highly corrosive. It aggressively draws moisture out of leather, leaving behind the characteristic white stains that can permanently damage the finish and weaken the hide's internal structure.
- Dirt and Grime Abrasion: Fine particles of dirt, dust, and grit are more destructive than they appear. At a microscopic level, they act as an abrasive. With each step, these particles grind against the leather’s grain, causing friction that wears down the fibers and dulls the finish.
Beyond Simple Water Repellency
A high-quality boot protector offers a comprehensive defense system for the material itself. It works by coating individual leather fibers without sealing the pores completely. This distinction is critical for maintaining breathability—a key characteristic that contributes to the comfort and performance of leather footwear.
A protective treatment is the single most important step you can take to preserve the structural integrity and appearance of new boots. It prevents small, preventable issues from becoming irreversible damage.
This proactive approach is centered on preservation. It prevents common damage, actively maintains the leather's natural suppleness, slows premature aging, and preserves the original appearance. The few minutes invested in applying a protector will be returned through the extended lifespan and durability of your boots. The logic is fundamental to material preservation; you can learn more about the principles of protective coatings used for other valuable surfaces.
Matching The Protector To Your Specific Leather Type
Using the wrong protector on your leather boots can be as damaging as using no protector at all. Not all leathers are created equal, and a product that restores a rugged pair of work boots could permanently ruin a pair of suede Chelsea boots.
The critical difference lies in the leather's finish. Smooth, full-grain leathers possess a dense, durable surface that can withstand robust treatments. Conversely, materials like suede and nubuck derive their characteristic velvety texture from a sanding process that creates a soft, napped surface. This delicate texture is far more absorbent and susceptible to damage from improper product application.
This guide will help you select the appropriate product for your specific footwear.
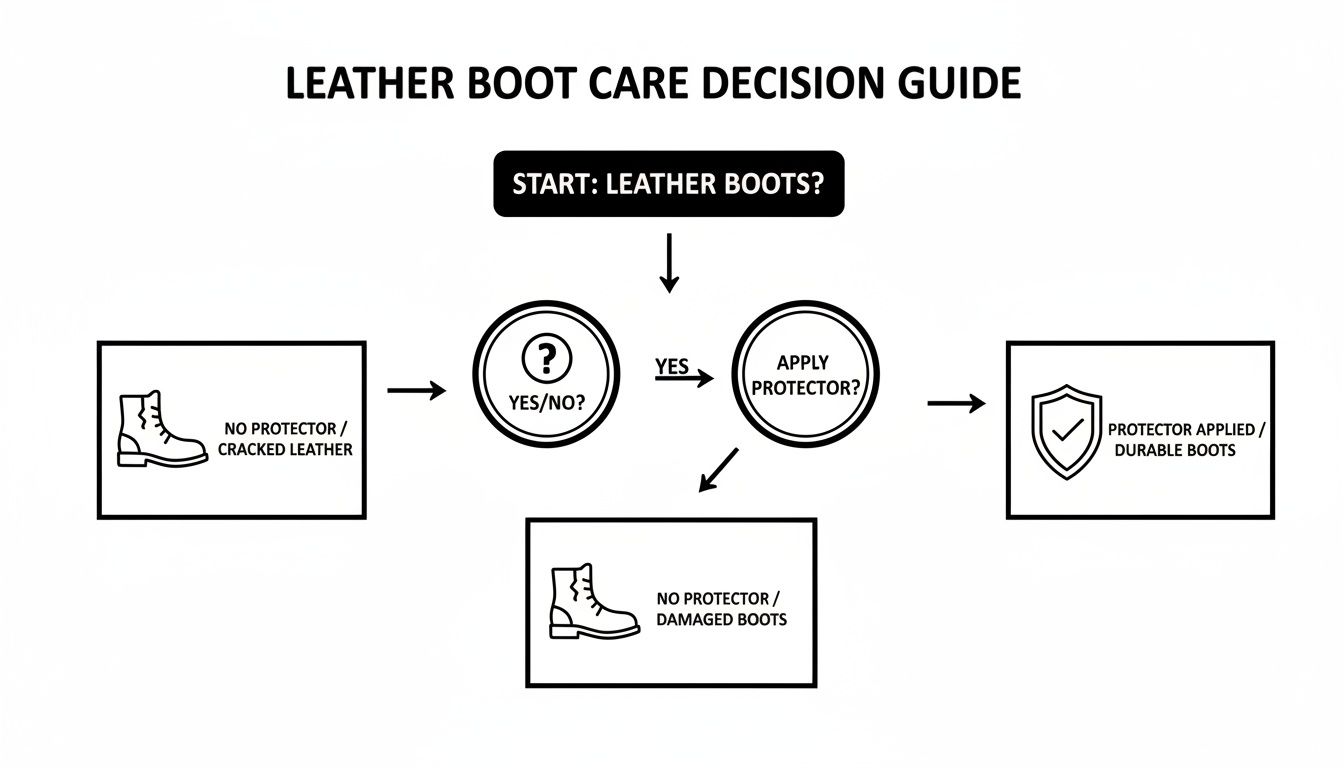
As the guide illustrates, proper protection is the only viable path to long-term preservation. Neglect leads to a steady, irreversible decline in the material's condition.
Protector Types For Different Leathers
For robust, full-grain leather boots—such as classic work boots or hiking boots—waxes and oil-based conditioners are effective choices. They provide heavy-duty water resistance while deeply nourishing the hide to prevent cracking.
However, applying wax to suede would be a catastrophic error. It would instantly crush the delicate nap, creating a greasy, matted finish that is nearly impossible to reverse. For suede and nubuck, a specialized aerosol spray is the only appropriate option.
A purpose-built spray for napped leathers, like our Gold Standard Premium Sneaker Protector Spray, is formulated to create a protective barrier on the fibers without weighing them down or altering their texture, preserving that signature softness and color.
To simplify the selection process, this reference table pairs protector types with corresponding boot materials.
Protector Type vs. Leather Boot Style
| Protector Type | Best For (Leather Type) | Primary Benefit | Expert Considerations |
|---|---|---|---|
| Wax-Based | Smooth, full-grain, oil-tanned (e.g., work boots, hikers) | Maximum water resistance and deep conditioning. | Can slightly darken the leather. Not suitable for suede or nubuck. |
| Oil-Based | Full-grain and pull-up leather (e.g., heritage boots) | Nourishes and restores suppleness. | Use sparingly to avoid over-softening the leather's structure. |
| Aerosol Spray | Suede, nubuck, delicate leathers (e.g., dress boots, Chelseas) | Invisible, breathable barrier that won't alter texture. | Requires more frequent reapplication than waxes. |
| Cream/Lotion | Finished, smooth leather (e.g., dress shoes, fashion boots) | Light protection and conditioning with color restoration. | Less water-resistant than heavy waxes. |
Use this table as a quick reference to prevent costly mistakes and maintain the intended appearance of your boots.
Reading Labels Like An Expert
When selecting a product, always review the ingredient list. For finer dress boots, avoid formulations with heavy silicones. These can clog the leather's pores, trapping moisture and inhibiting the material's ability to breathe, which can lead to long-term damage. The goal is to enhance the leather's natural properties, not to suffocate it.
Insights can be drawn from the industrial protective footwear market, where performance and longevity are paramount. This market, which is projected to hit USD 19.59 billion by 2033, underscores the importance of durability. Studies indicate that leather uppers can account for nearly 40% of a safety boot’s carbon footprint, highlighting how proper care benefits both your investment and the environment. You can dig into these trends over on Grandview Research.
Ultimately, matching the boot leather protector to the material is a matter of preserving your investment. For a detailed breakdown of application, consult our guide on using a suede and leather waterproof spray.
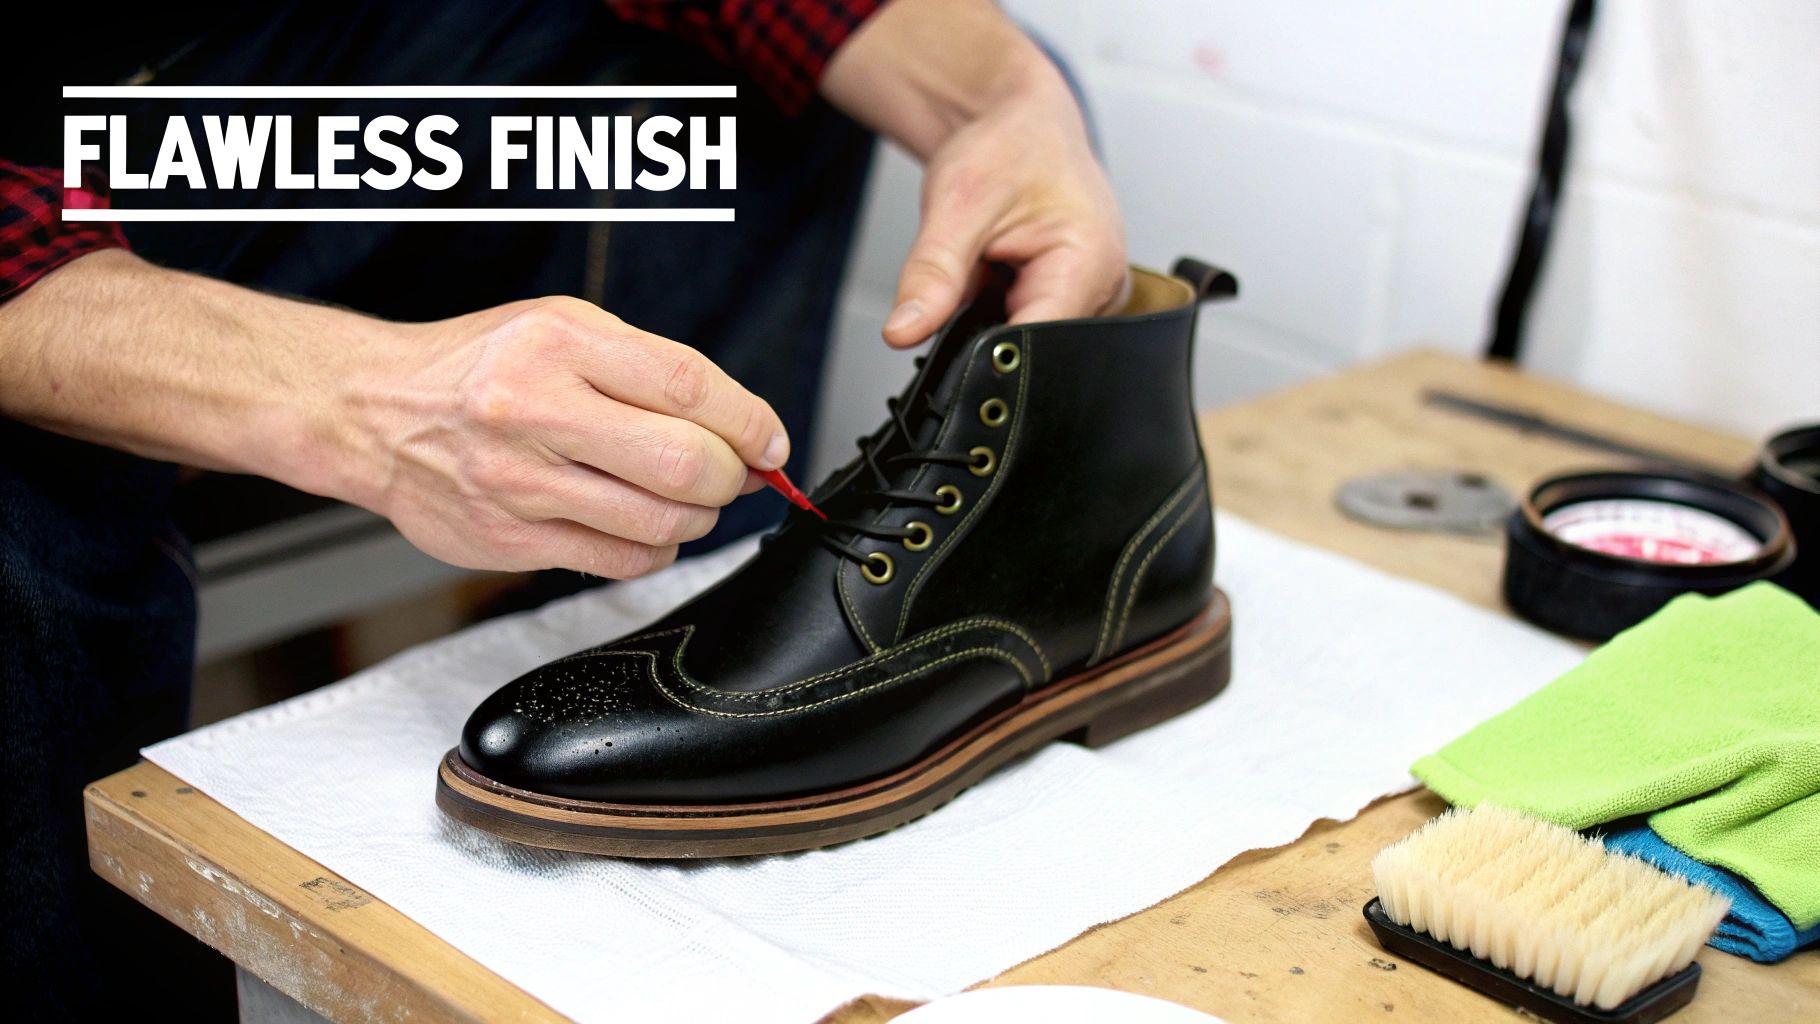
The Professional Method for a Flawless Application
Correct application of a boot protector is what distinguishes an amateur attempt from a professional, durable finish. The outcome is determined more by the process than by the specific product. This section outlines the exact techniques required to create a uniform, long-lasting barrier that protects the integrity of the leather.
The most critical phase is preparation. Applying a protector to an unprepared surface seals in dirt and compromises the treatment's effectiveness.
Preparing The Surface
Before any protector is applied, the leather must be impeccably clean and properly conditioned. Applying a protector over dirt, dust, or old polish traps abrasive particles against the hide, causing gradual damage and preventing the new layer from bonding correctly. This results in a weak, patchy barrier that will fail prematurely.
Follow this specific order of operations for optimal results.
- Clear Surface Debris: Using a horsehair brush, vigorously sweep the boots to remove all loose dirt and dust. Pay close attention to the welt, seams, and tongue gussets—areas where debris accumulates.
- Deep Clean: For a truly clean surface, a dedicated leather cleaner is essential. Apply the cleaner with a soft cloth to lift embedded grime and oils from the leather's pores. For a detailed walkthrough, our team has created a complete guide on the best way to clean leather shoes.
- Condition the Leather: After deep cleaning, some of the leather's natural oils may be depleted. This is the time to apply a high-quality leather conditioner to restore moisture and flexibility. This step is vital for preventing cracks and ensures the leather is supple and receptive to the protector.
- Allow to Dry Completely: Let the boots air dry naturally for several hours, or overnight. Never use a direct heat source, such as a hairdryer or radiator, as this can shrink and damage the leather fibers.
Perfecting The Application Technique
With a clean, conditioned, and completely dry surface, you are ready to apply the protector. The correct method varies by product type—wax, cream, or spray—and is key to avoiding an uneven or tacky finish.
For Waxes and Creams:
The objective is a thin, even layer. Using your fingers or a lint-free cloth, apply a small amount of product to the leather with small, circular motions. The friction generates warmth, helping the waxes melt into the pores rather than sitting on top. Concentrate on vulnerable areas like the seams and the welt, where water intrusion is most common.
A common error is oversaturation. Applying too much wax or cream clogs the leather's pores, suffocating the material and leaving a sticky residue that attracts more dirt. It is far more effective to build up two thin layers than to apply one thick coat.
For Aerosol Sprays:
Technique is paramount with an aerosol. Hold the can approximately 6-8 inches from the boot. This distance ensures a fine, even mist and prevents oversaturation. Always work in a well-ventilated area. Use a steady, sweeping motion, beginning the spray just before the boot and ending it just after to avoid heavy spots and drips. Allow the first light coat to dry before applying a second for complete coverage.
Curing and Final Buffing
Patience is crucial during the final phase. After application, the protector needs time to cure—the process by which the formula bonds with the leather fibers to create a resilient barrier. Rushing this step will result in a weak, ineffective shield.
Allow the boots to cure for at least a few hours, preferably overnight, in a dry, room-temperature environment.
Once fully cured, perform a final buffing with a clean horsehair brush. Use quick, light strokes across the entire boot. This action removes any slight excess product, evens the finish, and raises a natural, professional sheen. Your boots are now properly protected.
Building a Sustainable Leather Care Routine
Applying a boot protector is not a one-time task; it is the beginning of a maintenance regimen. The initial application sets a baseline, but long-term preservation is achieved through a simple, sustainable care schedule.
There is no universal rule for reapplication frequency. The ideal routine depends on the level of wear and exposure your boots endure. A pair of office boots worn on city sidewalks may only require a protective refresh every two or three months. In contrast, heavy-duty hiking boots exposed to mud, rain, and abrasive terrain may need to be retreated after every significant outing.
The key is to observe the condition of your boots rather than adhering to a rigid schedule.
Learning to Read Your Leather
Your boots will provide clear signals when they require attention. The most telling indicator that a protective barrier has degraded is the leather's reaction to water. When a protector is effective, water will bead up and roll off the surface.
When you observe water beginning to darken the leather or soak in, even momentarily, the shield is compromised, and it is time to reapply. It is always better to be proactive with care than to react to damage.
Another sign is the look and feel of the leather. If it appears dull, dry, or lighter in color—particularly in high-flex areas—it is overdue for both conditioning and protection.
A complete care system is cyclical. It integrates protection with cleaning and conditioning, so each step supports the others. This holistic approach prevents deep-seated damage before it can begin.
Creating Your Care Cycle
An effective routine makes these steps feel like second nature. Tying your care schedule to seasons or activities can help.
- Pre-Season Preparation: Before winter, perform a full treatment: deep clean, condition, and apply a fresh coat of protector to prepare for salt and moisture. Repeat this process before the spring rainy season.
- Post-Activity Care: After a muddy hike or a day in the snow, clean and re-protect your boots as soon as they are dry. This prevents corrosive elements from setting in and causing damage.
This proactive approach is increasingly relevant. The global boots market was valued at USD 37.59 billion in 2024 and continues to grow, indicating a rising number of consumers investing in premium footwear and seeking to protect it.
For comprehensive care, incorporate natural conditioners like Jojoba Oil to maintain the leather’s suppleness. Following conditioning, a quality protector provides the final shield. Our Gold Standard Premium Sneaker Protector Spray offers an effective barrier that simplifies this maintenance cycle, keeping your boots ready for any condition.
Troubleshooting Common Protection Mistakes
Even with careful preparation, application issues can arise. The key is not to avoid mistakes entirely but to know how to correct them without causing further damage. Here are our field-tested solutions for the most common problems.
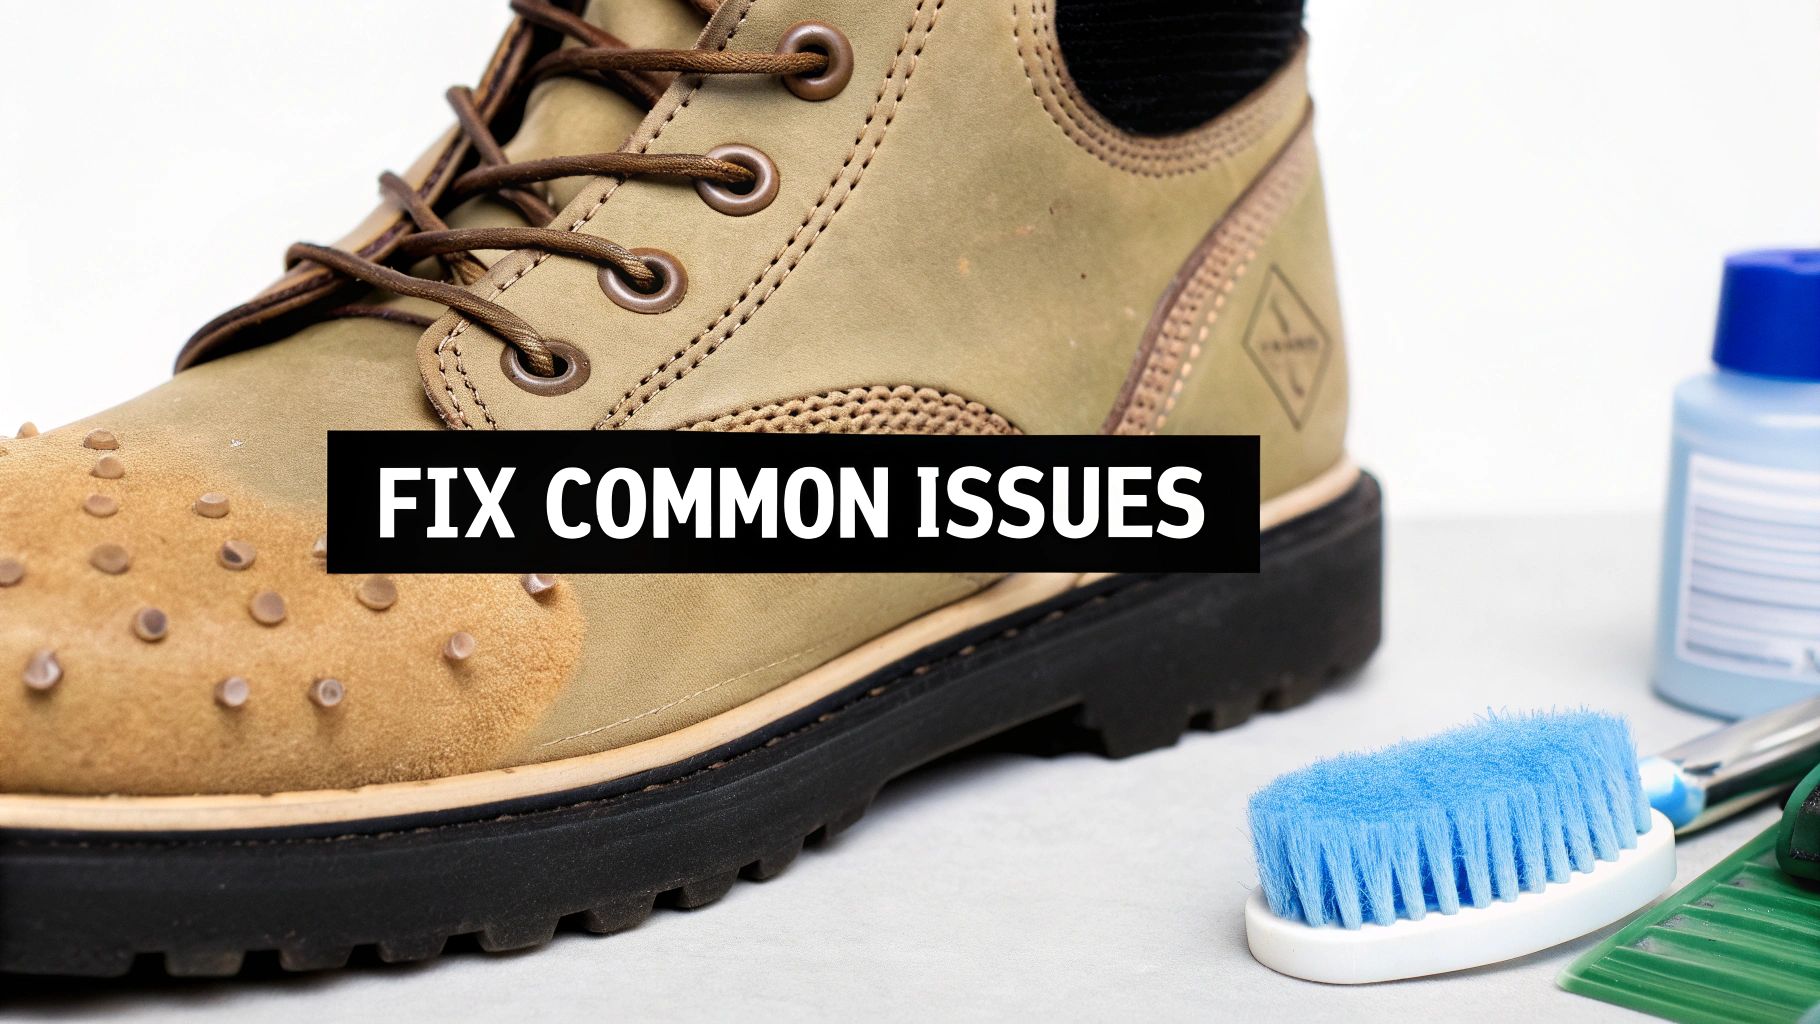
Knowing how to address these occasional issues will give you the confidence to apply protector correctly every time.
Correcting a Sticky or Tacky Finish
This is the most frequent issue and is almost always caused by applying too much product. When the leather's pores are oversaturated, the excess protector sits on the surface, creating a sticky film that attracts dirt.
The remedy is typically straightforward. Using a clean horsehair brush, buff the boot vigorously. The friction and warmth will help distribute the excess product and encourage absorption. If tackiness persists, a light wipe with a clean, dry microfiber cloth can lift any remaining surface residue.
Fixing Uneven Streaks from a Spray
Streaks from an aerosol protector usually indicate an improper application technique, such as spraying too close to the boot or failing to maintain a constant, fluid motion. This results in heavy, wet patches that dry unevenly.
First, allow the boot to dry completely. Attempting to fix it while wet will only worsen the problem. Once dry, a thorough buffing with a horsehair brush can often blend the streaks. For stubborn spots, apply another very light, even coat from the proper 6-8 inch distance. This second pass will help unify the finish.
Never attempt to wipe a wet spray protector. This will smear the product, creating a concentrated blotch that is much more difficult to correct. Patience is the proper tool in this situation.
Addressing Unexpected Darkening
Many conditioning protectors, particularly those rich in oils and waxes, are formulated to darken leather slightly as they nourish the hide. However, sometimes this effect is more pronounced than anticipated.
After the protector has fully cured (allow 24 hours), a vigorous buffing can sometimes lighten the leather's shade. For a more direct approach, a high-quality leather cleaner may be used to gently lift some of the freshly applied oils. Always test this method on a small, inconspicuous area first, as results vary depending on the leather and the product used.
Your Top Questions About Boot Protection, Answered
Even with a comprehensive guide, specific questions often arise. Here are our direct, field-tested answers to the most common inquiries we receive about protecting leather boots.
How Often Should I Re-Treat My Boots?
The honest answer is: it depends entirely on use. There is no single correct interval.
For daily commuter boots in mild weather, reapplying every 2-3 months is a sound guideline. For hiking or work boots exposed to frequent rain, mud, or snow, re-treatment may be necessary every few weeks or after each deep cleaning.
Observe the leather itself. When water no longer beads and rolls off the surface but instead begins to darken and soak into the hide, the protective barrier has failed. This is your definitive signal to reapply.
Can I Use One Protector for All My Leather Boots?
This is a common but inadvisable shortcut. Using a single product across different leather types can cause damage because their material properties and needs are fundamentally different.
- Suede and Nubuck: These leathers have a delicate, napped surface. They require specialized aerosol sprays formulated to protect without altering their texture. A wax or cream will crush the fine fibers, creating a greasy, irreversible matted finish.
- Smooth and Full-Grain Leather: These durable leathers benefit from heavier waxes, creams, and oils that provide deep conditioning and robust water resistance.
You must match the protector to the material to avoid discoloration or permanent textural damage. When in doubt, perform a spot test on an inconspicuous area, such as the inside of the tongue.
Will This Make My Boots 100% Waterproof?
A high-quality protector will make your boots highly water-resistant, but it will not make them waterproof. Only a non-porous material like rubber can render a boot fully waterproof.
A protector creates a breathable barrier. It coats the individual leather fibers, causing water to bead and roll off rather than soak through. This keeps your feet dry from external moisture while still allowing water vapor from your feet to escape. This breathability is essential for comfort and prevents moisture buildup inside the boot.
The market for premium leather boots is expanding, projected to grow by USD 8.03 billion by 2029. This growth is driven by consumer demand for high-performance footwear with effective water resistance. If you're interested in the data, you can find more insights on this trend over at Technavio.
Do I Really Need to Clean My Boots Before Applying a Protector?
Yes. This is the single most critical step in the process and is non-negotiable.
Applying a protector over a dirty surface seals dirt, dust, and abrasive grit against the leather. With every step, these trapped particles grind against the hide, accelerating wear and tear. Furthermore, a contaminated surface prevents the protector from bonding properly with the leather fibers, resulting in a weak, patchy barrier that will not perform as intended.
Always begin with a clean, dry surface to ensure effective and lasting protection.
For a boot leather protector that provides a reliable, breathable shield without altering the appearance or feel of your footwear, Gold Standard delivers a trusted solution. Explore our collection of premium shoe care essentials.