
Properly cleaning leather shoes is a methodical process, not a guess. A field-tested routine is the only way to preserve the material while achieving a superior clean. The correct procedure involves dry brushing, applying a pH-neutral foam cleaner, wiping away residue, allowing the shoes to air dry completely, and finishing with a high-quality leather conditioner to restore the leather’s essential oils and flexibility.
Laying the Groundwork for Proper Leather Care
Effective leather care is an investment in the longevity and appearance of your footwear. At Gold Standard, we approach it as a complete preservation regimen. This is more than wiping off surface dirt; it’s about maintaining the structural integrity of the material itself. This is especially critical for premium dress shoes or collectible sneakers where condition dictates value.
There is a fundamental difference between surface cleaning and deep conditioning. Common household cleaners often contain harsh solvents and surfactants. These chemicals aggressively strip the natural oils from the leather, leaving it dehydrated, brittle, and prone to cracking.
The Critical Role of Tools and Solutions
Using high-quality, material-specific solutions is non-negotiable. The right formulas work in synergy with the leather, not against it, maintaining its flexibility and preventing the degradation caused by aggressive, synthetic cleaners. This principle extends to your tools.
The right tools are as crucial as the cleaning solution. A professional-grade result cannot be achieved with an old rag and dish soap. Specialized equipment designed to protect the material while effectively removing contaminants is essential.
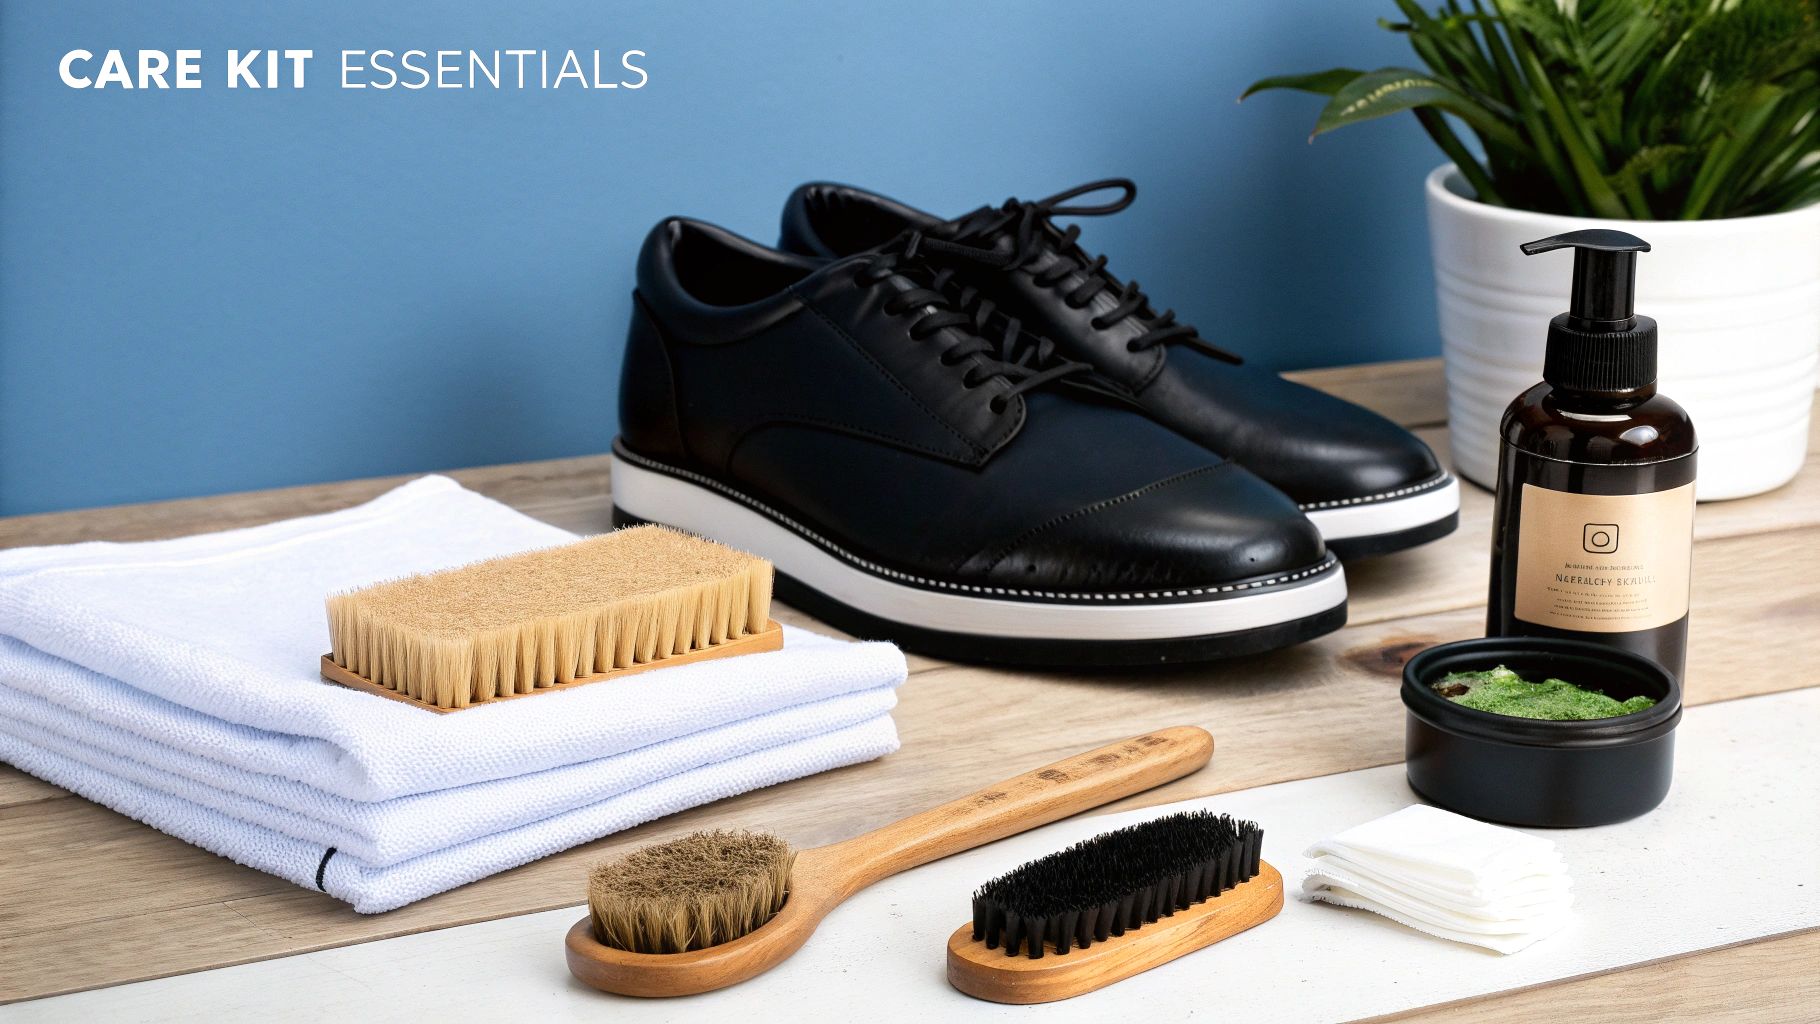
A well-curated kit is the foundation of any effective shoe care routine. Assembling the correct tools transforms a chore into a skilled practice.
Here is an overview of the essential components required for a professional-level clean. These are the non-negotiables.
Your Essential Leather Cleaning Toolkit
| Tool | Why It's Essential | Our Recommendation |
|---|---|---|
| Soft Hog-Hair Brush | Ideal for removing loose dirt and debris from the surface without inflicting micro-scratches on the leather's finish. | A brush with a comfortable wooden handle and densely packed, natural bristles provides optimal control and effectiveness. |
| Premium Foam Cleaner | A pH-balanced, natural formula lifts dirt from the leather’s pores without oversaturating it or causing chemical damage. | Look for a water-based foam that minimizes the need for extensive rinsing, which can damage leather over time. |
| Microfiber Towels | Highly absorbent and soft, they are perfect for wiping away excess cleaner and buffing the shoe without leaving lint residue. | Keep several on hand—one for cleaning, one for drying, and a fresh one for buffing. |
| Leather Conditioner | This crucial final step replenishes the essential oils that cleaning can remove, keeping the leather flexible and strong. | Choose a conditioner with natural emollients for deep penetration and lasting moisture. |
With these essentials, you are not merely cleaning your footwear—you are preserving it.
The global shoe care market was valued at USD 4.47 billion in 2024 and is projected to grow, reflecting a wider consumer understanding that proper maintenance extends the life and value of footwear. It’s a movement we are dedicated to supporting with expertise.
An effective cleaning regimen also prepares the leather for a final layer of defense. Once your shoes are clean and conditioned, our line of shoe protector sprays can shield them from future stains and water damage.
The Pre-Cleaning Ritual: A Non-Negotiable First Step
Before any liquid touches your shoes, a specific preparation sequence is required. This phase separates a mediocre clean from a professional one. It is not a quick wipe; it is the foundation for the entire process. Rushing this stage is the single most common mistake we observe, and it consistently leads to unsatisfactory results.
First, remove the laces. This simple step is mandatory. It provides unobstructed access to the entire shoe, particularly the tongue and eyelet area where debris accumulates. Leaving them in results in an uneven clean and visible "tan lines" of dirt.
Setting Up for a Perfect Clean
With the laces removed, insert a pair of quality shoe trees. Cedar shoe trees are the industry standard; they not only maintain the shoe's shape but also absorb residual moisture and odor.
This step is critical for two reasons:
- It provides a solid work surface. Cleaning a collapsed shoe is ineffective. A shoe tree creates a firm, consistent canvas, allowing for even pressure during brushing and cleaning.
- It smooths out the leather. The trees stretch out creases and wrinkles where dirt becomes deeply embedded. This allows your brush and cleaner to access every part of the surface.
Working without a shoe tree is analogous to painting on a crumpled canvas—you are guaranteed to miss spots and achieve a patchy, incomplete result.
Think of prep work as creating a clean canvas. You’re removing anything that could turn into an abrasive and scratch the leather once you add liquid. It's like sanding wood before you stain it—the prep makes all the difference.
With the shoe properly shaped, begin the dry brush. Using a soft, natural bristle brush—hog hair offers an excellent balance of softness and efficacy—methodically brush away all loose dirt, dust, and grime. Pay close attention to the welt, seams, and any broguing details.
This is not a cosmetic step. You are physically removing abrasive particles that, when mixed with a liquid cleaner, would act like sandpaper. Skipping this will result in grinding that grit into the leather, causing micro-scratches that permanently dull the finish. This is the best way to clean your leather shoes without causing inadvertent damage.
While our focus here is leather, these core principles of prep work are universal. Similar logic applies when preparing to clean fabric furniture. Once every last particle of dry soil is gone, your shoes are ready for cleaning.
Mastering the Deep Clean
With your shoes properly prepped, you can begin the deep clean. This is where you address the embedded grime. A proper deep clean restores the leather by using the right technique and products to lift dirt from the material's pores without stripping its natural oils.
The optimal tool for this stage is a high-quality foam cleaner. Avoid liquid soaps, which can oversaturate the leather and leach out essential fats. A controlled foam sits on the surface, allowing its cleaning agents to break down dirt without waterlogging the material. This is crucial for maintaining the leather's structural integrity.
This diagram illustrates the critical prep steps—the foundation for an effective deep clean.
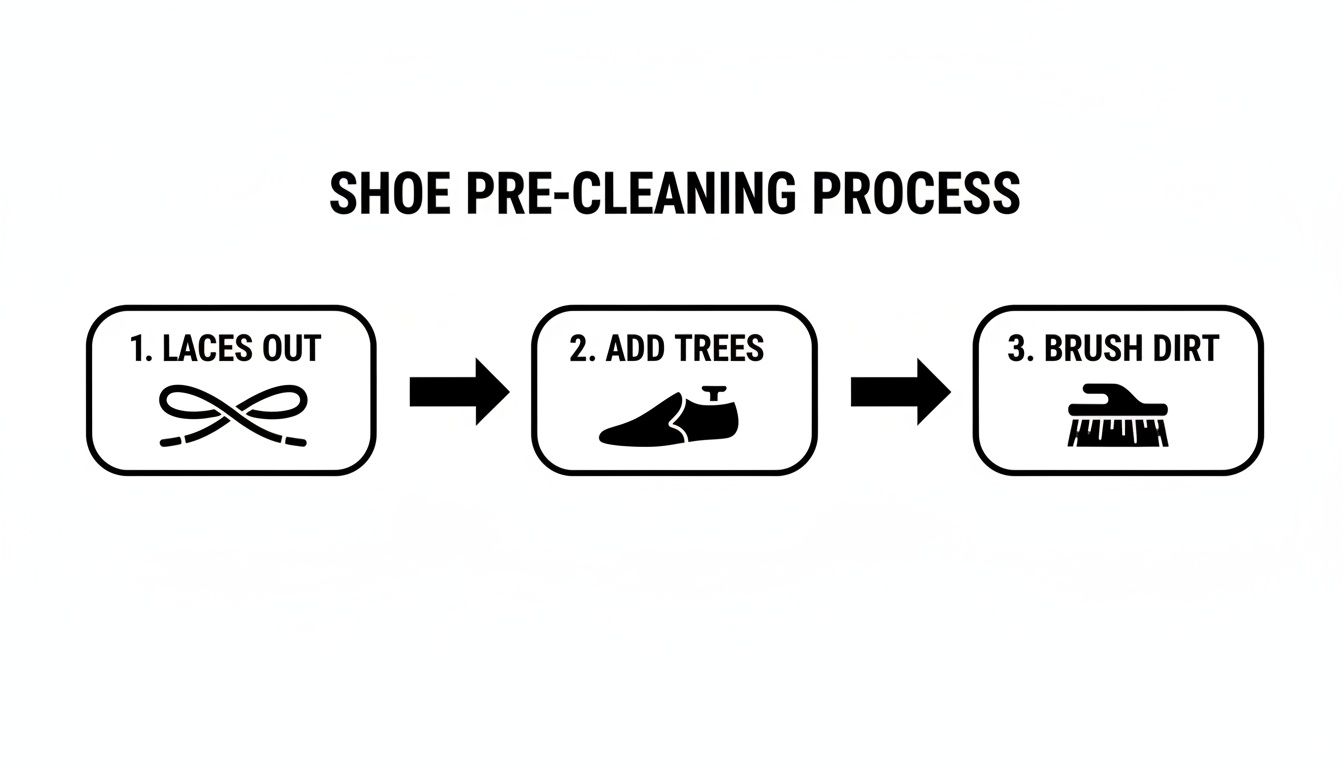
Do not skip this sequence. It ensures you aren't grinding abrasive particles deeper into the leather during the wet cleaning phase.
Applying Cleaner with Precision
First, apply a small amount of foam cleaner onto a soft bristle brush—never directly onto the shoe. This method gives you precise control over product application and prevents oversaturation.
Next, work the cleaner into the leather using small, gentle, circular motions.
The goal is to generate a light, consistent lather, which is what lifts the dirt from the leather's grain.
Work on the shoe in sections: the toe cap, then a side panel, then the heel. This systematic approach ensures complete coverage and prevents the cleaner from drying and leaving a residue on another part of the shoe.
The key here is patience. Allow the foam and the brush to do the work. Aggressive scrubbing is a direct path to a scuffed, damaged finish. Gentle, consistent pressure is what effectively removes grime, especially from stubborn creases and seams.
Your technique should adapt to the specific leather type:
- Smooth Full-Grain Leather: Slightly firmer pressure can be used to work the lather into the tight grain.
- Pebbled or Textured Leather: Use a lighter touch. Let the soft bristles work into the texture. A gentle dabbing motion can be effective for lifting dirt.
Immediately after cleaning a section, wipe away the soiled foam with a clean, damp microfiber towel. This is non-negotiable; it prevents the loosened dirt from being reabsorbed into the leather.
Tackling Problem Areas Like Seams and Midsoles
Dirt preferentially collects in seams and along the midsole junction. For these areas, use the tip of your brush to work the foam directly along the stitch lines. Be meticulous. This buildup is not only unsightly but can degrade the stitching over time.
The leather care market was valued at USD 3.9 billion in 2024, with cleaners comprising a dominant 64.3% of product sales in 2023. This data highlights the recognized importance of specialized cleaners in footwear maintenance, the largest segment of the market.
After addressing all sections, perform a final, gentle wipe-down of the entire shoe with your damp microfiber towel to remove any remaining residue. Your shoes are now properly cleaned and ready for the critical drying and conditioning stages.
To assemble the ideal toolkit for this task, consult our curated guide to the best sneaker cleaning kit.
Properly Drying and Conditioning Your Leather
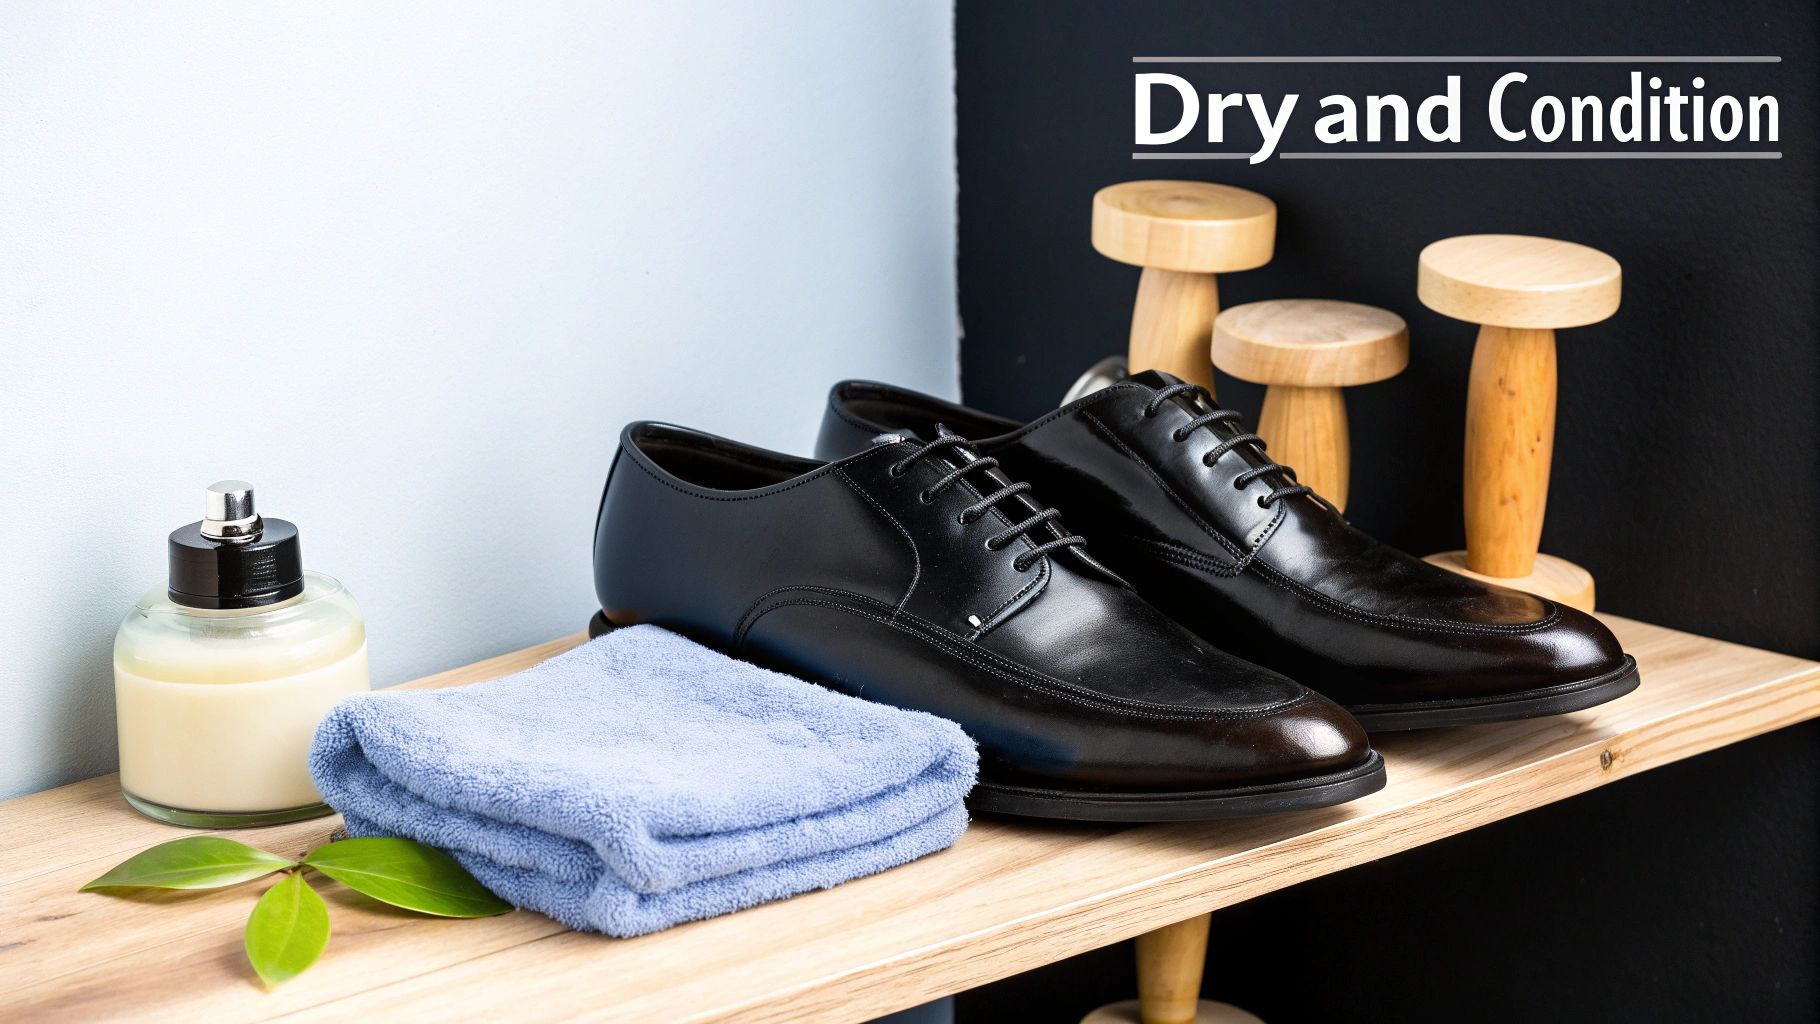
The cleaning phase is complete. The subsequent drying and conditioning phase is where you preserve the leather's integrity. Rushing this stage will result in stiff, cracked leather, negating your cleaning efforts.
First, patience is paramount. Leather must air-dry naturally, away from direct heat. This process typically takes 12 to 24 hours. To facilitate drying and maintain the shoe's shape, insert cedar shoe trees, which are highly effective at wicking moisture from the interior.
Resist any temptation to accelerate the process. Applying heat from a hairdryer or placing shoes near a radiator is extremely damaging. Intense, direct heat rapidly extracts the natural oils, causing the leather fibers to constrict and become brittle.
The Science of a Good Conditioner
Once the shoes are 100% dry to the touch, it is time to condition. The cleaning process, no matter how gentle, removes some of the fats and oils that keep leather pliable. Conditioning replenishes them.
Think of it as hydration for the material. Without it, leather dehydrates, tightens, and eventually cracks. A quality conditioner penetrates the pores, restoring flexibility and reviving color. This is not about superficial shine; it is about nourishing the material from within. This step is the primary defense against premature aging.
How to Apply Conditioner Like a Professional
Proper technique ensures optimal absorption. The goal is a thin, even coat, not a greasy surface layer.
- Start small. Apply a pea-sized amount of a quality leather conditioner to a clean microfiber cloth.
- Massage it in. Use small, circular motions to work the conditioner into the leather. Gentle, consistent pressure is sufficient.
- Focus on stress points. Pay extra attention to seams and creases where the shoe flexes. These areas are most susceptible to wear.
- Allow for absorption. Let the conditioner penetrate for at least 30 minutes. The leather will visibly darken as it absorbs the emollients.
- Buff to finish. Once absorbed, use a clean section of your cloth or a horsehair brush to buff the shoes. This removes excess residue and develops a deep, healthy luster.
A common mistake is over-application of conditioner. This clogs the leather's pores, impeding its ability to breathe and creating a tacky surface that attracts more dirt. Always start with a minimal amount; a second light layer can be added if the leather still appears dry.
Common Cleaning Mistakes and How to Avoid Them
Shortcuts in leather care often lead to irreversible damage. Here are common errors and the correct professional alternatives.
| Common Mistake | Why It Damages Your Shoes | The Professional Alternative |
|---|---|---|
| Using a hairdryer or direct heat to dry | This "cooks" the leather, rapidly extracting essential oils and causing it to become brittle and crack. | Let shoes air-dry naturally at room temperature for 12-24 hours, using cedar shoe trees to absorb moisture. |
| Applying too much conditioner at once | Clogs the leather’s pores, prevents it from breathing, and leaves a sticky residue that attracts dust and dirt. | Apply a thin, even layer with a cloth. Let it absorb fully, then buff off the excess. Add a second thin coat only if needed. |
| Using dish soap or household cleaners | Harsh detergents strip the leather of its natural fats and can permanently discolor or dehydrate the material. | Use cleaners specifically formulated for leather, such as a dedicated pH-balanced leather foam cleaner. |
| Skipping the conditioning step | Leaves the leather vulnerable post-cleaning. Without its oils replenished, it will dry out, stiffen, and crack over time. | Always follow a cleaning session with a quality leather conditioner to restore moisture and flexibility. |
By mastering the drying and conditioning phases, you are not just cleaning your shoes—you are executing a preservation strategy that ensures they remain spotless, fortified, and flexible.
Advanced Troubleshooting for Scuffs and Stains
Even with a diligent cleaning routine, scuffs, water spots, and salt stains are inevitable. These issues can be resolved without damaging the leather.
This requires moving beyond general cleaning to targeted treatments. The guiding principle is to always start with the gentlest method. An aggressive or incorrect approach can permanently set a blemish. Here are field-tested methods for common issues.
Correcting Minor Scuffs and Abrasions
Light scuffs on smooth leather often appear more severe than they are. Before resorting to pigmented polish, attempt a more restorative fix.
Apply a small amount of high-quality leather conditioner directly to the scuffed area. Using a clean microfiber cloth, gently massage it into the mark with small, circular motions. The moisture and oils from the conditioner are often sufficient to darken the abrasion, blending it seamlessly with the surrounding leather.
If the scuff remains visible, a colored cream polish is the next step. It is crucial to match the shade precisely to your shoe’s color. Apply a very thin layer only to the affected area, feathering the edges to blend. Allow it to dry completely, then buff the entire shoe to restore a uniform finish.
Never attempt to "scrub" a scuff away. This will only damage the leather's grain. The goal is to nourish and recolor the damaged fibers, not abrade them further.
Dealing with Salt Stains from Winter Wear
Winter road salt inflicts significant damage. The resulting chalky white lines are not merely surface stains; the salt actively leaches moisture from the leather.
To safely remove them:
- Create a solution. Mix one part white vinegar with two parts cool water.
- Apply carefully. Dip a soft, clean cloth into the solution and wring it out until it is merely damp.
- Blot, do not rub. Gently blot the salt stains. The residue will lift from the leather onto the cloth.
- Air-dry completely. Once the stains are gone, allow the shoes to air-dry fully, away from direct heat.
- Condition thoroughly. After they are dry, apply a generous coat of leather conditioner to replenish lost moisture and restore flexibility.
For more in-depth solutions, our comprehensive guide on how to remove shoe stains covers a wider range of blemishes.
Handling Unwanted Water Spots
Sudden rain can leave distinct water spots on leather. The correct, albeit counterintuitive, solution is to blend the spot with controlled moisture.
Take a damp cloth and lightly moisten the entire panel of the shoe where the spot is located, working from seam to seam. This equalizes the leather's tone and prevents a hard "water line" from forming as it dries. Allow the shoe to air-dry completely, then follow with a thorough conditioning.
Your Leather Shoe Care Questions, Answered
Here are direct, field-tested answers to the most common questions we encounter from footwear enthusiasts. This is the practical knowledge that elevates shoe care from a routine to a craft.
How Often Should I Clean My Leather Shoes?
The optimal cleaning frequency is determined by wear.
For shoes in daily rotation, a quick wipe-down with a damp cloth after each use is highly effective at preventing surface grime from setting. For these frequently worn pairs, a full deep clean every 2-4 weeks is recommended.
For high-end dress shoes or collectible pairs worn infrequently, a deep clean every few months—or as visibly needed—is sufficient.
The most critical rule is not based on a schedule, but on immediacy. Address spills and stains as soon as they occur. The longer a foreign substance remains on leather, the higher the probability of permanent damage.
Can I Use Household Cleaners on Leather?
No. The results are consistently damaging.
Standard dish soaps, all-purpose sprays, and glass cleaners contain harsh detergents and chemicals with a high alkaline pH. This strips leather of its essential oils, leading to irreversible dryness, cracking, and discoloration.
Always use a pH-balanced cleaner formulated specifically for footwear. A quality foam cleaner is designed to lift grime without compromising the leather's natural composition. It is the safest and most effective method.
What is the Difference Between Conditioner and Polish?
Think of it in these terms: conditioner is for health, and polish is for appearance.
A leather conditioner functions as a moisturizer. It penetrates deep into the leather's pores to replenish the oils and moisture lost over time and during cleaning. This maintains the material’s suppleness and prevents cracking at flex points.
Polish, conversely, is a surface treatment. Its purpose is to add shine, conceal minor scuffs with pigment, and apply a thin, protective wax barrier. The operational sequence is non-negotiable for proper care: always clean first, then condition to nourish the leather, and finish with polish for aesthetic refinement.
Is There One Cleaner That Works for All Types of Leather?
While a high-quality, gentle foam cleaner is safe for most smooth, finished leathers, it is not a universal solution.
Materials with a napped texture, such as suede and nubuck, require their own specific set of cleaners and tools. Using a standard foam cleaner can damage their delicate texture. The same applies to delicate, unfinished leathers.
Before applying any new cleaner, perform a spot test. Apply a small amount to an inconspicuous area, such as the inside of the tongue. This simple precaution is the best way to prevent accidental discoloration or damage.
For a care system developed by footwear material experts, trust Gold Standard. Our products are formulated with premium, natural ingredients to deliver professional-level results. Explore the full collection at the official Gold Standard shop.