
Before attempting any stain removal, it is critical to understand the material itself. Successful suede care depends on a fundamental knowledge of the material, accurate identification of the stain, and the correct selection of tools.
The process is a technical discipline: you must always work with the grain of the suede's nap, never against it.
The Principles of Suede Material Science
First, suede is not merely "fuzzy leather." It is a unique material with a delicate, textured surface called a nap, composed of countless fine, raised fibers. This velvety structure, while desirable, is precisely what makes suede highly susceptible to trapping dirt and absorbing stains.
Visualize the nap as a dense, microscopic pile. When a substance is spilled, it doesn't just sit on the surface; it becomes entrapped deep within these fibers. This is why aggressive scrubbing with a wet cloth is the most common and damaging mistake. This action forces the stain deeper while crushing the nap, often creating a permanent, flattened, and discolored patch that is more conspicuous than the original stain.
Why Suede Requires a Specialized Approach
If there is one principle to remember, it is this: moisture is the primary adversary of suede. The material is exceptionally porous, absorbing any liquid it contacts. When saturated, the delicate fibers become waterlogged, clump together, and dry hard and stiff. This process is responsible for the characteristic water rings and dark spots that are notoriously difficult to remove.
For this reason, professional-grade cleaning protocols utilize foam-based cleaners, specialized erasers, and purpose-built brushes. The objective is always to lift the stain out of the fibers with minimal liquid application. It is also why a high-quality protector spray is not an accessory but an essential first line of defense for any suede footwear intended for regular wear.
The most prevalent error we observe is an immediate, panicked application of an all-purpose cleaner or water. This action almost invariably exacerbates the problem by driving the stain deeper into the material and causing permanent discoloration. Patience and proper tools are paramount in suede care.
Stain Identification: A Diagnostic Approach
Your entire treatment strategy depends on a correct diagnosis of the stain. You would not treat an oil-based stain with the same method as a dry soil mark; doing so is an expedited path to irreversible material damage.
Here are the three primary categories of stains you will encounter:
- Dry Debris and Scuffs: This includes everyday dust, dry soil, and minor abrasion marks. When addressed promptly, these are typically the most straightforward to resolve.
- Water-Based Stains: These are caused by rain, beverage spills, or salt lines from winter conditions. The primary challenge is preventing the formation of a distinct "ring" as the area dries.
- Oil-Based Stains: The most challenging category. Grease, lotions, or automotive fluids bond directly with the suede fibers and must be carefully drawn out of the material, not scrubbed away.
Consumers are increasingly recognizing that premium footwear is an investment worth protecting. The global shoe care market expanded to $4.7 billion in 2023 and is projected to reach $7.3 billion by 2032. This growth demonstrates a clear understanding among owners that proper maintenance tools are as crucial as the footwear itself. You can learn more about the growing shoe care market and its trends.
Having the correct equipment readily available ensures you are prepared for any incident and will not be forced to improvise with household items that can destroy the nap.
Your Suede Care Toolkit: Essentials vs. Upgrades
Assembling a proper toolkit is fundamental. While a professional-level setup is not initially necessary, a core set of essentials is non-negotiable for managing common issues. Here is a breakdown of what is required versus what is recommended for more advanced restoration.
| Tool | Primary Use | Essential or Optional |
|---|---|---|
| Suede Eraser & Brush | Lifting dry dirt, scuffs, and restoring the nap. | Essential |
| Microfiber Towel | Blotting moisture and applying cleaners gently. | Essential |
| Gold Standard Protector Spray | Creating a barrier against water and stains. | Essential |
| Gold Standard Foam Cleaner | Safely lifting stubborn stains with minimal moisture. | Optional (but highly recommended) |
| Crepe Brush | Gently restoring the velvet texture on delicate suede. | Optional |
| Corn Starch or Talcum Powder | Absorbing fresh oil and grease stains. | Optional |
The essential tools will equip you to handle over 90% of common suede-related incidents. As your expertise develops, adding the optional tools will enable you to manage even the most challenging stains with professional proficiency.
A Tactical Guide to Common Suede Stains
Treating all stains uniformly is a novice error and the fastest way to ruin quality footwear. Effective suede cleaning is not about aggressive scrubbing; it is about material science and methodical application of the correct technique. Consider yourself a material technician—the treatment must correspond to the specific damage.
We will deconstruct the methodology for the three most common adversaries: stubborn water marks, oil-based contaminants, and everyday scuffs. Each requires a distinct protocol. Understanding the why behind each step is what separates a successful cleaning from a costly mistake. This is your field guide for when footwear encounters the real world—from unexpected rain and accidental spills to the rigors of daily use.
This decision tree provides a visual protocol for your initial response. It emphasizes stain identification, tool selection, and the critical step of testing in an inconspicuous area.
The primary directive is clear: always identify the nature of the stain before taking any action. A reactive, uninformed approach is the leading cause of exacerbated damage. A systematic process is essential to maintaining the integrity and appearance of your suede.
Neutralizing Water Marks and Rings
Counterintuitively, the most effective method for removing a water stain involves the strategic application of more water. The unsightly ring left by a splash is not dirt; it is the demarcation line where the water ended, causing the suede's nap to dry in a clumped, uneven state. Your objective is to blend this hard edge into the surrounding material.
The technique involves re-dampening the entire affected panel of the shoe, from seam to seam. Use a lightly misted brush or a damp—never saturated—microfiber cloth. Feather the moisture outward so the entire section dries as a single, uniform piece, thereby eliminating the original watermark.
After achieving even dampness, gently blot the area with a dry microfiber towel. The goal is solely to absorb excess moisture, not to rub or scrub. Next, insert paper towels or, preferably, cedar shoe trees to maintain the footwear's structure. Allow the items to air dry naturally, away from direct heat or sunlight. This slow, even drying process is what prevents a new ring from forming.
Tackling Oil and Grease Stains
Oil is a formidable challenge for suede as it bonds directly with the fibers. The immediate response must focus on drawing the oil out of the material, not rubbing it further in. Rapid action is critical.
The moment a spill occurs, gently blot it with a clean cloth to remove any surface-level grease. Immediately apply a generous amount of an absorbent powder, such as cornstarch or talcum powder, directly onto the stain. Do not rub it in. Allow the powder to sit for several hours, or overnight if possible. The powder functions as a desiccant, wicking the oil up and out of the suede fibers.
After sufficient time has passed, brush the powder away with a suede brush. If the stain was addressed immediately, this may be all that is required. If a mark remains, the oil has begun to set, and a specialized cleaner is necessary.
For oil stains that have already set, a high-quality foam cleaner is the most effective solution. The formula is specifically engineered to break down lipids without over-saturating the suede. Apply a small amount of foam to a brush, work it into the stain using small circular motions, and then immediately blot the resulting suspension of dirt and foam away with a clean towel.
It is logical that specialized products are seeing increased adoption. The global market for suede shoe cleaners was valued at $0.8 billion in 2022 and is projected to reach $1.2 billion by 2030. This growth reflects a broader understanding that premium materials demand purpose-built cleaning solutions. You can explore more about the specialized suede cleaner market and its trends.
Erasing Dry Dirt and Scuffs
For everyday grime, dust, and light scuffs, the approach should be mechanical, not chemical. A quality suede eraser is your primary tool. It functions as a mild abrasive that crumbles as it works, lifting particulate matter from the nap without abrading the fibers themselves.
Gently work the eraser over the soiled or scuffed area. Minimal pressure is required; allow the tool to perform the work. The eraser will leave small crumbles, which is normal—these particles are carrying the dirt away.
Following the eraser, use a firm-bristled suede brush. Employ short, directional strokes, all moving in the same direction, to sweep away the eraser debris and any loosened dirt. This action also serves to lift and reset the nap, restoring the uniform, velvety texture that is characteristic of pristine suede.
Key Techniques for Brushing and Erasing
- Always Brush in One Direction: A back-and-forth motion can damage the delicate nap. Identify the natural grain of the suede and work with it.
- Use the Corners for Detail: The sharp corners of a suede eraser are ideal for targeting tight areas along seams or near the sole.
- Finish with a Nap Reset: After any cleaning, perform a final, gentle brushing of the entire shoe. This restores a uniform appearance and soft texture.
By matching your technique to the specific type of stain, you move from a reactive, panicked state to a proactive, professional approach. This is the foundation of high-level footwear care—understanding the material and treating it with the appropriate respect.
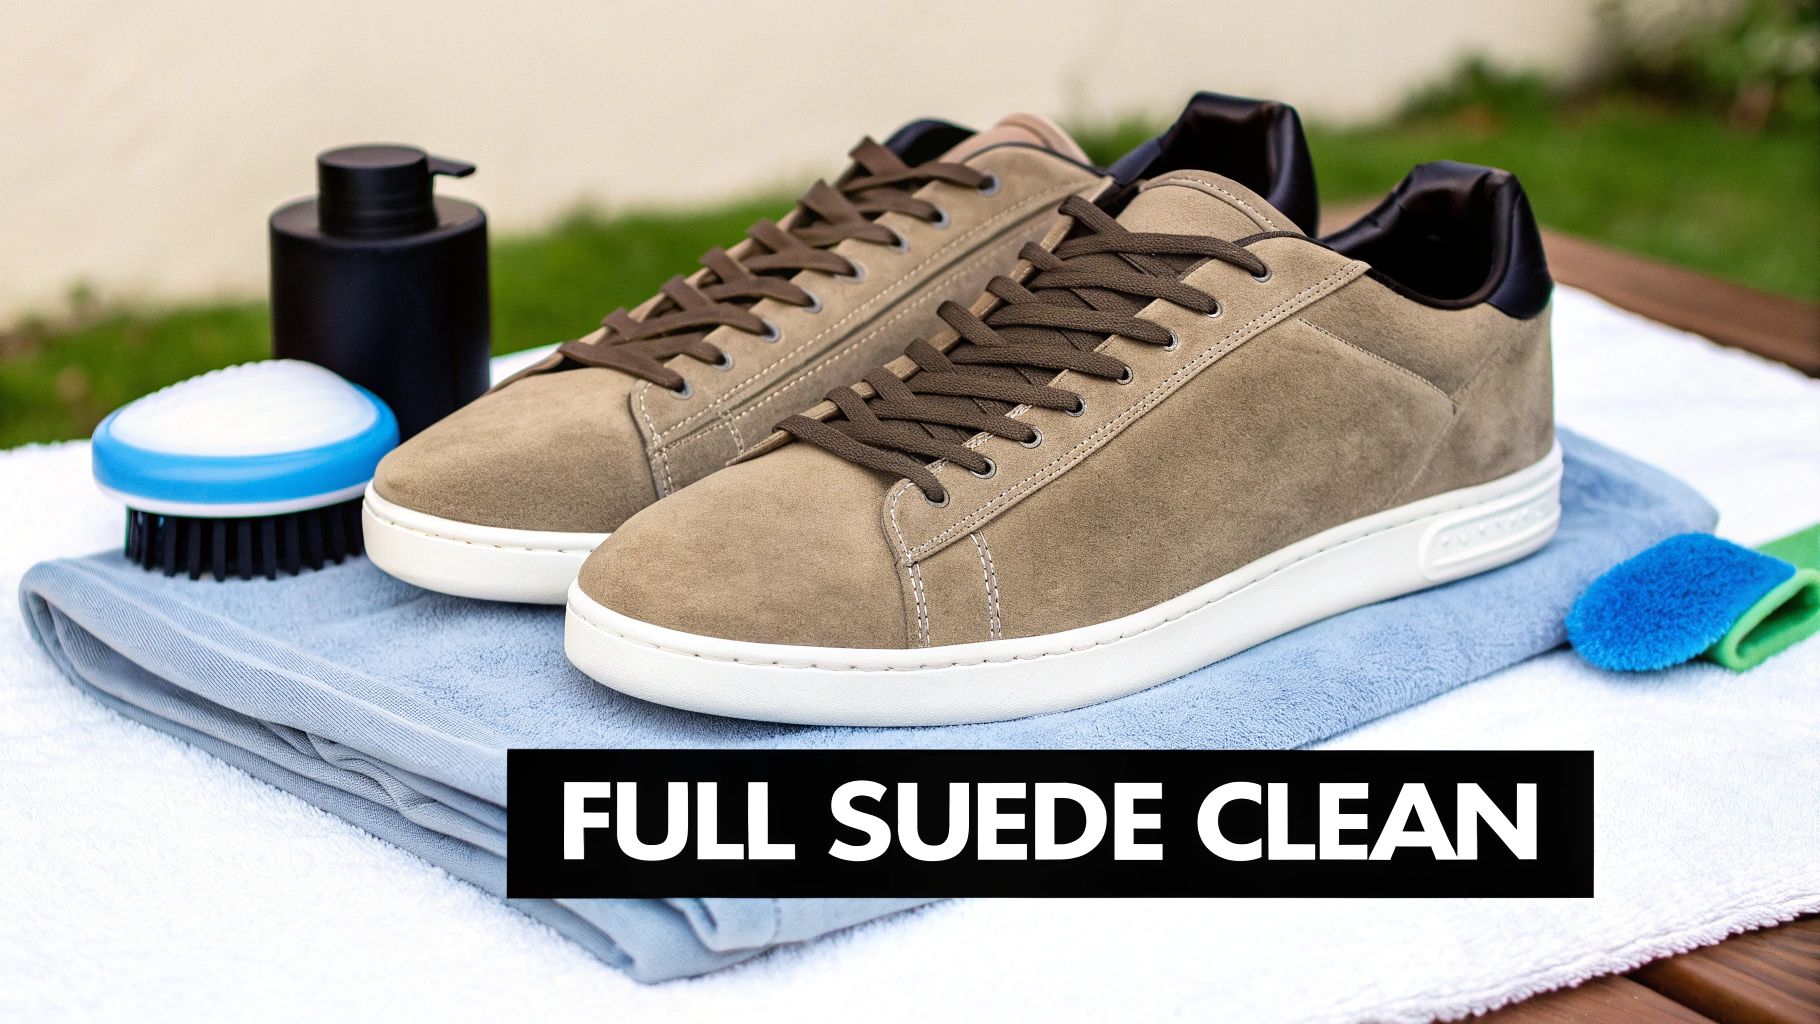
A Protocol for a Full Suede Deep Clean
There comes a time when spot-cleaning is insufficient. When a favored pair of footwear has accumulated a general layer of grime that dulls its color and texture, it is time to graduate from simple stain removal to a comprehensive deep clean—a full restoration for tired, well-worn suede.
Approach this not as a quick fix, but as a systematic restoration project. It requires patience and precise technique. The objective is to lift embedded dirt from the entire shoe without creating a saturated, discolored result. Executed correctly, this process can effectively reset the footwear's appearance.
Preparing Suede for Cleaning
Before any cleaner is applied, a thorough dry preparation is non-negotiable. This initial phase accomplishes two critical objectives: it removes all loose surface contaminants and begins to lift the suede’s nap, preparing it for the cleaning solution.
First, remove the laces. Then, insert a quality pair of shoe trees—cedar is the superior choice. Shoe trees are essential for maintaining the sneaker's structure and shape as it becomes damp and subsequently dries. Without them, the suede is at risk of warping or shrinking.
Next, take a firm-bristled suede brush and go over the entire shoe with confident, consistent strokes, always moving in the same direction. This dislodges loose dirt, dust, and other surface debris. Focus on high-contact areas like the toe box and along the seams where grime accumulates. A thorough dry brushing alone can significantly improve the shoe's appearance.
The Art of the Foam Cleanse
The core principle of a successful suede deep clean is using minimal moisture. This is precisely why professionals employ a premium foam-based cleaner. A liquid spray can instantly saturate and stain the material, but a quality foam, such as the Gold Standard Foam Cleaner, provides maximum control. It is engineered to lift dirt to the surface without waterlogging the delicate suede fibers.
Dispense a small amount of foam directly onto your suede brush. A common error is applying cleaner directly to the shoe, which invariably leads to uneven saturation and potential spotting. Using the brush as the applicator ensures perfect distribution of the product.
Begin to scrub the suede in small, consistent, circular motions. This technique is far more effective than a simple back-and-forth scrubbing, as it works the cleaner into the nap from all angles without causing damage. It is best to work in sections—address one side panel, then the toe box, then the heel—to ensure a uniform clean across the entire shoe.
The primary reason deep cleans fail is impatience. Users either saturate the shoe with product or scrub with excessive force. Trust the chemistry of the cleaner and the mechanics of the brush. The goal is to lift the grime out, not to abrade it into submission.
As you scrub, the foam will begin to darken. This indicates that it is successfully pulling dirt from the suede. This is your cue to proceed.
Blotting Away Contaminants
Immediately after cleaning a section, you must remove the soiled foam. Use a clean, dry microfiber towel for this step. The technique is critical: blot, do not wipe. Wiping will smear the loosened dirt back into the nap.
Press the towel firmly onto the foamed area and hold for a moment. Microfiber is highly absorbent and will pull the dirty suds and moisture directly out of the suede. You will see the grime transfer to the towel. Rotate to a clean section of the towel and repeat. Continue blotting until the area is merely damp, not wet. This immediate extraction is what prevents the formation of watermarks.
The Critical Drying and Finishing Process
Once the entire shoe has been cleaned and blotted, the drying process begins. This is where patience is essential. A rushed or improper drying job can nullify your efforts, resulting in stiff, patchy suede.
- Location is Key: Place the footwear in a well-ventilated room, away from direct sunlight or any heat source like a radiator or vent. Attempting to accelerate drying with heat is a guaranteed method for making suede brittle and can compromise the sole's adhesives.
- Maintain Shape: Keep shoe trees inside the sneakers for the entire drying period. This is non-negotiable for preserving their original shape and preventing the toe box from collapsing.
- Patience is a Virtue: Allow them to air dry for a minimum of 24 hours. They must be completely dry to the touch before you proceed to the final step.
After the shoes have fully dried, the nap may feel somewhat flat or stiff. This is normal. The final step is to take your dry suede brush and give the entire shoe a final, gentle brushing. This "resets" the nap, lifting the individual fibers and restoring the soft, velvety texture that defines quality suede.
Cleaning the suede is only part of the process. The final step, which restores the material's signature soft, velvety texture—the nap—is what distinguishes a simple cleaning from a true restoration.
After stain treatment, the suede's nap can feel stiff or appear matted. This is a normal consequence of moisture causing the fine fibers to adhere to one another as they dry. Your task is to gently separate and lift them.
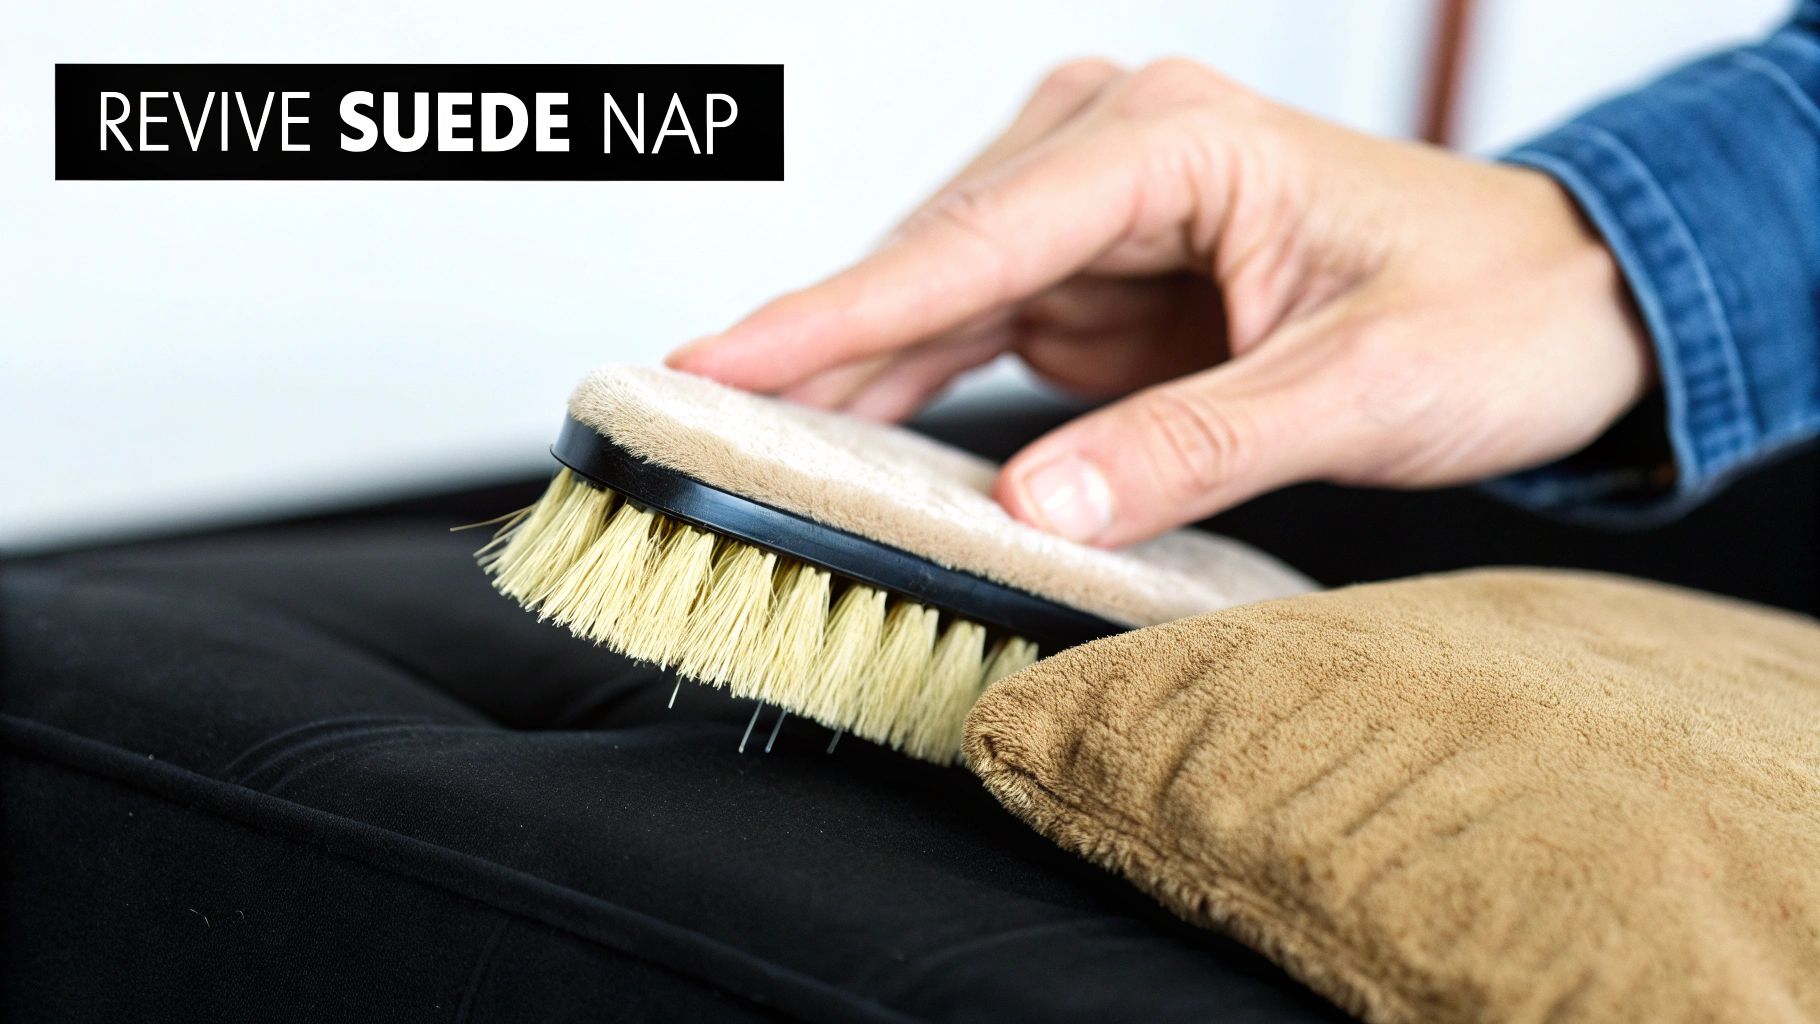
Brushing the Nap Back to Life
For this task, a quality suede brush is indispensable. You require bristles with the correct stiffness—hog hair is an excellent choice—to gently lift and separate the fibers without damaging the material. The technique is straightforward but requires a light hand.
Begin by brushing the entire shoe with your dry brush. Use light, even strokes, all moving in the same direction for the initial pass. This aligns the grain of the suede and begins to loosen any stiff areas. Do not apply heavy pressure; let the bristles do the work.
After the initial pass, vary your technique. Use short, quick strokes in multiple directions to address any stubborn areas that still appear flat. Pay close attention to the toe box and sides, as these areas become compacted through normal wear. The goal is a consistent, uniform texture across the entire surface—no dark patches or shiny spots.
A professional finish is defined by consistency. You are not merely brushing off dust; you are re-texturizing the entire surface. When executed correctly, this process restores the deep, rich color that is only visible when suede is properly napped.
The Final Shield: Protecting Your Work
Having invested the effort to restore your suede, do not omit the most critical final step. Applying a high-quality protector spray locks in your results. This is not simply about waterproofing; it is about creating an invisible barrier that repels water, dirt, and oil before they can set as stains.
This practice is becoming standard among knowledgeable consumers. The stain remover market is substantial—in North America alone, it is a $7.3 billion market with a 32.5% global share, driven by the understanding that proactive protection is necessary. Simultaneously, there is a significant push for eco-friendly formulations, particularly in Europe, which is influencing the types of products available globally. It is clear that consumers demand protection that is both effective and safe for their high-value goods. You can discover more insights about the stain remover products market if you are interested.
A top-tier formula like the Gold Standard Protector Spray is engineered to achieve this without altering the suede's texture or breathability. Many lower-quality sprays contain heavy silicones that seal the material's pores, effectively suffocating it. In contrast, a quality protector coats each individual fiber, allowing moisture to bead up and roll off rather than soaking in and creating a new stain.
How to Apply Protector Spray Correctly
A proper application ensures even coverage and maximum protection without over-saturating the footwear. Follow these key steps for optimal results.
- Ensure They Are Completely Dry: Never apply protector to damp suede. Doing so will trap moisture, leading to water marks or discoloration. Allow a minimum of 24 hours for air drying after cleaning.
- Ensure Adequate Ventilation: These sprays contain potent propellants. Always use them in a well-ventilated area. Outdoors is ideal, but a room with an open window is acceptable.
- Maintain Proper Distance: Hold the can approximately 6-8 inches from the shoe. Spraying too closely can cause the product to dispense too rapidly, creating wet spots.
- Apply Light, Even Coats: Use a smooth, sweeping motion to cover the entire shoe. You are aiming for a fine mist, not a drenching. Do not linger on any single spot.
- Allow Time to Cure: Let the first coat dry for at least 30 minutes. For the most robust shield, especially on new or freshly deep-cleaned shoes, apply a second light coat. Then, allow the footwear to cure for a full 24 hours before wearing them outdoors.
This final step ensures the longevity of your restoration work. It transforms a one-time fix into a long-term care strategy, keeping your suede footwear in exceptional condition.
When to Consult a Sneaker Restoration Professional
Even with a professional-grade care kit, every footwear owner must recognize the limits of DIY restoration. Attempting to resolve a severe suede stain removal challenge without the requisite expertise can transform a correctable problem into a permanent one.
This is not an admission of failure, but a strategic decision to protect your investment. Knowing when to cease your efforts and entrust your footwear to a professional is one of the most prudent judgments you can make.
Stains That Demand Professional Intervention
Certain contaminants are beyond the scope of at-home treatment. If you are facing one of the following, it is time to consult an expert.
-
Ink and Paint Stains: These substances do not sit on the surface; they rapidly penetrate and bond with suede fibers. Professionals possess specialized solvents to lift them, but using an incorrect agent will almost certainly result in a bleached, faded area more damaging than the original stain.
-
Deeply Saturated Oil: A minor grease spot can often be managed. A large, set-in oil stain that has fully permeated the material is a different matter. A professional has advanced techniques to draw out deep-set oil without destroying the suede's delicate texture.
-
Harsh Chemical Spills: This includes bleach, acids, or other corrosive agents. This is not merely a stain but actual chemical damage to the material's fibers and dye. Correction requires meticulous restoration work, often involving a complete re-dyeing process that is impossible to execute correctly at home.
The most costly repair is invariably the one that follows a failed DIY attempt. A professional can typically fix the original stain, but correcting both the stain and a misguided cleaning effort is a far more complex and expensive undertaking. Knowing when to step back is the mark of a true enthusiast.
Beyond Stains: Structural Damage
Sometimes the issue is more than superficial. This is where professional restorers demonstrate their value, addressing problems well outside the purview of at-home care.
It is time to seek a professional for issues like severe color fade from UV exposure, where entire panels must be re-dyed for a perfect match. The same applies to physical damage such as tears, rips, or sole separation. These problems require industrial-grade adhesives, precision stitching, and specialized equipment to achieve a lasting and aesthetically clean repair.
When in doubt, capture clear photographs of the damage and email them to a reputable restoration service. A brief expert consultation can prevent a costly and irreversible mistake.
Frequently Asked Questions in Suede Care
Even with a comprehensive guide, certain questions consistently arise. Here, we address the most common inquiries we receive from the community regarding proper suede maintenance. Consider this your reference for navigating those specific "what if" scenarios.
Can I Use Vinegar or Dish Soap on Suede Footwear?
We understand the impulse to use household items, but we strongly advise against it. This is a common DIY approach that can cause irreparable damage to your footwear. Household cleaners are not formulated for materials as delicate as suede.
The acetic acid in vinegar can discolor the material and degrade its fibers over time. A surfactant like dish soap will strip the suede of its natural oils, leaving it dry, brittle, and susceptible to cracking. Always use a pH-balanced formula specifically designed for premium materials. Your footwear is an investment; treat it accordingly.
What is the Single Biggest Mistake in Suede Cleaning?
Without question, it is the excessive use of water. This is the most common and destructive error we observe. Suede is highly absorbent, and over-saturating it invites a host of problems: water rings, stiffness, and dye bleeding—a catastrophic failure from which there is often no recovery.
The guiding principle is minimal moisture. This is precisely why professionals rely on foam cleaners. You apply the foam, allow it to work, and immediately blot it away with a high-quality microfiber towel. This process enables the cleaning agents to lift the stain without waterlogging the suede itself.
Your objective is always control. You require just enough moisture to activate the cleaner, but not so much that you compromise the suede's texture or color. Patience and a light touch will always outperform brute force.
How Often Should I Reapply Suede Protector?
The frequency depends directly on wear. For a pair in regular rotation—worn once or twice per week—we recommend reapplying a quality protector spray every four to six weeks. This maintains the integrity of the protective barrier against dirt and accidental spills.
The critical exception: always reapply the protectant after any deep cleaning. Once the shoes are completely dry, a fresh application is necessary to restore the protective shield. Consistent protection is your best defense against future stains.
Is It Possible to Remove an Old, Set-In Stain from Suede?
It is challenging, but not always impossible. Success depends on the nature of the stain, how long it has been present, and how deeply it has penetrated the fibers. For stubborn, aged stains, several patient rounds of spot treatment may be required to gradually break them down.
Begin with the gentlest method: a quality suede eraser and brush. If you suspect the stain is oil-based (even an old one), try an absorbent powder first. For deeply embedded grime, a targeted application of a specialized foam cleaner offers the best chance of success. That said, if you are dealing with a severe stain like ink or red wine on a valuable pair, the safest course of action is to consult a professional. It is better to seek an expert's aid than to risk making the problem worse.
Ready to provide your suede with the expert-level care it deserves? The Gold Standard Foam Cleaner and Protector Spray are engineered to handle tough stains while preserving the integrity of your most prized footwear.