
Creases in leather shoes are inevitable, but their severity is not. Understanding the material science behind leather is the first step in managing them effectively. Creases are memory lines formed within the leather's fibrous structure. To remove them, you must gently persuade those fibers to relax and reset into a smoother alignment. This guide provides a systematic, field-tested approach to do just that without damaging the material.
The Science of Why Leather Creases
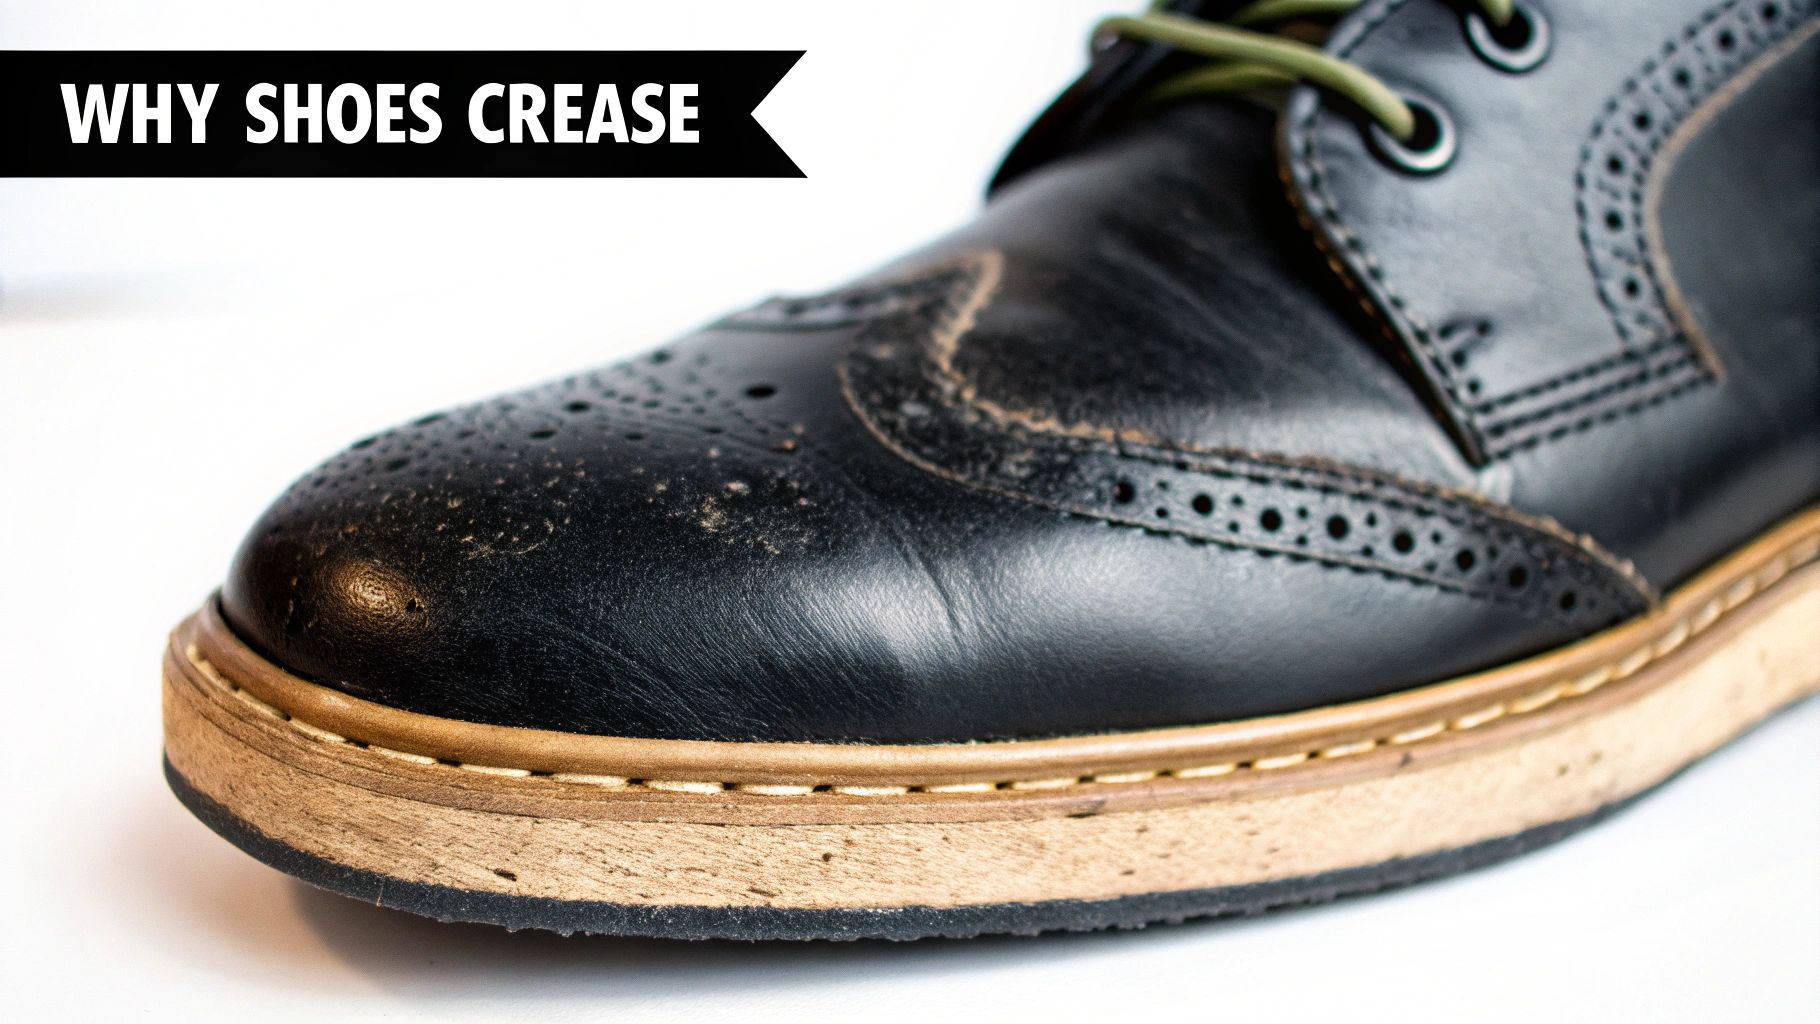
Creases are a physical record of your gait and the shoe's flex patterns. On a microscopic level, leather consists of a dense matrix of collagen fibers. With each step, your foot bends, compressing and stretching these fibers. Over time, this repeated motion causes the fibers to settle into the visible lines we identify as creases.
However, not all creases are equal. The depth, sharpness, and location of creases are determined by specific material and structural factors. Understanding these variables is fundamental to both prevention and treatment.
The Role of Leather Quality
The primary factor dictating how a shoe creases is the grade and type of leather. Full-grain leather, the highest quality available, retains the hide's original, dense top layer. It tends to develop fine, subtle flex lines that follow the foot's natural movement, often enhancing the shoe's character over time.
Conversely, corrected-grain leather has had its surface sanded and coated with a synthetic finish. This type often develops deeper, more defined creases because the artificial coating is less flexible than the natural grain. It is more prone to cracking and folding harshly at flex points.
The Impact of Shoe Fit and Construction
A shoe's fit is equally critical. An oversized shoe creates excess volume in the toe box, allowing the leather to buckle and collapse with each step. This leads to heavy creasing across the vamp. A correct, snug fit ensures the shoe flexes in unison with your foot's natural bending points, minimizing material stress.
It is crucial to understand that creasing is a natural property of leather in motion, not a defect. The objective is not total elimination but effective management, allowing your shoes to age with grace and structural integrity.
Maintaining premium footwear is essential for preserving its value, especially for the ultimate luxury in men's shoes. This focus on longevity is reflected in market trends; the global shoe-care market was valued at USD 4.7 billion in 2023 and is projected to reach USD 7.3 billion by 2032, driven by consumer demand for products that extend the life of premium footwear.
Assembling Your Crease Removal Toolkit
Successfully removing creases from leather shoes requires a methodical approach and the correct tools. Improvisation can lead to subpar results or, worse, irreversible damage to the leather. Before beginning, assemble your equipment methodically.
Your toolkit can be divided into two categories: foundational care items for preparation and aftercare, and specific tools for the heat application process. Each component plays a distinct role in ensuring a safe and effective outcome.
Foundational Care Essentials
These are non-negotiable items for any serious footwear maintenance, particularly when dealing with the delicate structure of leather.
- High-Quality Cedar Shoe Trees: This is the most critical tool for both correcting and preventing creases. Unlike plastic alternatives, cedar actively absorbs residual moisture and oils left by your feet, allowing the leather to dry in its correct anatomical shape. During the treatment process, they provide a solid, perfectly shaped form to press against.
- A pH-Balanced Leather Cleaner: You must begin with a clean surface. A purpose-formulated cleaner, like Gold Standard Premium Shoe Cleaner, is engineered to lift dirt, old polish, and oils from the leather's pores without causing dehydration. This step is critical; you do not want to embed contaminants deeper into the material with heat.
- A Nourishing Leather Conditioner: Heat application will inevitably draw some of the natural oils out of the leather, leaving it dehydrated and susceptible to cracking. A high-quality conditioner, such as Gold Standard Leather Conditioner, is essential for post-treatment care. It replenishes lost moisture, restores flexibility, and fortifies the leather's internal fiber structure against future wear.
A comprehensive care system is a process, not just a collection of products. Proper cleaning and conditioning are as vital to the long-term health of your footwear as the crease removal technique itself.
Tools for the Heat Treatment
For the direct treatment of creases, you will need a few common household items. The operative principle here is control.
- A Household Steam Iron: An iron with adjustable temperature settings is mandatory. You will use the lowest effective heat setting to maintain precise control over the application.
- Clean Cotton Cloths: You need at least one clean, thick cotton cloth. A section from an old t-shirt or a kitchen towel is ideal. This cloth serves as a protective buffer, diffusing the iron's heat evenly and preventing scorching.
- Distilled Water: This is a crucial detail. Use only distilled water to dampen the cloth. Tap water contains minerals that can leave behind chalky deposits and stains on the leather as the water evaporates.
A Professional's Guide to the Controlled Heat Method
The application of controlled heat is a classic technique for relaxing creases in leather, but precision is paramount. The goal is not to "iron" the shoe, but to gently warm the leather's fibers, making them pliable enough to be reshaped. Executed correctly, this method can dramatically smooth creases and restore a clean profile to your footwear.
The entire process hinges on control over heat, moisture, and pressure. Excessive heat or haste can lead to scorching, discoloration, or permanent structural damage. Approach this as a careful persuasion of the leather fibers, not a forceful flattening.
Step 1: Prepare the Shoe
Before plugging in the iron, the shoe must be properly prepared. Begin by thoroughly cleaning the leather. Any surface dirt, dust, or polish residue can be baked into the material by the heat, creating a permanent stain. Use a quality leather cleaner and a soft brush, concentrating on the creased areas.
Next, you must stuff the shoe to create a firm, smooth interior surface. This step is non-negotiable. Attempting to iron an empty shoe is ineffective, as it will simply collapse under pressure.
- Shoe Trees (Optimal): A well-fitting cedar shoe tree provides the ideal interior form, creating a perfectly even and taut surface from within.
- DIY Stuffing (Alternative): If shoe trees are unavailable, pack the shoe tightly with balled-up socks or clean cloths. The objective is to completely fill the toe box and vamp, pushing the creases up and out until the leather is taut.
This preparation provides the solid foundation required for the even application of heat and pressure.
Here is a diagram illustrating the complete workflow.
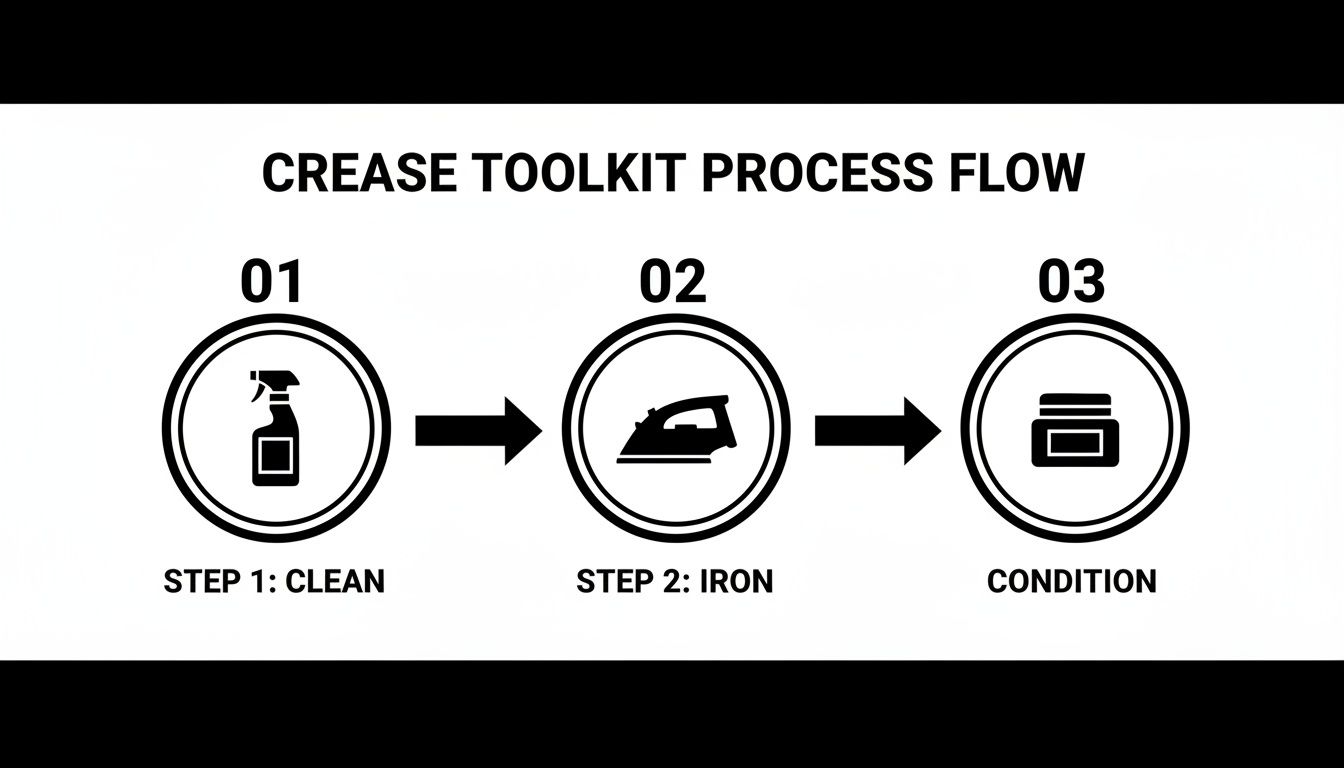
As shown, the process is cyclical. The heat treatment is one component of a larger system that begins with cleaning and concludes with conditioning.
Step 2: Apply Controlled Heat
With the shoe properly stuffed, you can proceed with the heat application. Set your iron to its absolute lowest heat setting—typically labeled for silk or synthetics. Critically, never use the iron's direct steam function. This delivers overly intense and uncontrolled heat that is damaging to leather.
Next, take a clean, thick cotton cloth and dampen it with distilled water. Wring it out thoroughly so it is merely damp, not saturated. Lay this cloth flat over the creased area of the shoe, ensuring the fabric is smooth.
Gently press the warm iron onto the damp cloth.
Caution is Paramount: Keep the iron in constant motion. Allowing it to rest in one spot for more than a few seconds risks burning the leather. Use light, continuous passes, gliding the iron over the crease. The objective is to transfer gentle heat and steam through the cloth to the leather below.
After approximately 10-15 seconds of continuous passes, lift the iron and cloth to inspect your progress. The crease should begin to relax and diminish. This process requires patience. Deeper creases may need several passes; do not rush the process.
To ensure safety, adhere to the following checklist.
Heat Application Safety Checklist
This table serves as your quick-reference guide for safe heat application. Adherence to these points will minimize the risk of damaging your footwear.
| Check Point | Rationale | Best Practice |
|---|---|---|
| Lowest Iron Setting | Prevents overheating and scorching the leather. | Use the "Silk" or "Synthetic" setting. High heat is the enemy. |
| No Direct Steam | The iron's steam is too hot and concentrated. | Use a damp cloth to create gentle, controlled steam instead. |
| Use a Protective Cloth | Acts as a barrier, diffusing heat and preventing burns. | A thick, damp cotton cloth (like a t-shirt) is ideal. |
| Keep the Iron Moving | Prevents heat from concentrating in one spot. | Use continuous, light passes. Never let the iron rest. |
| Check Progress Frequently | Allows you to stop before any potential damage occurs. | Lift the cloth and check the leather every 10-15 seconds. |
Following these protocols is not just about caution; it is about achieving an effective, professional result.
Step 3: The Cool-Down Phase
Once you are satisfied with the reduction of the crease, you enter the most critical phase: the cool-down. Immediately remove the cloth, but leave the shoe stuffed with the shoe tree or packing material. Allow the shoe to cool to room temperature naturally. This will take several hours; overnight is optimal.
During this cooling period, the leather's fibers reset and "memorize" their new, smoother configuration. Removing the stuffing prematurely will likely cause the crease to reappear as the leather cools. Once fully cooled, the leather will be firm, and the new, smooth shape will be set.
Post-Treatment Conditioning and Long-Term Care
Removing the creases is a significant accomplishment, but the process is not yet complete. The application of heat, even when controlled, inevitably depletes some of the natural oils and moisture within the leather. This leaves the material's fibers dehydrated and vulnerable, creating the ideal conditions for dryness, brittleness, and eventual cracking.
Therefore, your immediate next step is to rehydrate the leather. This is where a high-quality leather conditioner is indispensable. A superior formula penetrates deep into the leather's pores to replenish lost emollients, restoring its structural integrity.
The Correct Conditioning Protocol
Think of this step as restoring the leather's internal resilience. Proper conditioning makes the material supple and flexible, which is your primary defense against the formation of new creases.
Apply a small, dime-sized amount of Gold Standard Leather Conditioner to a soft, clean cloth. Work the conditioner into the shoe using small, circular motions, paying extra attention to the areas that were treated with heat. Allow the conditioner to absorb for at least 30 minutes, then use a fresh cloth to gently buff off any excess residue.
This process does more than moisturize; it rebuilds the leather's natural resilience, preparing it to withstand the stresses of daily wear. With this step, you transition from a one-time repair to a sustainable, long-term care strategy.
Developing a Proactive Prevention Strategy
Managing creases is a continuous process. Once your shoes are restored, the focus shifts to maintaining that condition. This is achieved through the implementation of consistent habits.
The most effective way to protect your investment is to integrate preventative care into your daily routine. Small, consistent efforts are far more impactful than occasional, intensive repair sessions.
This principle is well-established among professional cobblers. A combination of shoe trees, regular conditioning, and occasional, careful heat treatment can significantly reduce creasing in just one to three cycles. Heat-and-pressure methods are an industry standard for a reason—they are effective when executed safely. You can explore these professional techniques in greater depth at InternationalLeatherClub.com.
Here are the non-negotiable components of a long-term care regimen:
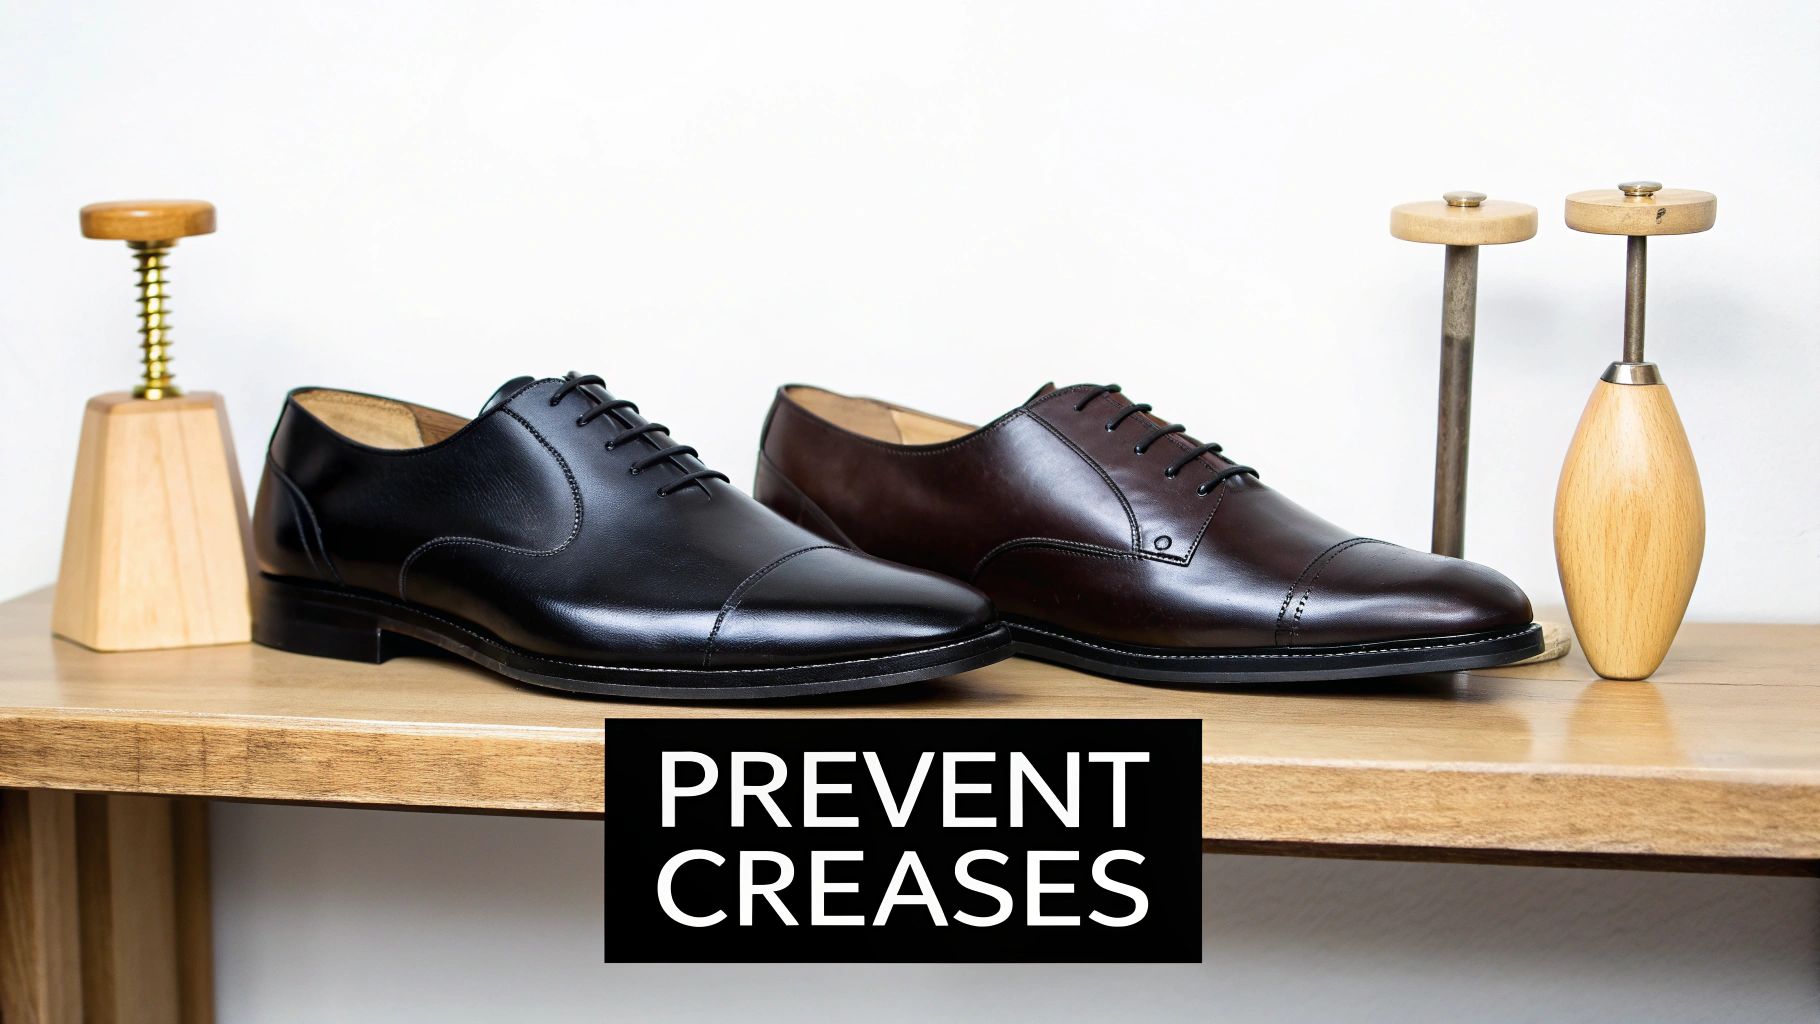
- Use Cedar Shoe Trees Religiously. Insert them the moment you remove your shoes. Cedar holds the shoe's shape while absorbing damaging moisture.
- Rotate Your Footwear. Avoid wearing the same leather shoes on consecutive days. A 24-hour rest period allows the leather fibers to fully dry and recover.
- Apply a Protective Barrier. For an additional layer of defense against water and stains, which accelerate leather degradation, finish with a protector spray. Our Premium Sneaker Protector Spray can shield your freshly restored shoes from environmental damage.
Proactive Crease Prevention: The Best Defense
While restoring a heavily creased shoe is satisfying, the most effective strategy is to prevent deep creases from forming in the first place. Shifting your mindset from reactive repair to proactive care is the hallmark of an expert approach. This comes down to a few foundational habits that will protect your investment for years. These practices help your leather shoes develop a rich patina rather than deep, unsightly cracks.
The Critical Importance of a Proper Fit
This is the most common point of failure. A shoe that is even slightly too large is a primary cause of creasing. The excess space in the toe box leaves the leather unsupported, causing it to collapse and buckle with every step. This mechanism is what creates harsh, deep creases across the vamp.
A shoe that fits correctly will flex precisely where your foot naturally articulates. This synergy guides the leather to form fine, natural flex lines instead of aggressive folds. Take the time to be professionally sized—it is the single most impactful preventative measure you can take.
The objective is not a crease-free shoe, which is impossible. The goal is to control how the shoe creases, guiding the leather to develop character that enhances its appearance, rather than detracts from it.
Implement a Strategic Footwear Rotation
Wearing the same leather shoes daily is exceptionally hard on the material. A rest day between wears is non-negotiable for longevity. This downtime allows the leather fibers to completely expel moisture absorbed from your feet, helping them to return to their original shape and maintain their resilience. Simply rotating your shoes drastically reduces the stress that causes deep-set creases.
Daily Habits That Make a Difference
Beyond fit and rotation, two simple tools are essential for crease prevention.
- Shoe Trees Are Non-Negotiable: While vital for restoration, their primary function is prevention. The moment you take off your shoes, insert cedar shoe trees. The cedar absorbs residual moisture while the spring-loaded form gently smooths out minor creases from the day's wear before they can become permanent.
- Always Use a Shoe Horn: Forcing your foot into a shoe crushes the heel counter—the rigid component that provides structural support to the rear of the shoe. A damaged heel counter compromises the shoe's entire structure, altering its flex dynamics and leading to unnatural creasing.
This philosophy of maintenance is gaining traction as consumers increasingly view repair and upkeep as a sustainable practice. This trend contributes to the growth of the shoe-repair market. For those interested in the broader context, this detailed study on footwear lifecycles provides further insight into the environmental and market forces at play.
Common Questions on Shoe Crease Removal
Even with established techniques, specific questions frequently arise. Here are concise, expert answers to the most common queries.
Can a Hair Dryer Be Used Instead of an Iron?
Yes, a hair dryer is a viable alternative and often a safer starting point for those hesitant to use an iron. The principle is identical: apply gentle warmth to make the leather pliable.
Set the dryer to a medium heat and maintain constant movement, holding it six to eight inches from the shoe's surface. Do not concentrate heat on a single spot. Use your free hand to gently massage and smooth the crease as the leather warms. While this method is more forgiving, for deep, set-in creases, the controlled steam from the iron-and-damp-cloth technique typically delivers more effective and uniform heat.
Does This Method Work on All Leather Types?
No, and this is a critical distinction. The controlled heat method is suitable only for smooth, finished leathers like full-grain or calfskin. Applying it to other materials can cause significant damage.
- Suede and Nubuck: Do not attempt. Direct heat or moisture will irreversibly damage the delicate, textured nap.
- Patent Leather: This material has a high-gloss, plastic-like coating. Heat can cause this finish to bubble, warp, or even melt.
When in doubt, always perform a spot test. Select a hidden area, such as the inside of the tongue, and apply the method there first. It is always better to err on the side of caution.
How Often Should Shoes Be Conditioned to Prevent Creases?
For conditioning, consistency is more important than intensity. The optimal frequency depends on wear patterns and climate.
For a pair in regular rotation, conditioning every one to two months is a sound practice to maintain leather hydration and flexibility. In arid climates, you may need to increase this frequency to every three to four weeks to prevent the leather from drying out.
Additionally, if your leather shoes become saturated with water, allow them to air dry completely on cedar shoe trees. Once dry, apply a light coat of conditioner to replenish the essential oils stripped out by the water.
Mastering these details is what elevates a shoe care routine from adequate to exceptional. It is the combination of precise restoration techniques with consistent, intelligent maintenance. To ensure your leather footwear receives the professional-grade care it deserves, build your regimen on the foundation of Gold Standard products.
Explore our premium care systems at https://gold-standard-approved.myshopify.com.