
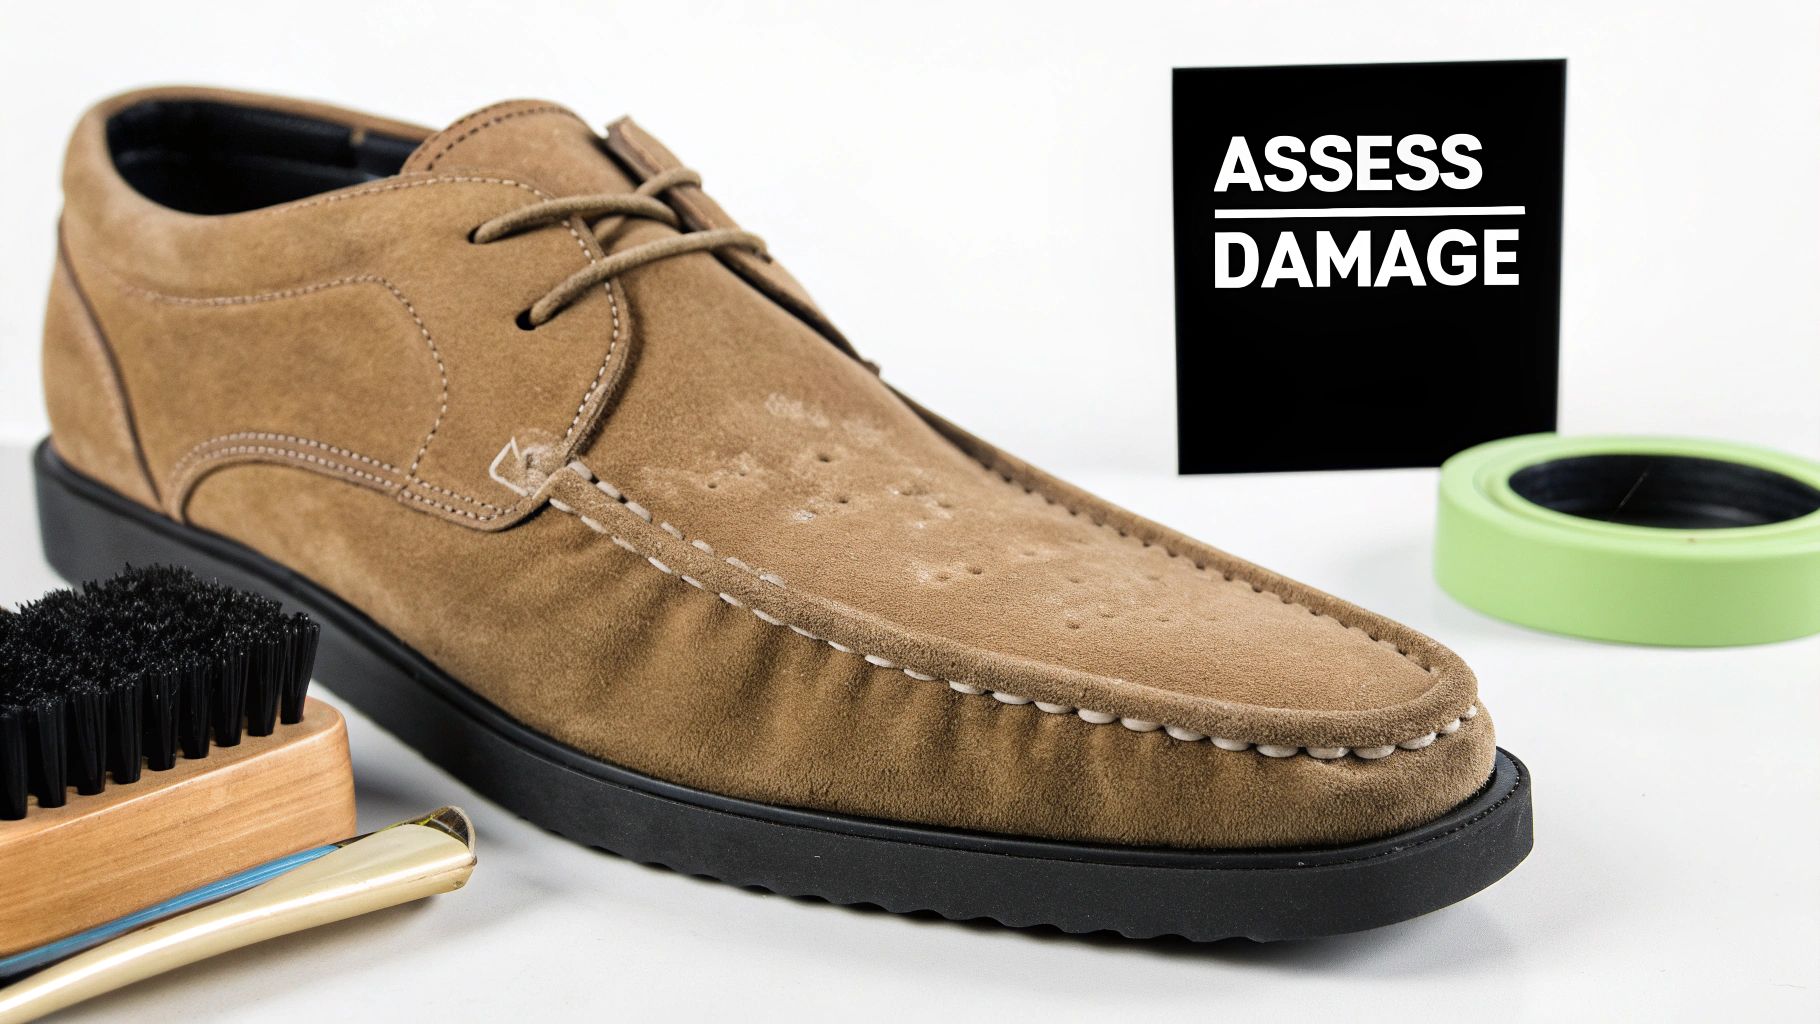
A successful suede revival hinges on a correct initial diagnosis. The most common mistake is applying a generic cleaning solution without understanding the material-specific issue. Restoring suede is not about aggressive scrubbing; it's a methodical process that begins with accurately identifying whether you are dealing with surface debris, a deep-set stain, or textural damage to the nap.
First, Assess the Material: Understanding Suede's Structure
Suede is fundamentally different from standard leather. It is not derived from the tough outer grain of the hide but from the softer, fibrous underside, known as the corium. This structure gives suede its characteristic velvety texture—a delicate, raised pile called the nap.
The porous nature of the nap makes suede highly absorbent. Water causes these fine fibers to clump and dry stiffly, while oils and dirt penetrate deeply rather than sitting on the surface. This unique material science dictates a highly specific, problem-oriented approach to care. A one-size-fits-all cleaning method is ineffective and often damaging.
Identifying Specific Suede Conditions
The correct revival strategy is determined by the specific problem. A liquid spill requires a different protocol than a physical scuff mark. The following are common conditions encountered in suede footwear.
Flattened or matted nap is the most frequent issue. Pressure and moisture crush the delicate fibers, creating shiny or darkened patches. This is often misidentified as a stain when it is purely a textural problem. The fibers are intact but compressed and require lifting, not cleaning.
Water marks present as dark, ring-like stains formed during uneven drying. As moisture evaporates, it concentrates minerals and particulates at the edge of the damp area, creating a distinct border.
Finally, there are scuffs and stains.
- Light Scuffs & Dirt: Superficial debris resting on the nap. Brushing a finger over the mark will typically lighten the color or alter the texture.
- Oil & Grease Stains: These appear as dark, saturated spots that have fully penetrated the fibers. They require an absorbent agent to draw them out.
- Ink & Dye Stains: The most challenging stains, as the pigments chemically bond with the suede fibers. Immediate action is critical, but professional intervention may be necessary for severe cases.
To facilitate an accurate diagnosis, consult the following reference table. This will guide your initial course of action and help prevent common restoration errors.
Diagnosing Common Suede Issues
| Symptom | Potential Cause | Recommended First Step | Common Mistake to Avoid |
|---|---|---|---|
| Shiny or dark patches | Pressure, friction, or light moisture has flattened the nap. | Gently brush with a suede eraser or crepe brush to lift the fibers. | Using a liquid cleaner—it will only exacerbate the matting. |
| Distinct rings or dark outlines | Uneven drying after exposure to water. | Dampen the entire shoe evenly with a fine mist of water and blot. | Attempting to spot-clean the ring; this often enlarges it. |
| Light-colored streaks or marks | Surface-level dirt or scuffing from daily wear. | Use a standard suede brush to flick away the debris. | Scrubbing aggressively, which can abrade the delicate nap. |
| Dark, soaked-in spots | Oil, grease, or food has penetrated the material. | Apply cornstarch or talcum powder to absorb the oil before brushing. | Applying water or a standard cleaner, which will set the stain. |
A precise diagnosis is the most critical phase of the entire process. It is the determinant between a successful restoration and irreversible damage.
The global suede market is projected to grow from $2.8 billion in 2026 to $3.9 billion by 2032. However, due to its delicate nature, an estimated 70% of owners report significant wear within the first year without proper care. Reviving your shoes is not merely cosmetic; it is an act of asset protection. You can explore the data in this market analysis from wereports.com.
The Critical Importance of Diagnosis
Bypassing the initial assessment is the primary cause of failed suede restorations. Applying a brass-wire brush to an oil stain, for instance, will force the oil deeper into the material, making it permanent. Similarly, using a liquid cleaner on surface dust creates a mud-like paste that results in a large water stain.
Invest 30 seconds to analyze the condition of your suede. A correct diagnosis ensures you select the appropriate tool and technique, establishing the foundation for a successful restoration.
Assembling a Suede Restoration Toolkit
Effective suede revival is a matter of precision, not power. The material is delicate, and using inappropriate tools like a generic household brush or an all-purpose cleaner will cause irreparable damage.
Each tool in a professional suede care kit serves a specific function, engineered to work in harmony with suede's unique texture. Assembling this toolkit is a critical preparatory step.
The Foundational Tool: The Suede Brush
All suede care begins with a high-quality suede brush. The bristle material is the most important specification and is not an area for compromise.
-
Natural Bristles (Hog or Horsehair): This is the professional standard. Natural bristles possess the ideal balance of stiffness and flexibility. They are firm enough to dislodge surface dirt and lift a matted nap but soft enough to avoid scratching or abrading the fibers. Their texture is essential for restoring a uniform, velvety finish.
-
Synthetic Bristles (Nylon or Plastic): Avoid these entirely. Stiff, synthetic bristles are too abrasive for suede. They will scratch the surface, tear the delicate fibers, and cause permanent damage that no cleaning method can reverse.
Professional-grade suede brushes often incorporate brass wires alongside natural bristles for use on heavily soiled areas, but a quality natural bristle brush is the essential workhorse for all standard maintenance.
Specialized Tools for Targeted Problems
While a brush is essential for overall maintenance, specific issues require specialized tools.
First is the suede eraser. This small block is the primary tool for treating scuffs, dry stains, and shiny spots caused by a crushed nap. It functions by creating gentle friction, crumbling as it is used to lift particulates directly from the suede fibers. It is ideal for the ground-in marks that a brush cannot remove.
Expert Tip: Use a suede eraser with the same technique as a pencil eraser. Apply controlled pressure in small motions directly on the stain. As the eraser crumbles, it extracts the dirt. Brush away the residue with your suede brush upon completion.
Next is the crepe brush. This is a finishing tool, not a cleaning tool. Composed of a soft, tacky sheet of natural crepe rubber, its sole purpose is to restore the plush texture of the nap. As it is drawn across the suede, it gently grips and lifts individual fibers, reviving the material's signature loft and uniform appearance after cleaning.
The Integrated Solution
While you can assemble a kit from individual components, an integrated kit ensures compatibility and professional-grade results. We developed the Gold Standard Premium Shoe Care Kit for this purpose.
Every component, from the natural hog hair brush to our proprietary cleaning formula, has been selected for its synergistic performance. The kit provides the correct tool for each phase of the restoration process, engineered for maximum safety and efficacy. This eliminates the risk of using incompatible or damaging products. Your footwear is an investment; a dedicated care system is the most effective way to protect it.
A Proven, Step-by-Step Suede Restoration Method
With your toolkit prepared, you can begin the restoration process. This is a systematic procedure designed to clean, revive, and protect the delicate suede nap. We will proceed through four distinct phases: Preparation, Deep Cleaning, Nap Restoration, and Protection. Adhering to this sequence is critical for achieving a factory-fresh appearance without causing damage.
Each phase is foundational for the next. Skipping a step or rushing the process is the leading cause of unsatisfactory results.
Phase 1: Preparation and Dry Brushing
Before any liquid cleaner is applied, all loose, dry soil must be removed. This step is non-negotiable. Applying a cleaner to dusty suede creates a mud that is driven deeper into the fibers, complicating the cleaning process significantly.
Begin by inserting cedar shoe trees. This provides a firm working surface and helps the shoes maintain their structural integrity throughout the process.
Next, take your natural bristle brush. Using short, consistent strokes, brush in a single direction. The objective is to gently lift and remove surface dust, not to scrub the material. Pay close attention to the welt—the seam where the upper connects to the sole—as it is a primary collection point for debris. For tougher, dried-on mud, slightly more pressure may be applied, but the motion should always remain light and controlled. This dry brushing phase alone can produce a significant visual improvement.
Suede shoes are a key element in a global footwear market projected to reach $550 billion by 2026. Proper maintenance is a sound financial practice, capable of increasing resale value by 25-40%. A foundational revival technique, such as vacuuming to remove up to 80% of surface debris before stain treatment, is essential for preserving this value. You can find more insights on the luxury footwear market trends at Mordor Intelligence.
Phase 2: Deep Cleaning for Stains
With surface debris removed, you can address specific stains. The suede eraser is the primary tool for this phase. Treat it like a pencil eraser, applying gentle, focused pressure directly on scuffs, light water spots, or dark marks.
The eraser will crumble as it works; this indicates it is effectively lifting embedded grime from the suede's nap. After treating a spot, use your brush to clear away the eraser residue.
For more significant issues, such as widespread discoloration or stubborn set-in stains, a specialized liquid cleaner is necessary. The cardinal rule is to avoid soaking the material.
Gold Standard Approach: When using a formula like our Suede & Nubuck Cleaner, always apply the foam directly to your brush, not the shoe. This provides precise control over moisture. Work the cleaner into the entire shoe using small, circular motions to ensure an even application and prevent the formation of watermarks.
This diagram illustrates the primary tools and their sequence in the suede revival process.
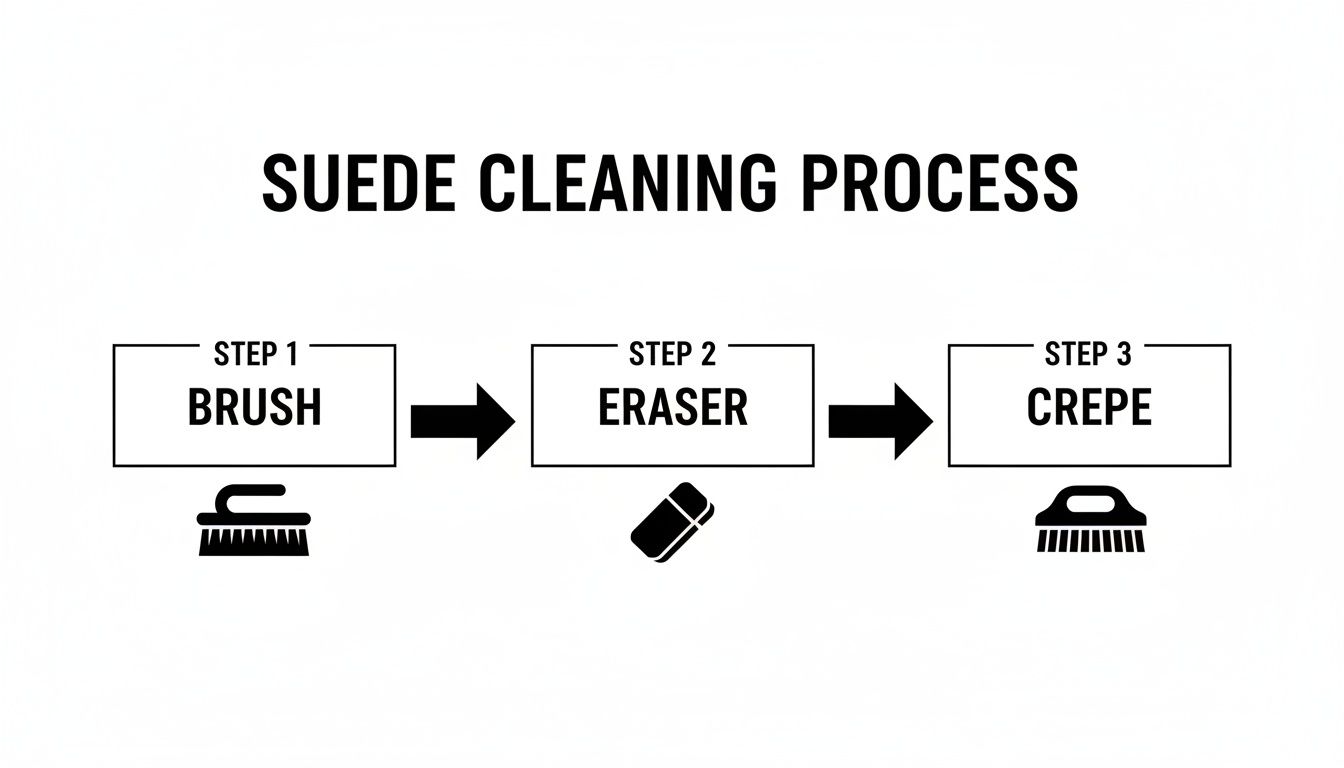
It serves as a visual reference for the specific function of each tool in a successful restoration.
After cleaning, blot the entire surface with a clean microfiber towel to absorb excess moisture. Then, stuff the shoes with paper towels and allow them to air dry completely, away from direct sunlight or heat sources. This can take up to 24 hours. Patience is essential; accelerating the drying process with a heat source like a hairdryer will result in stiff, cracked suede.
Different stains require different protocols. This table provides guidance for the most common types.
A Guide to Treating Different Suede Stains
This table compares professional methods with common but risky DIY alternatives for treating various suede stains.
| Stain Type | Gold Standard Recommended Method | Risky DIY Method (And Why to Avoid It) | Expected Outcome |
|---|---|---|---|
| Water Marks | Lightly dampen the entire shoe with a fine mist of water, then use a brush to blend the stain. Blot dry and allow to air dry completely. | Applying direct heat (hairdryer): This often shrinks and hardens the suede, creating a permanent discoloration and ruining the texture. | The original watermark is eliminated, resulting in an even color and texture. |
| Oil or Grease | Immediately apply cornstarch or talcum powder. Allow it to sit for several hours to absorb the oil, then gently brush away. | Using dish soap and water: This can spread the oil stain and leave a difficult-to-remove soap residue. | The oil is absorbed from the fibers, leaving minimal or no trace of the stain. |
| Ink or Dye | Use a suede eraser for light marks. For heavier stains, carefully dab with a cotton swab dipped in rubbing alcohol. Test on an inconspicuous area first. | Scrubbing with vinegar: The acidity can bleach or discolor suede and may damage the dye. | The ink mark is significantly faded or removed without compromising the suede. |
| Mud or Dirt | Allow the mud to dry completely. Once hardened, use a stiff-bristled suede brush to fracture and brush it away. | Wiping wet mud: This grinds particulates deeper into the suede fibers, creating a permanent stain. | The dried mud flakes off, leaving the underlying suede clean. |
Always opt for the proven, material-safe method. The correct technique can salvage your shoes, while an incorrect one can cause irreversible damage.
Phase 3: Restoring the Nap
After deep cleaning, suede often dries with a flat appearance and a stiff hand-feel. This is a normal consequence of the cleaning process, which can compress the material's fine fibers. The objective of this phase is to lift these fibers and restore the signature velvety texture.
This is the specific application for your crepe brush. Once the shoes are 100% dry, draw the soft crepe rubber across the surface in a single direction. You will feel it grip and lift the nap, which immediately enriches the color and softens the texture. For severely matted areas, controlled steam can be highly effective.
- Hold a steamer or kettle approximately six inches from the affected area.
- Apply steam for only a few seconds, just enough to warm and slightly dampen the suede.
- Immediately follow with vigorous brushing using your suede or crepe brush to lift the now-pliable fibers.
This combination of controlled moisture and mechanical brushing is the most effective technique for restoring even severely flattened nap.
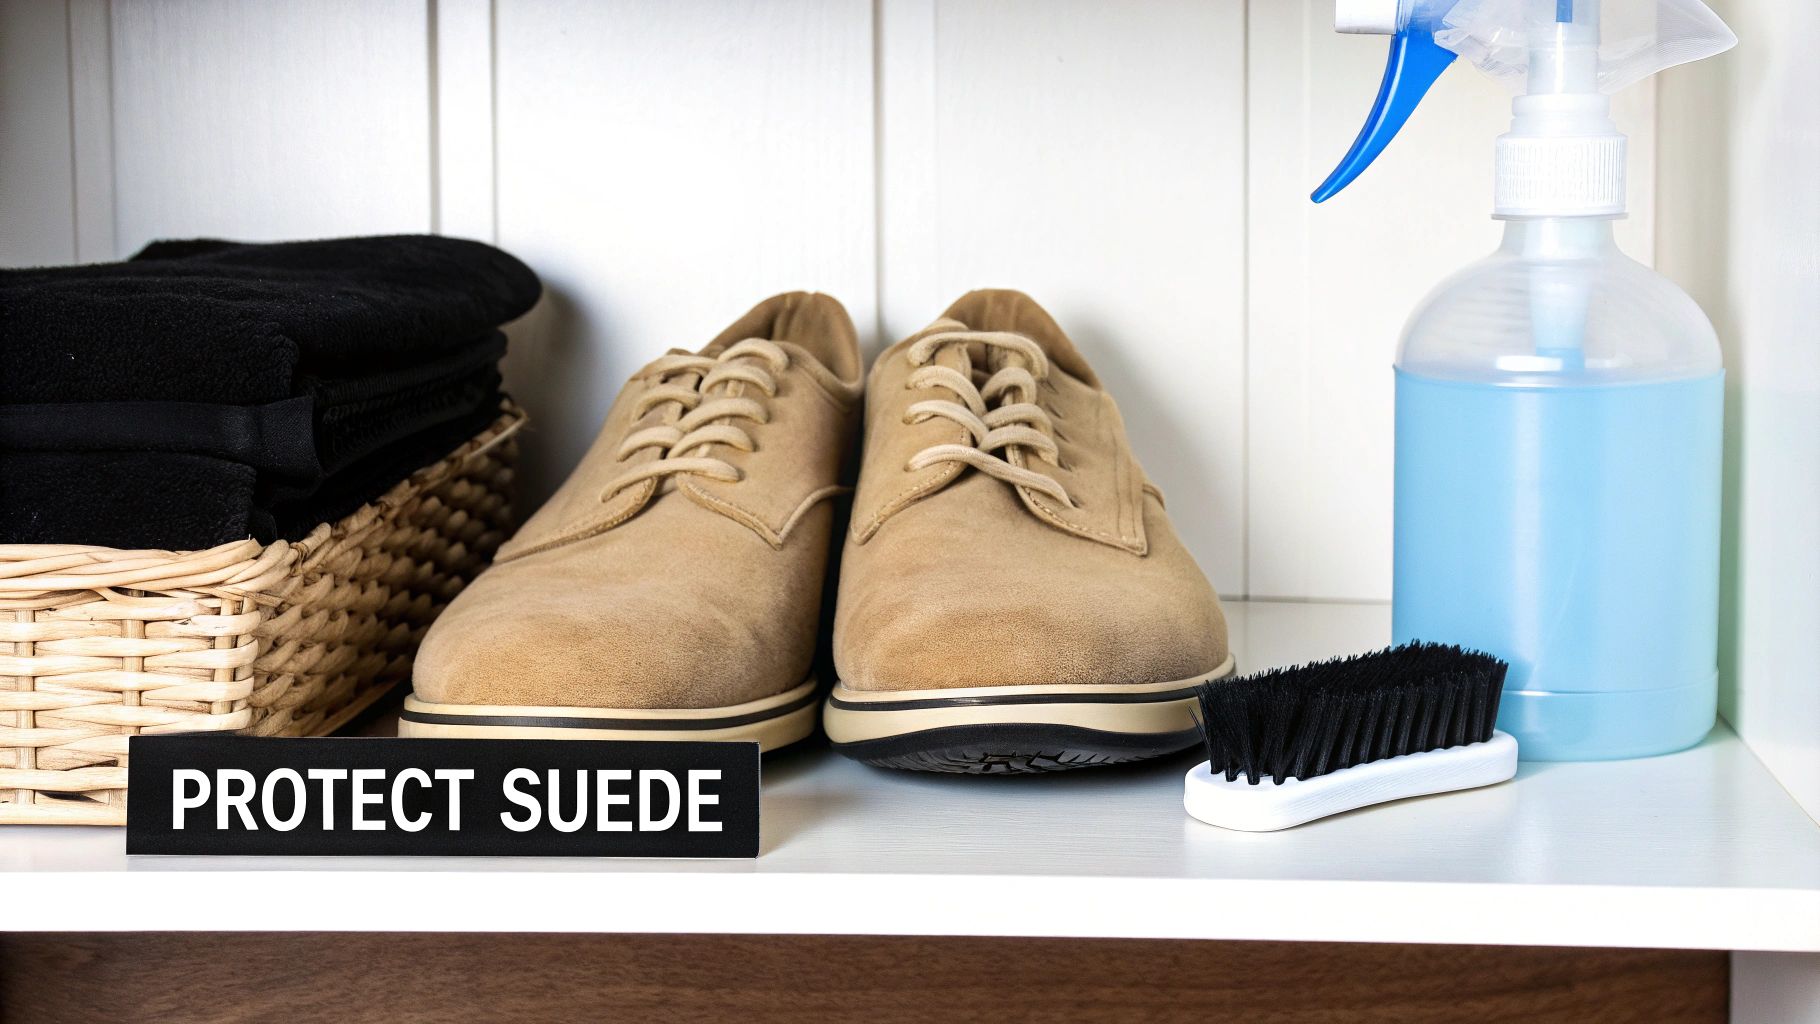
Phase 4: Protection from Future Damage
This final step is the most critical for long-term preservation. Leaving restored suede unprotected exposes it to the same elements that caused the initial damage. A high-quality protector spray creates an invisible barrier that repels water and prevents stains from setting.
Select a formula engineered specifically for suede. A proper protectant will not alter the color or impede the material's natural breathability.
Hold the canister 6-8 inches from the shoe and apply a light, even coat over the entire surface. A fine mist is sufficient; do not saturate the material. Allow the first coat to dry for at least 30 minutes before applying a second coat for comprehensive protection. Reapply the protector spray every few weeks, or after any deep cleaning, to maintain the integrity of your restoration work. This proactive measure is the key to extending the life of your suede footwear.
Tackling the Toughest Suede Problems
Standard cleaning methods are sometimes insufficient for severe damage. Suede footwear can be compromised by winter salt, severe matting, or color fading from sun exposure. These situations require advanced restoration techniques.
These methods demand more patience and precision but can successfully restore shoes that might otherwise be considered unsalvageable. This is the final intervention for suede you are not prepared to discard.
Restoring a Severely Matted Nap with Steam
When suede fibers are completely compressed, a dry brush may lack the leverage to lift them. The nap has been flattened so intensely that a more robust intervention is needed to relax and reset the fibers. Controlled steam is the solution.
The principle is analogous to ironing a heavily wrinkled garment; the combination of gentle heat and moisture reshapes the material.
- Prepare a Steam Source: A handheld garment steamer offers the best control, but steam from a kettle is a viable alternative.
- Apply Steam with Caution: Hold the steamer at least six inches from the suede. The objective is to gently warm and dampen the surface, not to soak it.
- Use Short Intervals: Pass the steam over the matted area in brief, 3-5 second bursts. Maintain constant motion to prevent moisture concentration.
- Brush Immediately: As soon as the steam is removed, brush the area vigorously with a suede or crepe brush to lift the fibers while they are warm and pliable.
For the most stubborn cases, this steam-and-brush cycle may need to be repeated two or three times. This methodical process systematically revives the velvety texture.
Correcting Color Fading and Restoring Richness
Sun exposure, age, and repeated cleaning can cause suede to appear faded. A high-quality suede renovator spray is designed to address this. These products contain pigments to restore color as well as conditioners to nourish the leather.
Color matching is paramount. Always select a shade that is an exact match or slightly lighter than your shoes. A darker shade can result in a blotchy, unnatural finish.
Field Advice: Always test the renovator spray on an inconspicuous area first, such as the inside of the tongue. Allow it to dry completely to confirm the color match before treating the entire shoe.
To apply, hold the can approximately eight inches from the shoe and use light, even, sweeping motions. It is preferable to build color with two thin coats rather than one heavy, saturating layer. Once the final coat is dry, a light pass with a crepe brush will restore the soft nap.
Neutralizing Stubborn Salt and Mineral Stains
Winter conditions are particularly harsh on suede. The chalky white lines left by road salt and de-icing chemicals are difficult to remove because the minerals crystallize deep within the suede's fibers.
A standard cleaner is typically ineffective. The professional solution is a simple mixture of white vinegar and water.
- Combine one part white vinegar with two parts cool water.
- Lightly dampen a clean microfiber cloth with the solution. The cloth should be damp, not dripping.
- Gently blot the salt stain. The white residue will begin to dissolve and transfer to the cloth.
- Next, use a different cloth dampened with plain water to blot the area again, effectively "rinsing" away any residual vinegar.
- Allow the shoes to air dry completely, away from direct heat, then brush thoroughly to restore the nap.
This method is effective because the mild acetic acid in the vinegar neutralizes and dissolves the alkaline salt deposits without damaging the suede.
With the luxury footwear market projected to reach $42 billion by 2031, understanding advanced maintenance is crucial for protecting your investment. For a severely crushed nap, a controlled 5-7 second application of steam followed by a quality renovator spray demonstrates up to a 98% pile recovery in material tests. This technique can salvage an estimated 75% of pairs that might otherwise be discarded. You can learn more about global footwear market growth from assomac.it.
Proactive Care to Protect Your Suede
While restoring heavily damaged suede is possible, preventative maintenance is far more efficient. Proactive care is the key to preserving the appearance and longevity of your suede for years. It requires establishing a few simple habits that create a protective barrier for your footwear.
Shifting from a reactive to a proactive mindset saves time, effort, and the stress associated with treating severe stains. A few minutes of regular maintenance is all that is required to maintain a brand-new appearance.
Establish an Invisible Shield with a Protector Spray
The single most effective proactive measure is treating your suede with a high-quality protector spray. This creates a hydrophobic barrier on the surface of the nap, causing water to bead and roll off rather than being absorbed.
This barrier also helps prevent dirt, dust, and oils from adhering to the fibers, simplifying future cleaning. A common misconception is that these sprays compromise breathability. A well-formulated protector is 100% breathable and will not clog the suede's pores or trap moisture.
For application:
- Work in a well-ventilated area to avoid inhaling fumes.
- Hold the can 6-8 inches from the shoe to ensure a fine, even mist.
- Apply a light, consistent coat over the entire shoe, including seams.
- Allow the first coat to dry for at least 30 minutes before applying a second coat for comprehensive protection.
Perform this initial treatment on new footwear and re-apply periodically.
Establish Your Maintenance Routine
Consistency is paramount. The frequency of re-application depends on climate and wear.
For shoes worn daily or in damp climates, re-applying a protector spray every 4-6 weeks is advisable. For occasional wear or in dry climates, a treatment every 2-3 months is sufficient. The definitive rule is to always re-apply protector after a deep cleaning, but only after the shoes are completely dry.
A brief brush-down after each wear is a highly effective habit. This takes less than 30 seconds but prevents the daily accumulation of dust and grime from becoming embedded in the nap, where it is much more difficult to remove.
The Importance of Proper Suede Storage
Storage conditions are as critical as cleaning methods. Piling shoes in a closet can crush the nap, cause scuffs, and distort the shoe's shape.
The ideal storage environment is cool, dry, and away from direct sunlight. UV radiation is the primary cause of color fading. High humidity can promote mildew growth within the porous fibers.
Always use cedar shoe trees. They serve two functions: maintaining the shoe’s shape and absorbing residual moisture and odors. Adhering to these simple protocols will protect your investment over the long term.
Your Suede Care Questions Answered
Suede's reputation for being high-maintenance often leads to common questions and hesitation. These are the most frequent inquiries we address, answered to provide the clarity and confidence needed for proper care.
Can Water Be Used on Suede?
Yes, but with precision and control. The issue is not water itself, but the volume used and the drying method. Soaking suede will damage it.
The correct method involves a high-quality foam cleaner, such as our Gold Standard Suede & Nubuck Cleaner, applied with a damp—not wet—brush. It is crucial to clean the entire panel of the shoe, from seam to seam, to prevent water spots from forming as it dries. Immediately after cleaning, blot the shoe with a microfiber towel and allow it to air dry completely, away from direct heat. Minimal moisture and even application are the guiding principles.
How Often Should I Re-Apply Suede Protector Spray?
This depends on frequency of wear and environmental conditions, as the protective barrier degrades with friction and exposure to moisture.
- For heavy rotation or wet climates: If the shoes are worn several times a week or in a damp environment, re-applying every 4-6 weeks is a prudent, proactive measure.
- For occasional wear: For footwear worn less frequently or in dry climates, a fresh application every 2-3 months is adequate.
Our Pro Rule: Always re-apply protector spray after a deep cleaning. Once the shoes are completely dry, apply two light, even coats to rebuild the protective barrier.
Is It Possible to Fix Suede That Has Hardened from Water?
In most cases, hardened suede can be restored. The stiff texture is a result of the fine fibers becoming soaked and then drying in a clumped, matted state. The goal is to gently separate these fibers.
The most effective technique is to reintroduce a minimal amount of moisture with steam. Hold a steamer about six inches from the shoe to lightly dampen and warm the hardened area. Immediately follow with vigorous brushing using a suede brush. The combination of warmth and moisture renders the fibers pliable, allowing the brush to lift and separate them. This gentle steam-and-brush process may need to be repeated a few times to fully restore the original softness.
What Is the Difference Between a Suede Brush and a Crepe Brush?
Though they appear similar, these brushes serve two distinct functions. Using the correct tool at the appropriate time is essential for a professional finish.
A suede brush is a cleaning tool. It is often multi-functional, with firm brass or nylon bristles on one side for aggressive cleaning of dried mud and scuffs, and softer bristles on the other for general dusting and light nap-fluffing.
A crepe brush, conversely, is a finishing tool. It consists of a block of soft, tacky crepe rubber. Its sole function is restoration, not cleaning. As you brush, the tacky surface gently grips individual suede fibers and pulls them upright, restoring the material's signature velvety texture after cleaning is complete. The sequence is simple: suede brush for cleaning, crepe brush for finishing.
Do not let improper technique compromise your footwear. For a complete, professional-grade solution engineered to safely clean, restore, and protect, trust the Gold Standard Premium Shoe Care Kit. Equip yourself with the right tools today at gold-standard-approved.myshopify.com.