
Proper cleaning begins before a single drop of water touches your footwear. The tools and techniques you employ are as critical as the cleaning solution itself. Getting this preparatory phase right is the difference between a pristine, box-fresh finish and a disappointing, potentially damaging outcome.
Your Pre-Cleaning Toolkit and Material Analysis
Rushing the initial stage is a common mistake. A few moments dedicated to setup can prevent irreversible damage.
Assemble Your Core Supplies
The correct tools facilitate a more effective and safer cleaning process. Using abrasive household items like old rags or a stiff dish brush can grind particulates deeper into the material or cause permanent micro-scratches.
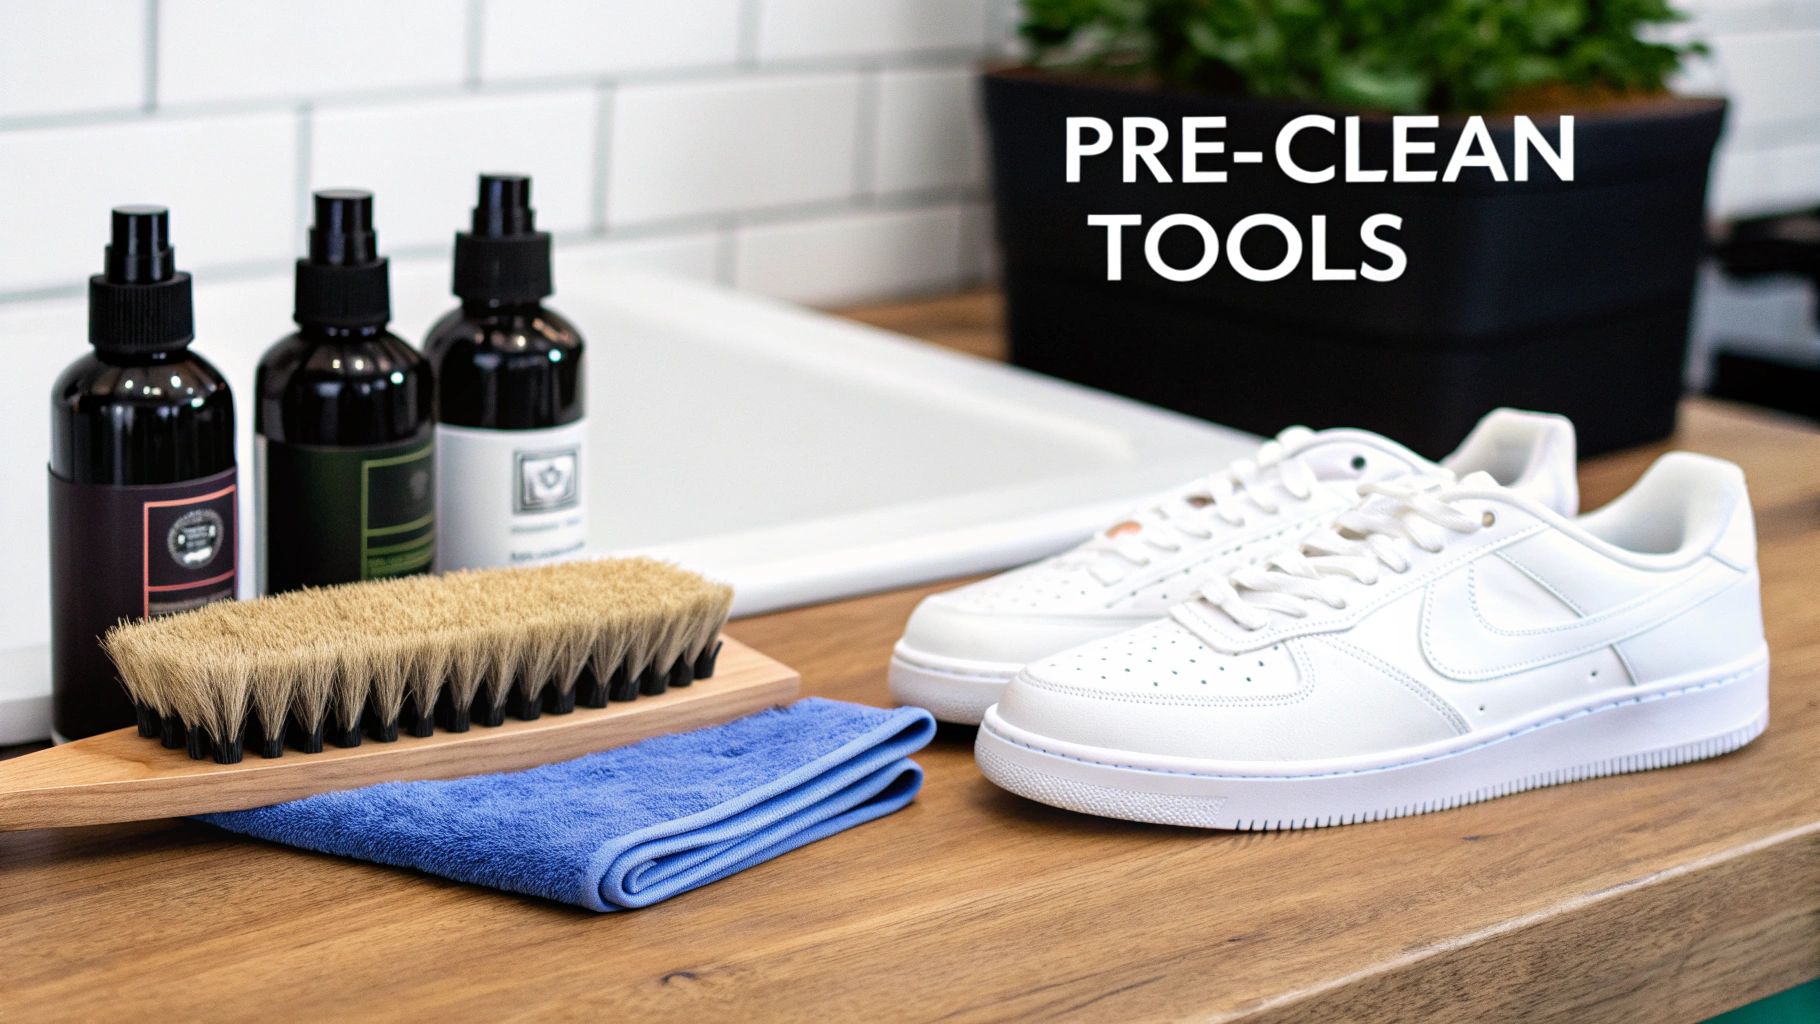
Your essential toolkit should include:
- A Soft-Bristle Brush: This is fundamental for dislodging surface dirt without abrading leather or snagging delicate knit textiles. Horsehair is the industry benchmark for its ability to clean effectively while being exceptionally gentle on uppers.
- Premium Microfiber Cloths: Unlike cotton rags, a quality microfiber cloth is engineered with fibers that lift and trap dirt particles, preventing you from merely redistributing grime across the sneaker's surface.
- A Bowl of Cool Water: Never use hot water. Elevated temperatures can warp synthetic materials, compromise adhesives, and permanently set organic stains like grass or mud, making them nearly impossible to remove.
Identify Your Sneaker's Material
With your tools prepared, perform a material analysis of your sneakers. Are they constructed from leather, canvas, or a synthetic mesh? The material composition dictates every subsequent step, especially for complex designs like different types of sneakers, such as high-top football sneakers.
You would not apply a leather cleaner to suede, and the same principle applies here. Understanding the material you are treating is the foundation of proper footwear care.
Our primary rule is non-negotiable: Always begin with the gentlest cleaning method. You can escalate the intensity for a stubborn stain, but you cannot reverse damage caused by an overly aggressive initial approach.
Adhering to this principle is not just about cleanliness; it is about preservation and extending the lifespan of your footwear.
The Universal Method: A Foundation for General Cleaning
This is our foundational workflow, the starting point for nearly any pair of white sneakers. Consider it the essential first pass before addressing material-specific needs or heavy-duty stain removal.
Before applying any liquid, dry preparation is a mandatory step. This prevents you from converting loose dirt into a muddy abrasive paste.
First, remove the shoelaces and any removable insoles. This provides unobstructed access to all areas of the sneaker, including the tongue and interior crevices. Set them aside for separate cleaning.
Dislodge All Surface Debris
Using a quality soft-bristle brush, systematically remove all loose dirt, dust, and surface particulates. Address the uppers, midsoles, and the grooves of the outsole. The objective is to remove any debris that is not already embedded in the material.
Apply moderate pressure; let the bristles perform the work. This step is critical as it prevents you from grinding abrasive particles into the textile during wet cleaning, a common cause of micro-scratches and premature wear. Using the right tool, such as a premium soft-bristle shoe cleaning brush, ensures effective cleaning without inflicting damage.
Mix and Apply the Cleaning Solution
With dry debris removed, prepare a gentle cleaning solution. A few drops of a concentrated, pH-balanced cleaner in a bowl of cool water are sufficient.
Dip your brush into the solution and tap away the excess liquid. The brush should be damp, not saturated.
Expert Tip: Oversaturation is one of the most frequent cleaning errors. It leads to watermarks, particularly on canvas, and can degrade the structural adhesives of the shoe. Precision and control are paramount.
Begin scrubbing the sneaker's surface with gentle, circular motions. This technique effectively lifts grime from the material's texture without being abrasive. A light foam will begin to form, indicating that the solution is lifting dirt from the fibers.
After scrubbing a section, use a clean, damp microfiber cloth to wipe away the foam and lifted grime. Repeat this process section by section until the entire shoe has been treated. This universal method is the cornerstone of a sound cleaning regimen.
Material-Specific Protocols: How to Clean Different Sneaker Materials
You have completed the initial dry brush and general wipe-down. Now, we move to material-specific treatments. Applying a single cleaning method to all footwear is the fastest way to cause irreversible damage.
The logic is simple: each material—be it durable leather, absorbent canvas, or delicate mesh—reacts differently to moisture, friction, and cleaning agents. Understanding these material properties is what distinguishes an amateur cleaning from a professional-level restoration.
This flowchart provides a visual guide for approaching any pair, helping you determine whether to begin with a dry method or proceed directly to a deeper clean.
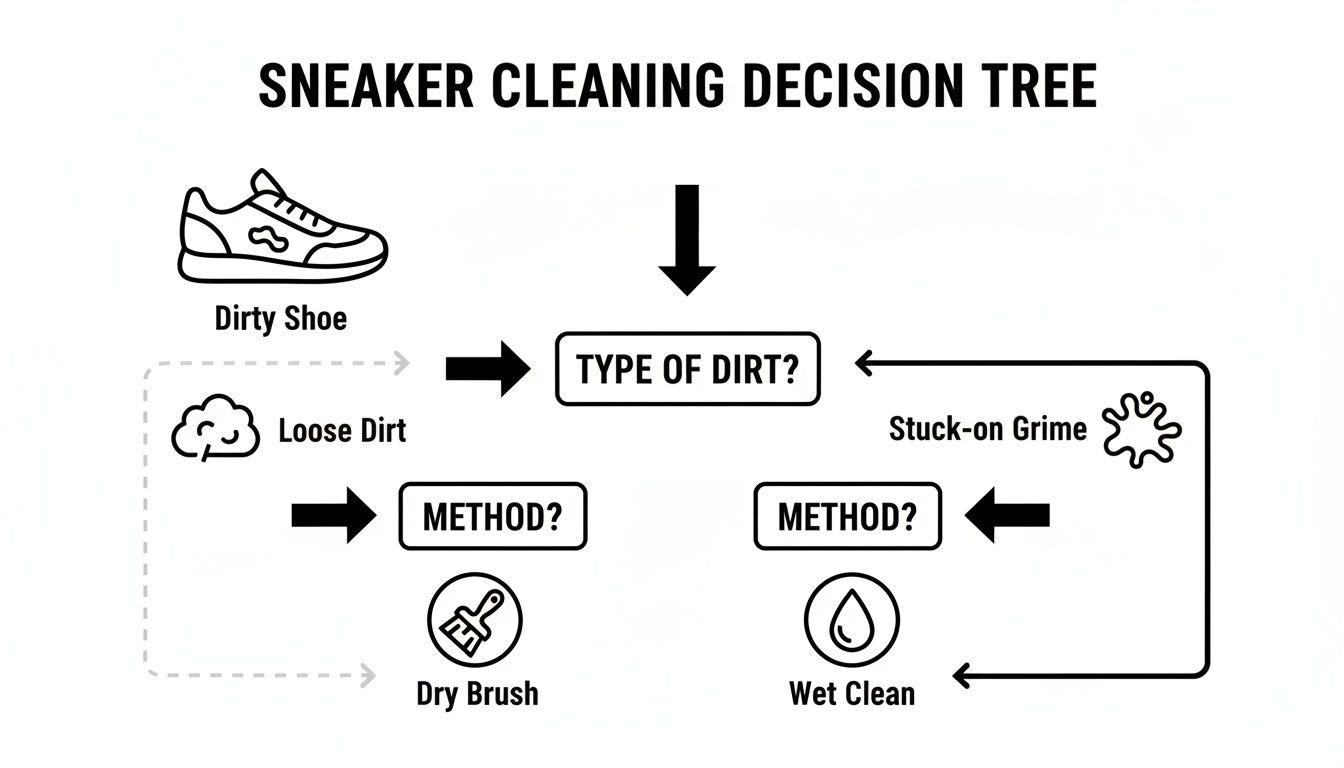
The key takeaway is to always remove loose, abrasive particulates first. Neglecting this step means you are grinding that grit into the shoe's surface during wet cleaning, which can cause permanent damage.
For clarity, here is a reference guide for the most common sneaker materials.
White Sneaker Material Cleaning Guide
| Material | Primary Cleaning Method | Key Tools | Crucial Precaution |
|---|---|---|---|
| Leather | Spot clean with a targeted solution; condition afterward. | Soft brush, microfiber cloth, leather conditioner. | Avoid oversaturating the leather; always condition after cleaning to prevent cracking. |
| Canvas | Lather, lift, and blot with a cleaning solution. | Medium-stiff brush, microfiber cloth. | Do not scrub aggressively, as this can fray the fibers. Ensure all soap is blotted out. |
| Mesh/Knit | Gentle patting motion with a foamy cleaner. | Soft-bristle brush, cloth for internal support. | Never scrub hard. Support the material from the inside to prevent stretching or snagging. |
| Suede/Nubuck | Dry cleaning is the default; liquid is a last resort. | Suede eraser, suede brush. | Water is the primary adversary; it will stain and flatten the material's nap. |
This table provides a solid foundation. Let’s now detail the specific techniques for each material.
Cleaning White Leather Sneakers
White leather is prone to collecting grime in scuffs and creases. The objective is to clean thoroughly without stripping the leather's natural oils, which leads to dryness and cracking.
A targeted approach is most effective. After the initial dry brush, apply a dedicated leather cleaner. Work the product in with a soft brush, paying special attention to high-contact areas like the toe box and heel counter.
Pro Tip: Conditioning leather sneakers after a deep clean is non-negotiable. It is analogous to applying moisturizer to skin. A quality leather conditioner replenishes moisture, maintains flexibility, and restores the material's natural luster. This single step will do more to extend the life of your footwear than nearly any other action.
Tackling White Canvas Uppers
Canvas is a durable classic, but its woven texture readily traps dirt. The technique is to lift the grime out of the fibers rather than driving it deeper.
A pair like these women's lace-up canvas shoes showcases a classic canvas weave. To clean them, work up a rich, foamy lather with your cleaning solution and gently agitate it into the fabric with a brush. Allow the foam to dwell for several minutes to penetrate and break down embedded dirt.
Next, take a clean, damp microfiber cloth and blot the area. Apply firm, direct pressure. You are not rubbing; you are extracting the dirt and suds from the textile. You will see the soil transfer to the cloth. Repeat with a clean section of the cloth until it comes away clean. This ensures complete residue removal, preventing the fabric from feeling stiff upon drying.
Caring for Mesh and Knit Fabrics
Breathable knit sneakers are exceptionally comfortable, but their open-weave structure is also delicate. An improper technique can easily snag the material, cause stretching, or push dirt deeper into the weave. A light touch is essential.
Follow these steps to clean knits without causing damage:
- Use a Softer Brush: Employ a brush with extra-soft bristles. A clean, soft-bristled toothbrush is an effective alternative.
- Pat, Don't Scrub: Avoid aggressive scrubbing. Use a gentle dabbing or patting motion to press the cleaning foam into the material. This lifts dirt without distorting the fabric's structure.
- Provide Internal Support: Place a small towel or your hand inside the shoe while cleaning. This creates a firm surface to work against and prevents the material from stretching.
Following these protocols will maintain the cleanliness, breathability, and structural integrity of your knit uppers.
Restoring Suede and Nubuck
Suede and nubuck require a specialized approach. For these materials, water is the enemy. It can cause discoloration and permanently flatten the velvety texture, known as the "nap." Therefore, dry cleaning is the default method.
A dedicated suede cleaning kit is mandatory. These kits typically include a suede eraser to gently lift stains and a specialized brush with stiff bristles designed to restore the nap.
Begin with the eraser, applying it to any spots or scuffs. Once the mark is removed, use the brush to revive the texture, brushing consistently in a single direction. If you must address a stubborn stain with a liquid cleaner, use a product formulated specifically for suede. Apply it sparingly and adhere strictly to the product's instructions to prevent damage. Patience is critical.
Advanced Stain Removal and Sole Restoration
Sometimes, a standard cleaning protocol is insufficient. You may be facing stubborn stains—coffee on canvas, grease on leather, or embedded grass stains. This is where a more targeted, surgical approach is required.
We must also address the primary adversary of white sneakers: sole yellowing. This gradual oxidation process can make even the cleanest uppers appear aged. The good news is that it is often reversible with the correct technique.
Targeted Techniques for Different Stains
Applying a generic stain remover is rarely effective and can set the stain or damage the material. Diagnose the stain first, then select the appropriate treatment.
- Oil and Grease Marks: These are hydrophobic, meaning they repel water. You need a solution that can absorb or break down the oil. Apply a small amount of a specialized degreaser to the spot. Alternatively, a thick paste of baking soda and water can be effective. Allow it to sit for several minutes to draw the grease out of the material, then gently scrub it away.
- Ink or Dye Stains: Act quickly. The moment a spill occurs, blot—do not rub—the stain with a clean, dry cloth to absorb as much liquid as possible. Next, dip a cotton swab in rubbing alcohol and carefully dab the stain, working from the outside edge inward to prevent spreading. Always test the alcohol on an inconspicuous area first to ensure colorfastness.
- Grass Stains on Canvas: Grass stains are a form of dye. A 50/50 mixture of white vinegar and water is an effective pre-treatment. Apply it directly to the stain and allow it to sit for approximately 30 minutes to break down the pigments before proceeding with a brush and your standard cleaning solution.
Reversing Yellowed Soles
The yellowing of rubber soles is caused by oxidation, a natural chemical reaction when the material is exposed to UV light and oxygen over time.
To reverse this, you need a sole brightening agent. These products contain a controlled oxidizing agent that, when activated by UV radiation, chemically reverses the yellowing process.
Our Go-To Method: Apply a thin, even coat of sole brightener onto the yellowed rubber, avoiding contact with the uppers. Wrap the soles in clear plastic film to prevent the product from evaporating. Place the sneakers in direct sunlight for several hours to allow the UV rays to activate the formula. The results can be transformative.
When to Use Aggressive Cleaners (With Extreme Caution)
In emergencies, you may be tempted to use a stronger agent like bleach. While used for whitening textiles for centuries, bleach is highly corrosive and should be a last resort. The modern best practice is to use a heavily diluted solution—no more than one part bleach to five parts water—and only for spot-treating resilient stains on all-white canvas. Using a stronger concentration or allowing prolonged contact will degrade fabric fibers, causing them to turn yellow and become brittle. You can learn more about safe product usage on the Clorox website.
If you must use this method, apply the diluted solution with a cotton swab directly to the stain. Let it sit for no more than five minutes, then thoroughly rinse the area with cool water to neutralize the chemical reaction. Never use this method on leather, suede, or any colored components.
The Critical Drying and Protection Phases

The cleaning process is not complete until the footwear is properly dried and protected. This final phase is where many well-intentioned cleanings result in permanent damage.
Impatience often leads to the use of direct heat. Placing sneakers near a radiator, in front of a heat vent, or in a machine dryer is a catastrophic error. Intense heat will warp the uppers, melt the adhesives bonding the sole, and can cause irreversible yellowing.
The Correct Method for Air-Drying
The only safe and effective way to dry sneakers is with ambient air circulation and patience. This is the professional standard for preserving the shoe's shape and structural integrity.
Follow this exact procedure:
- Absorb Internal Moisture: Loosely stuff each sneaker with absorbent, unprinted paper towels or clean white paper. This is a critical step that wicks moisture from the lining while helping the shoe maintain its form as it dries. Avoid using materials with ink, as it can bleed onto the interior fabric.
- Select the Proper Location: Place the stuffed sneakers in a well-ventilated area away from direct sunlight. The sun's UV rays can degrade and yellow certain materials. A shaded location with good airflow is ideal.
- Allow Adequate Time: Drying is not a rapid process. Depending on the material and ambient humidity, it can take 8 to 12 hours, or even longer. Complete drying is essential to prevent the growth of mildew and associated odors.
Lock in Cleanliness with a Protective Barrier
Once your sneakers are 100% dry—inside and out—it is time for the final, crucial step: applying a high-quality protector spray. This creates the first line of defense against future contaminants.
This is not an optional add-on; it is a fundamental component of footwear maintenance. A quality protective spray forms an invisible, breathable barrier that repels water and stains, preventing them from penetrating the material. This simplifies future cleanings and significantly extends the pristine appearance of your sneakers.
For a durable, breathable barrier that does not alter the look or feel of the fabric, we recommend our Gold Standard Premium Sneaker Protector Spray. A light, even application is all that is required to protect your freshly cleaned sneakers.
Your Top White Sneaker Questions, Answered
Maintaining white sneakers can seem challenging. We have compiled the most frequent questions we receive and provided the expert-verified answers to help you achieve consistent, professional results.
The market prevalence of white sneakers is undeniable. Major brands often dedicate 20–40% of their seasonal collections to white colorways, fueling demand for effective care solutions. Consumers are increasingly recognizing that proper maintenance is key to protecting their investment. You can find more insights about this trend and its market impact.
Common Sneaker Cleaning Questions
Can I put my white sneakers in the washing machine?
Our answer is an unequivocal no. A washing machine subjects footwear to excessive water, high temperatures, and tumbling action. This combination is highly destructive to the adhesives used in shoe construction, can warp the shoe's shape, shrink materials, and cause discoloration. Hand-cleaning is the only method that provides the control necessary for a safe and effective outcome.
How often should I clean my sneakers?
Frequency depends on usage. For sneakers in regular rotation, a light wipe-down after every one or two wears is a good practice to prevent dirt from setting. For a deep cleaning, visual inspection is your best guide. When they appear soiled or acquire a noticeable stain, it is time for a thorough treatment.
The single most effective piece of advice is to address scuffs and stains immediately. A fresh stain is significantly easier to remove than one that has had time to bond with the fabric fibers.
What is the correct way to clean white shoelaces?
Always remove the laces from the shoe before cleaning. Attempting to clean them while laced can damage the eyelets and is ineffective.
Use this professional method:
- Submerge the laces in a small bowl of warm water with a few drops of a quality sneaker cleaner. Allow them to soak to loosen grime.
- Gently rub the laces against each other. This friction helps the cleaning solution penetrate the fibers.
- Rinse thoroughly under cool, running water until all suds are gone.
- Lay them flat on a clean towel to air dry. Never place them in a machine dryer, as the heat will melt the plastic tips (aglets).
At Gold Standard, we believe that expert care is essential to extending the life and preserving the appearance of your footwear collection. Our premium products are engineered to deliver professional-grade results, ensuring your favorite pairs remain in pristine condition.
Explore the Gold Standard collection to maintain your sneakers.
Article created using Outrank