
The all-white Air Force 1 is more than a sneaker; it's a benchmark in footwear culture. Maintaining its iconic, factory-fresh condition, however, requires more than a simple wipe-down. It demands a precise understanding of the materials you are handling.
This guide moves beyond generic cleaning tips. We will detail a professional-grade method engineered to restore your AF1s without inflicting the common types of damage that prematurely ruin countless pairs.
We will analyze why the specific materials of an Air Force 1—the synthetic leather upper and the textured rubber midsole—necessitate a specialized cleaning protocol. Using improper tools or harsh household chemicals can cause irreversible material degradation.
Common Mistakes That Degrade Footwear
We see it constantly: well-intentioned owners causing more harm than good. The most prevalent mistakes include:
- Using Abrasive Household Cleaners: Bleach, dish soap, and all-purpose kitchen sprays are detrimental. Their chemical compositions strip the leather's protective finish, which leads directly to cracking, discoloration, and material failure.
- Oversaturating with Water: Soaking your sneakers is a critical error. Excess water weakens the adhesives bonding the upper to the sole and can permanently warp the shoe's internal structure during the drying process.
- Scrubbing with Incorrect Tools: A stiff-bristled kitchen brush will leave permanent micro-scratches and scuffs across the smooth synthetic leather. This is a direct path to a ruined pair.
This guide is about working with the materials, not against them. Our focus is on a cleaning process that restores your footwear and extends its functional lifespan.
The Nike Air Force 1 is a footwear phenomenon, with Nike reportedly selling over 10 million pairs annually. This volume is precisely why understanding correct cleaning methodology has become a critical skill for any footwear enthusiast.
Since their introduction, AF1s have remained a top-selling sneaker, making them one of the most visible shoes one can wear. With millions of pairs in circulation, owners are constantly seeking reliable solutions to protect their investment. You can explore the AF1's cultural significance further at Culture Kings.
Expert Takeaway: The objective is not merely to clean; it is to preserve. A successful restoration maintains the original texture of the leather, the brilliant white of the midsole, and the shoe's overall structural integrity. Aggressive cleaning for a quick cosmetic fix almost always results in long-term damage.
Our approach prioritizes material health, ensuring your Air Forces remain in pristine, wearable condition.
Assembling Your Sneaker Care Toolkit
The tools you use to clean your white Air Forces are as critical as the method itself. Sourcing supplies from under the kitchen sink is the fastest route to turning a simple refresh into a footwear disaster. Achieving a factory-fresh result requires a dedicated, purpose-built kit.
Consider this: you would not use a butter knife as a screwdriver. The same principle applies here. Your AF1s are constructed from multiple surfaces—smooth synthetic leather, textured rubber soles, delicate stitching—and each requires a specific tool for a proper, damage-free clean.
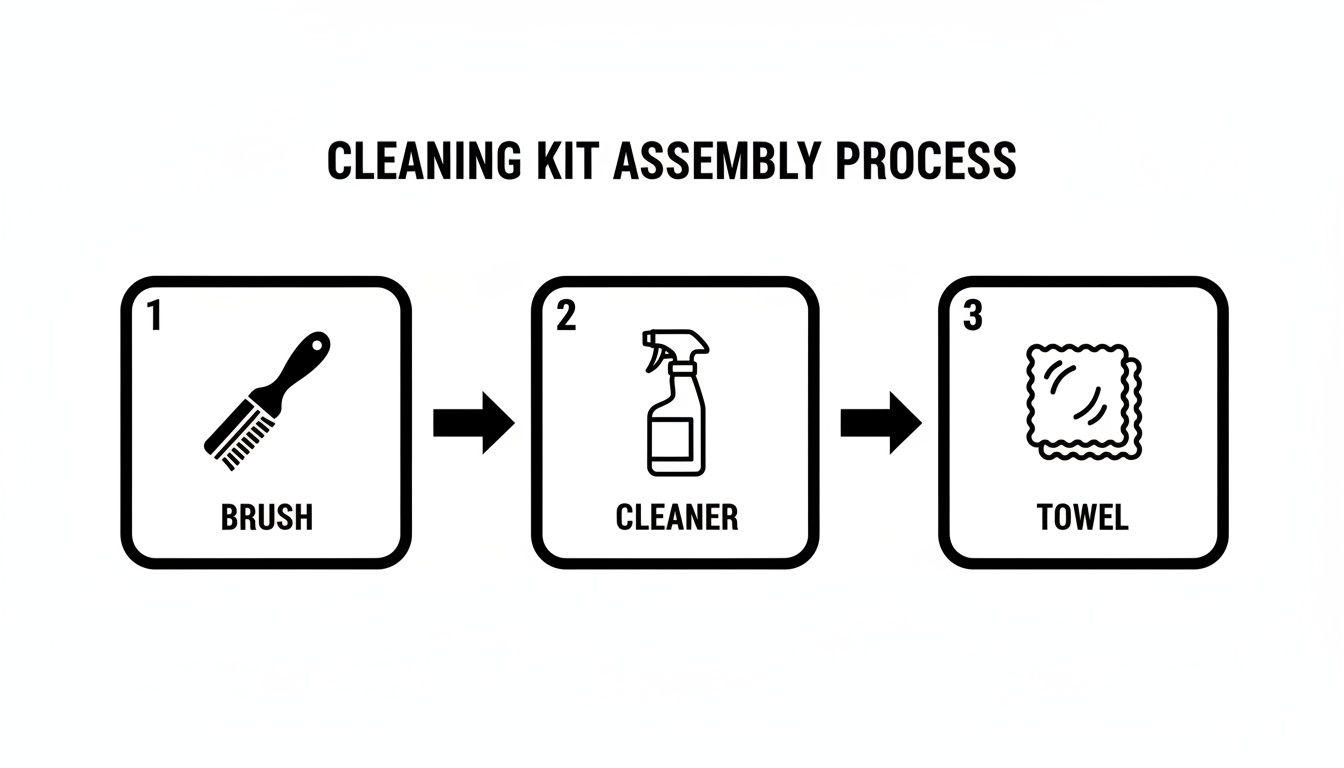
The Essential Four Tools
Your primary toolkit need not be extensive, but every component must be correct. These four items are the foundation of a professional-grade clean, each selected to be tough on dirt but gentle on your footwear.
- Soft Bristle Brush: This is your primary tool for the uppers. A brush with soft, natural bristles (such as hog hair) is ideal. It possesses enough rigidity to lift dirt while being gentle enough to avoid creating micro-scratches on the leather.
- Medium Bristle Brush: Reserve this for the midsole and outsole. The firmer bristles are essential for agitating dirt from the textured recesses of the sole where a soft brush would be ineffective.
- Premium Cleaning Solution: Avoid household soaps. A dedicated sneaker cleaner, like the Gold Standard All-Natural Shoe Cleaner, is formulated to break down dirt and stains without the harsh chemicals that desiccate leather, leading to cracks and yellowing.
- Microfiber Towel: Do not use old rags or paper towels. A high-quality microfiber towel is exceptionally absorbent and will not deposit lint on your freshly cleaned shoes. It is the ideal tool for blotting away foam and moisture without abrasion.
Essential Support Equipment
With the core cleaning tools established, two other items elevate your results from adequate to professional. These are not accessories; they are fundamental for protecting the sneaker's structure.
One of the most critical pieces of equipment is a pair of high-quality shoe trees. Insert them before you begin cleaning. They provide a firm, stable surface, making it significantly easier to scrub without the shoe collapsing. More importantly, they ensure your Air Forces maintain their original shape as they dry, preventing toe box collapse and the setting of deep creases.
Field Tip: Invest in adjustable cedar shoe trees. Beyond maintaining shape, the cedar naturally absorbs residual moisture from the shoe's interior and helps neutralize odors—a significant advantage during the drying phase.
The sneaker care market is saturated with options, from professional-grade products to DIY solutions. While common household items like baking soda or hydrogen peroxide can have an effect, they carry inherent risks. A 3% hydrogen peroxide solution, for instance, can be an effective whitening agent, but improper dilution or application time can result in blotchy, uneven discoloration. For official guidance, it is always prudent to consult Nike's official care guide.
Professional Tools vs. Household Substitutes: A Risk Analysis
The temptation to use convenient household items is understandable, but tool selection is about risk management. A substitute may appear to work initially while causing slow, cumulative damage. This table breaks down why investing in proper equipment is a prudent decision for anyone serious about footwear preservation.
| Professional Tool | Household Substitute | Potential Risk of Substitute |
|---|---|---|
| Soft Hog-Hair Brush | Dish Sponge, Old Toothbrush | The abrasive side of a sponge creates fine scratches on leather. Toothbrush bristles are often too stiff and can fray delicate stitching. |
| Premium Sneaker Cleaner | Dish Soap, All-Purpose Cleaner | These contain degreasers that strip the shoe's factory finish, causing the material to dry out, crack, and yellow over time. |
| Microfiber Towel | Paper Towels, Cotton Rag | Paper towels disintegrate and leave lint residue. A standard cotton rag tends to push dirt around rather than lifting it and is less effective at absorbing foam. |
| Adjustable Shoe Trees | Stuffed Newspaper | Newspaper ink can transfer to the shoe's inner lining. It also fails to provide the firm, uniform support required to prevent warping as the shoe dries. |
Ultimately, using the correct tools is not about aesthetics—it is about protecting your investment and maintaining the condition of your Air Forces for years, not weeks.
The Deep Cleaning Process: Uppers and Midsoles
With your cleaning station prepared and tools organized, you are ready to begin the restoration. Executing this phase correctly is what distinguishes a superficial wipe-down from a true, professional-grade deep clean. We will approach this methodically, beginning with dry preparation before introducing any liquid.
This workflow is simple but critical. Proceeding directly to a wet clean transforms loose dirt into a slurry, grinding it deeper into the leather and midsole texture. Removing surface debris first enhances the efficacy of every subsequent step.
Step 1: Preparation and Dry Brushing
Before introducing any cleaning solution, you must set the stage. Remove the laces and insoles; these require separate, specialized cleaning. This step also provides unobstructed access to the tongue and the area around the eyelets where dirt accumulates.
Next, insert your shoe trees. This is a non-negotiable step for a professional outcome. They create a firm, solid shape to work against, allowing you to apply even pressure with your brush without collapsing the shoe. This also smooths out creases in the toe box, opening them up for a more thorough clean.
With the shoe properly supported, take your soft-bristled brush. The objective is to remove all loose dust and surface dirt. Work around the entire shoe with light, sweeping motions, focusing on seams and stitch lines. For caked-on debris on the midsole and outsole, switch to your medium-bristled brush to break it loose.
Expert Insight: Consider dry brushing as a preliminary excavation. You are carefully removing the top layer of contaminants so your cleaning solution can penetrate and act on the more stubborn, embedded stains below. Skipping this step is analogous to attempting to wash a car still caked in mud—you will merely redistribute the grime.
Step 2: The Wet Clean
Now, we proceed to the main cleaning phase. Here, a quality cleaning solution and proper technique will lift embedded grime and restore the shoe's whiteness. The key is to control the amount of liquid and allow the foam to perform the work.
Begin by adding a small amount of a quality cleaning solution, such as the Gold Standard All-Natural Shoe Cleaner, to a bowl of cool water. Avoid warm or hot water, as it can be harsh on synthetic leather and may compromise the integrity of the adhesives used in the shoe's construction.
An organized setup is crucial for an effective and efficient process.
Having your tools ready allows you to work uninterrupted, which is essential for achieving a uniform result.
Dip your soft-bristled brush into the solution and tap it on the side of the bowl to remove excess liquid. You want the brush to be damp, not saturated. Now you are ready to begin cleaning the uppers.
Step 3: Mastering Your Technique
How you scrub is as important as what you scrub with. To achieve optimal results without damaging your footwear, adhere to these field-tested principles:
- Work in Small, Controlled Sections: Do not attempt to clean the entire shoe at once. Focus on one panel at a time—the toe box, a side panel, the heel. This allows you to manage the foam and wipe it away before it dries and leaves a residue.
- Use Gentle, Circular Motions: Scrub the leather using small, overlapping circular motions. This technique effectively generates a cleaning lather that penetrates the material's grain to lift out dirt. Avoid excessive pressure; let the solution and the bristles do the work. Scrubbing too aggressively can damage the leather's finish.
- Manage the Foam: The foam is what extracts the dirt from the material. You will see it discolor as it works—this is a positive indicator. Do not allow this dirty foam to sit. Immediately use your microfiber towel to blot and wipe it away.
- Address the Midsole: Switch to your medium-bristled brush for the rubber midsole. You can apply more firm pressure here to work the cleaner into its textured surface. The stiffer bristles are necessary for removing scuffs and ground-in dirt.
After cleaning a section, perform a final, thorough wipe with your microfiber towel to remove all residual soap and grime. Streaks or water spots that appear after drying are typically the result of leftover cleaner. Meticulous execution of this final wipe-down ensures a clean, even finish. With the uppers and midsoles restored, you can now address the details.
Restoring Laces, Insoles, and Oxidized Soles
A truly comprehensive restoration is defined by attention to detail. After cleaning the uppers and midsoles, addressing the laces, insoles, and sole yellowing is what elevates a decent clean to a professional standard. These components are often overlooked but are critical to achieving an authentic, box-fresh appearance.
Each component requires a distinct approach. Laces can fray, insoles harbor odor-causing bacteria, and soles discolor due to chemical reactions that scrubbing alone cannot reverse.
Reviving Laces Without Damage
Using a washing machine for laces is a common error that often results in irreversible damage. The machine's aggressive tumbling action can shred the fabric and, critically, destroy the plastic tips, known as aglets. Once an aglet is compromised, the lace is effectively ruined.
Gentle hand-washing is the only appropriate method.
- Fill a small bowl with cool water and add a few drops of cleaning solution.
- Submerge the laces and allow them to soak for 20-30 minutes. This provides sufficient time for the solution to penetrate the fibers and loosen embedded dirt.
- Gently rub the laces between your fingers. For stubborn stains, use a soft-bristled brush.
- Rinse them thoroughly under cool, running water until no suds remain.
- Squeeze out excess water with a microfiber towel and hang them to air dry. Never place them in a machine dryer.
Deodorizing and Cleaning Insoles
Insoles are a primary source of shoe odor but are frequently neglected during cleaning. They are typically made from porous foam, and saturating them with water can lead to mold, mildew, and material degradation. A light, effective surface clean is required.
Mix your cleaning solution and lightly dampen a soft-bristled brush. Gently scrub the entire surface of the insole, focusing on the heel and toe areas where pressure and moisture concentrate. As soon as a lather forms, wipe the foam and grime away with a microfiber towel.
For persistent odors, you can apply a light dusting of baking soda to the dry insoles and let them sit overnight before brushing it off. Most importantly, ensure the insoles are 100% dry before reinserting them into your shoes. Trapped moisture will lead to significant problems.
Field Tip: Never soak your insoles. A light surface scrub is all that is required. If you can squeeze water out of them, they are far too wet. This level of moisture can take days to evaporate and will permanently damage the foam's structure.
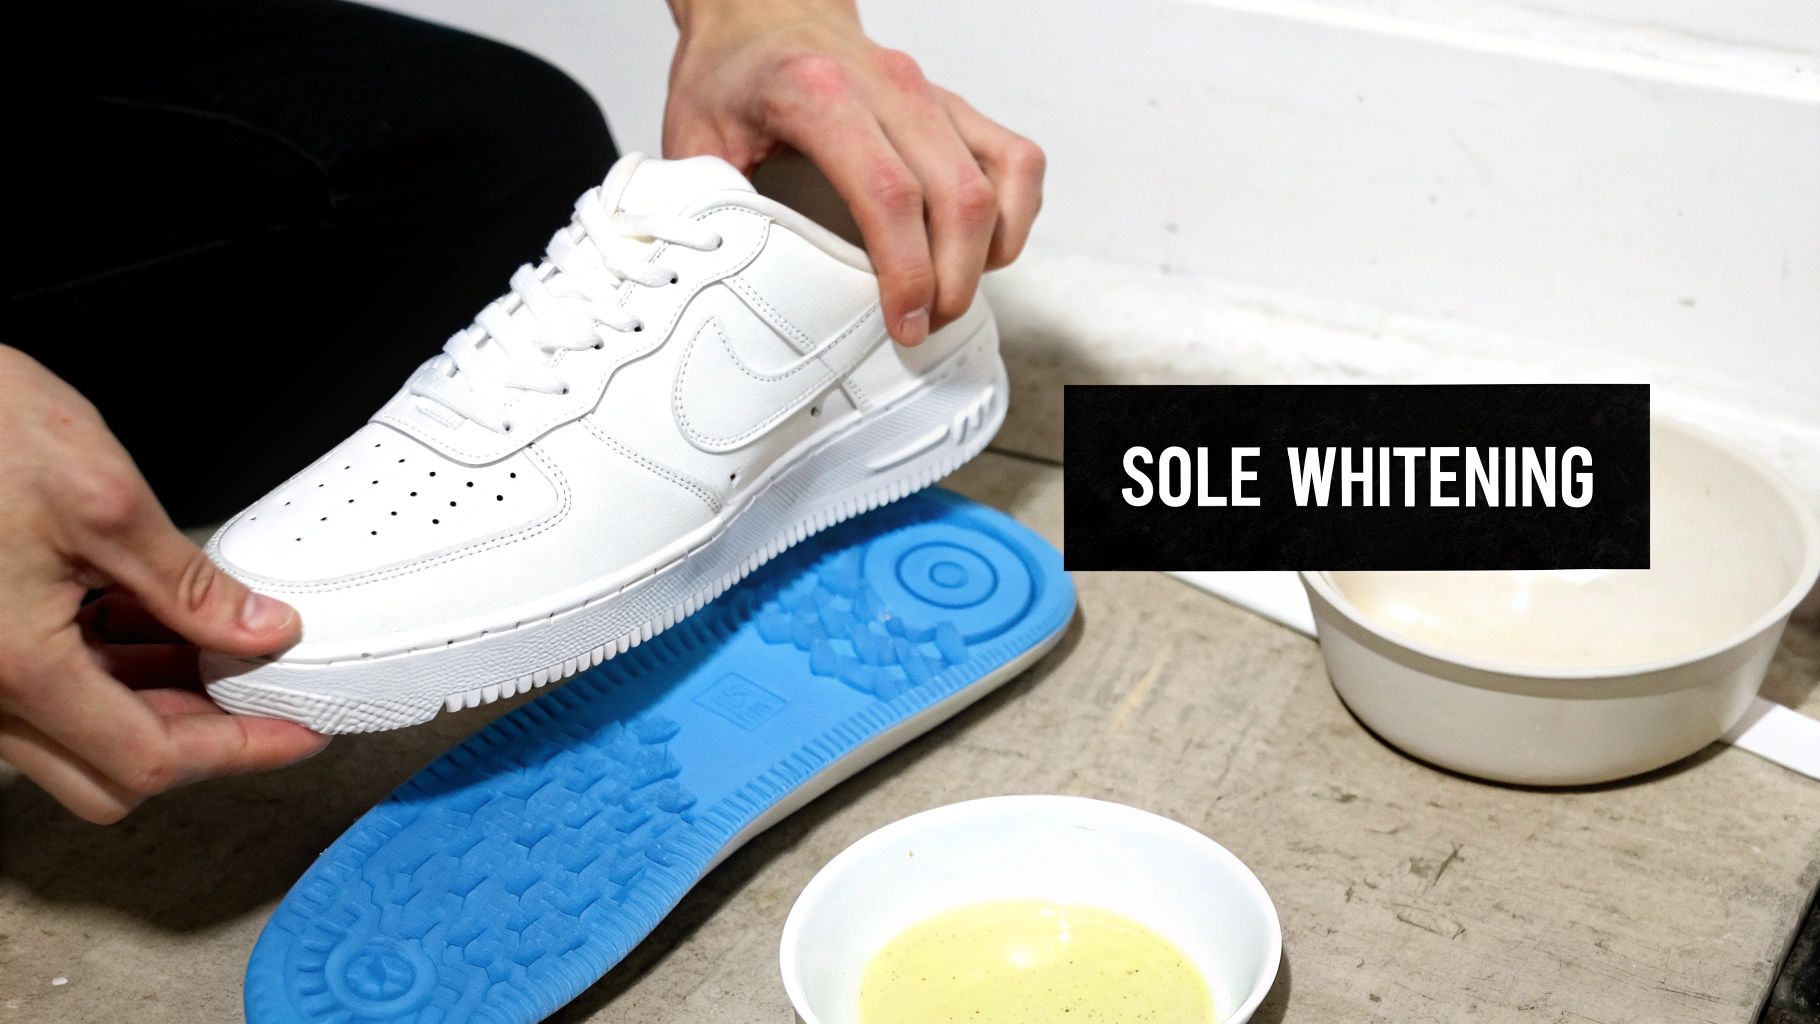
Reversing Sole Yellowing (Oxidation)
This is the most advanced challenge in cleaning white Air Forces. The yellow or cream-colored tint on rubber soles is not merely dirt; it is a chemical reaction called oxidation. Exposure to UV light breaks down the polymers in the rubber, causing them to yellow. Standard scrubbing will not reverse this process.
White sneakers present unique maintenance challenges. White-on-white Air Force 1s are particularly susceptible to discoloration, and yellowed soles demand a specialized reverse oxidation treatment. The midsole is consistently the most difficult area to restore. For more on this topic, you can review some of Nike's expert resources on maintaining white footwear.
To combat oxidation, you need a dedicated sole whitening product. These are typically peroxide-based creams that, when activated by UV light, reverse the chemical yellowing process.
Follow this professional method for de-yellowing soles:
- Mask the Uppers: Carefully apply painter's tape along the seam where the midsole meets the leather upper. Sole whitening agents can damage leather, making a protective barrier non-negotiable.
- Apply the Whitening Agent: Using a small brush, apply a thin, even layer of the sole whitening cream over all yellowed rubber surfaces. Precision is key.
- Wrap in Plastic Film: Cover the treated areas with clear plastic wrap. This crucial step prevents the cream from drying out, allowing it to remain active on the sole.
- Activate with UV Light: Place the shoes in direct sunlight for several hours. The sun's UV rays act as the catalyst for the de-oxidation process. You may need to rotate the shoes periodically to ensure even light exposure.
- Assess and Repeat: After a few hours, remove the plastic wrap and wipe the cream away. If some yellowing remains, the process can be repeated until the desired icy-white finish is achieved.
Proper Drying and Protection Protocols
The cleaning process is not complete until the shoes are properly dried and protected. The drying phase is where many people inadvertently damage their footwear. Improper drying can lead to warped uppers, cracked leather, and misshapen silhouettes.
The most common mistake is impatience, leading to the use of direct heat sources. Applying high heat from a hairdryer, radiator, or direct sunlight effectively "cooks" the leather, stripping it of its natural oils and leaving it brittle and prone to cracking.
Furthermore, intense heat can compromise the adhesives bonding the upper to the midsole, potentially causing separation over time. Patience is the most valuable tool in this final stage.
The Science of Air-Drying
The only correct method for drying your footwear is to air-dry them.
Place them in a cool, dry, well-ventilated area indoors, away from direct heat sources or sunlight. Proper air circulation is critical; it facilitates even moisture evaporation and prevents the formation of water spots or mildew.
This is where your shoe trees serve their final, crucial purpose. Keeping them inside the shoes during the drying process is essential.
- Moisture Absorption: High-quality cedar shoe trees actively draw moisture from the shoe's interior, significantly reducing drying time.
- Shape Retention: As leather dries, it naturally contracts. The shoe trees provide an internal form, ensuring the sneaker dries back to its original shape and preventing toe box collapse.
Expert Takeaway: A proper air-dry will take 8 to 12 hours, potentially longer in humid conditions. Never wear the shoes until they are 100% dry internally and externally. Wearing damp footwear is not only uncomfortable but also stretches the material and creates an environment for bacterial growth.
Applying a Protective Barrier
Once your Air Forces are completely dry and re-laced, a final step will protect your work and simplify future cleaning. Apply a quality sneaker protector spray to create an invisible, breathable barrier over the shoe.
This layer acts as a prophylactic, helping to repel water, dirt, and stains before they can penetrate the leather.
Ensure you select a spray formulated for synthetic leather that allows the material to breathe. Heavy-duty waterproofers can seal the leather's pores, which traps moisture and can contribute to yellowing. A light, even coat is all that is required.
This final step differentiates a simple clean from a comprehensive restoration. It preserves the crisp appearance of your white AF1s for longer and reduces the effort required for subsequent maintenance.
Frequently Asked Questions
Even with a detailed guide, specific questions arise. These are some of the most common inquiries we receive from the sneaker community, answered from a professional, materials-focused perspective.
Can I Put My White Air Force 1s in a Washing Machine?
We strongly advise against this. While it may seem like an efficient solution, a washing machine subjects the shoe to high heat, excessive water, and aggressive tumbling. This combination can warp the shoe's shape, crack the synthetic leather, and degrade the adhesives that bond the shoe together. Careful, methodical hand-cleaning is the only method that ensures the preservation of your footwear.
How Can I Reduce Creases in the Toe Box?
Creasing is an unavoidable result of wearing your footwear, but its severity can be managed. The most effective preventative measure is to insert shoe trees immediately after taking them off. This helps the leather reset and prevents deep creases from becoming permanently set.
Some advocate for using an iron on a low setting with a damp towel over the toe box. While this technique can work, it carries a high risk of causing irreversible heat damage if performed incorrectly.
Our Pro Tip: For safe and consistent results, high-quality shoe trees are the superior tool. They are not merely for storage; they are an essential preservation device for maintaining the AF1's classic silhouette.
What Is the Best Way to Address Scuffs on the Leather?
The appropriate method for scuff removal depends on the severity. For light surface marks, a targeted approach is best.
Apply a small amount of cleaning solution to a soft-bristled brush. Work the resulting foam into the scuffed area with a light circular motion, then immediately wipe the area clean with a microfiber towel. This typically lifts the mark without affecting the leather's finish.
For deeper scuffs where the material is physically abraded, you may have some success with a dedicated sneaker eraser. Avoid abrasive tools like magic erasers or the scouring side of a kitchen sponge, as these will permanently scratch the factory finish.
How Often Should I Deep Clean My Air Forces?
There is no single answer, as frequency depends on wear patterns and environment. However, we can provide a solid framework for maintenance.
- For daily wear: Perform a quick wipe-down of the midsoles and any visible spots after every few wears. This proactive upkeep minimizes the need for more intensive cleaning sessions.
- For occasional wear: Conduct a deep clean as needed when they appear soiled.
As a general guideline for regular use, a full deep clean, as detailed in this guide, should be performed every 1-2 months. Consistent, preventative maintenance is always more effective than reactive, intensive cleaning.
Ready to provide your Air Forces the professional-grade care they require? The Gold Standard All-Natural Shoe Cleaner is engineered to break down dirt and stains without the harsh chemicals that can damage your investment. Protect your collection with a cleaner trusted by those who understand the difference.