
A box-fresh pair of white Air Force 1s represents a clean slate. However, daily wear inevitably introduces dirt, scuffs, and a general layer of grime that compromises their iconic, crisp appearance. The question isn't if they'll get dirty, but how to properly restore them without causing damage.
This guide provides a professional, materials-focused methodology for cleaning your AF1s. We will bypass common household "hacks" and shortcuts—such as machine washing—that can permanently degrade the leather, compromise structural adhesives, and damage the stitching.
Instead, we will detail a specialist-level technique that cleans effectively while preserving the sneaker's integrity. Consider this not a quick fix, but a proper maintenance regimen for a timeless piece of footwear.
The Importance of a Professional Cleaning Method
The Air Force 1 has been a cultural staple since its debut in 1982, with Nike selling an estimated 10 million pairs annually. This ubiquity makes proper care knowledge essential for any owner.
Industry data indicates that while a majority—up to 70%—of owners attempt to clean their AF1s within the first six months, a significant portion employ methods that ultimately cause harm. You can explore the history of sneaker care further at Culture Kings.
Adopting a dedicated, professional approach offers distinct advantages over improvised solutions:
- Material Preservation: It protects the leather’s natural finish and oils. Harsh detergents or bleach can cause cracking and accelerate yellowing over time.
- Structural Integrity: Correct techniques maintain the strength of the shoe’s adhesives and stitching. A machine wash cycle, by contrast, can irreversibly compromise these bonds.
- Effective Results: By targeting different components—leather uppers, rubber midsoles, and laces—with appropriate tools and pressure, you achieve a uniform, thorough clean.
At Gold Standard, our philosophy is to treat footwear as a valuable asset. The right cleaning process is not just about aesthetics; it is about preservation and extending the life of a classic design.
This guide details the exact methods used by footwear care specialists to address everything from daily dirt to stubborn scuffs. You will learn what tools to assemble, why a pH-balanced cleaner is critical for leather, and how to execute a flawless restoration. By adopting these field-tested techniques, you can confidently protect your investment and maintain your sneakers in prime condition for years to come.
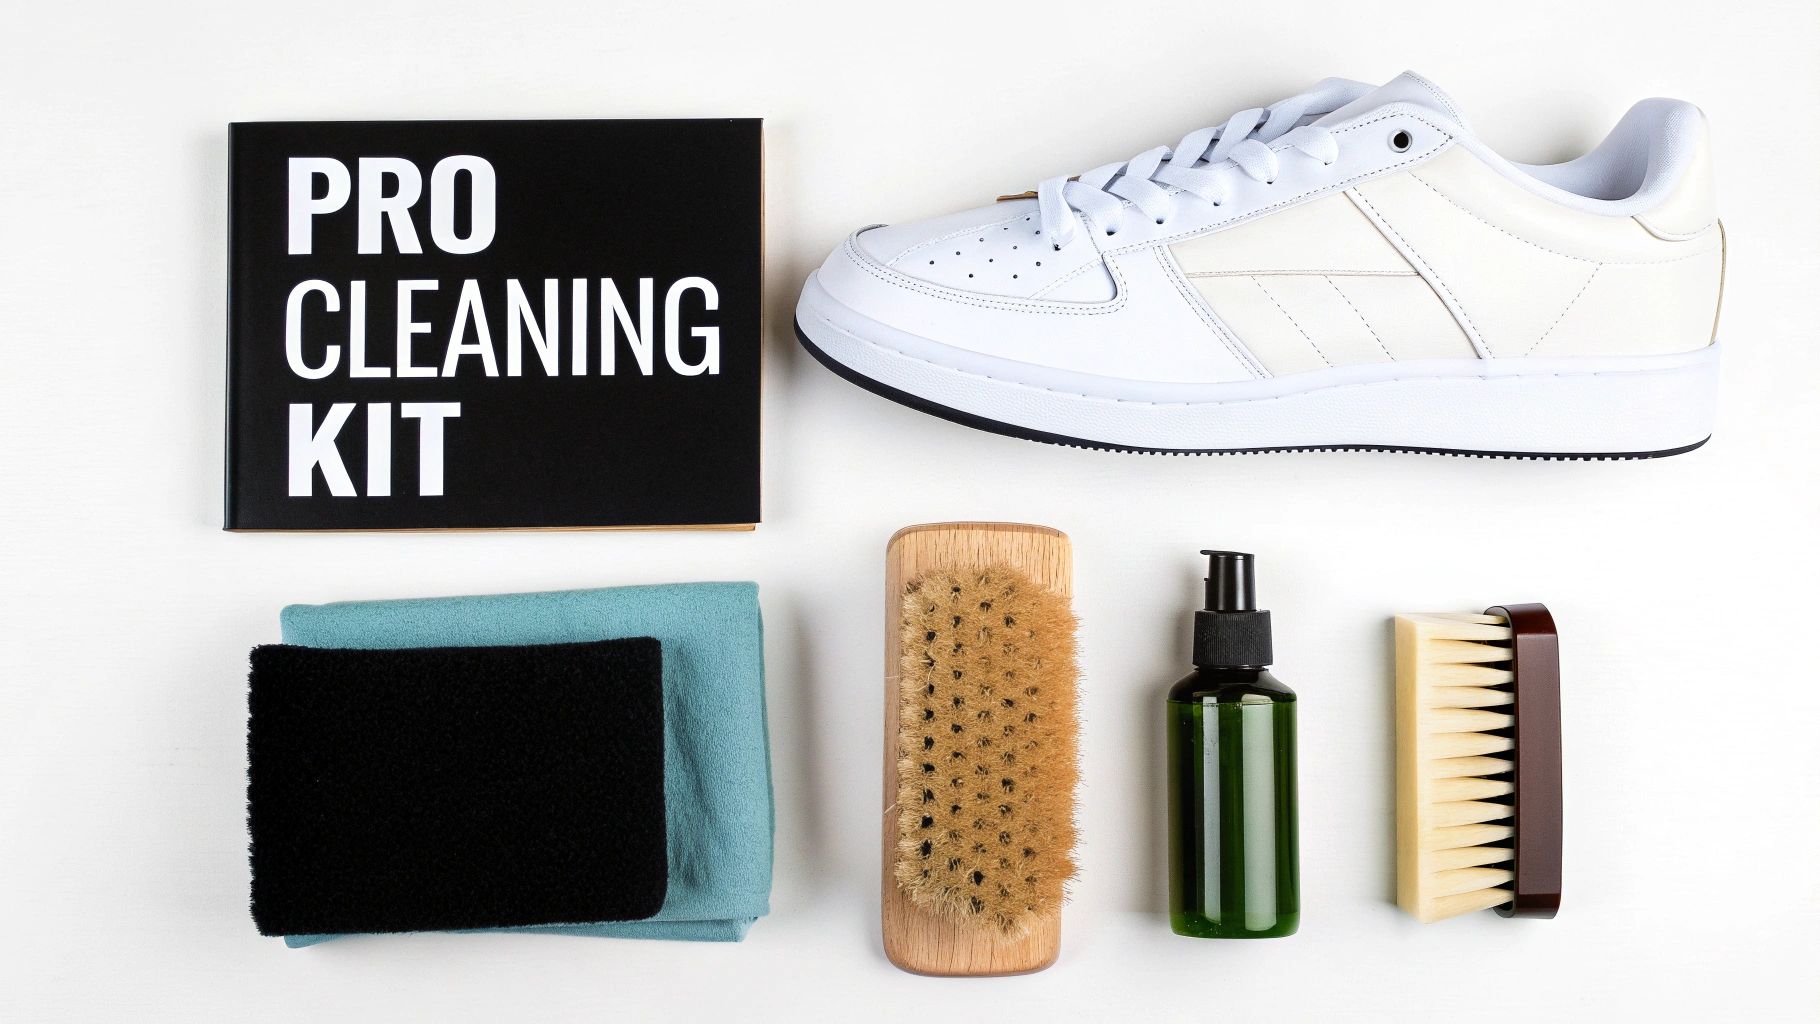
Assembling Your Professional Cleaning Toolkit
Effective cleaning is contingent on using the correct tools. While an old toothbrush and dish soap are readily available, this approach is the fastest way to damage a pair of AF1s. Household cleaners often contain harsh surfactants that can strip the leather's factory finish, leading to a dull, yellowed appearance.
Building a dedicated kit is a direct investment in the longevity of your footwear. Each component is designed for a specific purpose, engineered to work with the shoe's materials, not against them. This is the foundation for achieving a like-new appearance without inducing long-term damage.
The Essential Tools for Restoration
The difference between a superficial wipe-down and a true restoration lies in the equipment. A critical principle is the use of different brushes for different surfaces. One would not use a stiff, abrasive brush on delicate leather uppers.
Here are the necessary components for your toolkit:
- Soft-Bristle Brush: This is non-negotiable for the leather uppers. A quality brush, typically made from hog hair, is gentle enough to work a cleaning solution into a foam without scratching the surface. It effectively penetrates the grain and seams to lift embedded dirt.
- Medium-Bristle Brush: Reserve this more robust brush for the midsoles and outsoles. Its stiffness is required to scrub away scuffs and caked-on grime from the rubber—a task a soft brush cannot accomplish.
- Premium Cleaning Solution: The cleaning agent is paramount. You require a formula that is effective on dirt but gentle on leather. Look for a pH-neutral solution, such as the Gold Standard All-Natural Sneaker Cleaner, which is formulated to break down stains without desiccating the leather.
- Microfiber Towel: Avoid old t-shirts or paper towels. A high-quality microfiber towel is essential for drying. Its fibers are highly absorbent and draw moisture away efficiently without leaving behind lint or creating micro-scratches.
While using household items may seem convenient, the potential for irreversible damage is substantial.
Toolkit Comparison: Gold Standard vs. Common Household Items
This table outlines why dedicated sneaker care products are superior to common household alternatives.
| Component | Gold Standard Recommendation | Common Household Item | Material Analysis (Potential Damage) |
|---|---|---|---|
| Cleaner | pH-neutral sneaker solution | Dish soap, all-purpose cleaner | Harsh chemicals strip protective oils, leading to cracking, yellowing, and a dull finish. |
| Upper Brush | Soft-bristle hog hair brush | Old toothbrush, kitchen sponge | Abrasive bristles and sponges can scratch and scuff the smooth leather surface. |
| Sole Brush | Medium-bristle synthetic brush | Scouring pad, wire brush | Excessively aggressive. These can permanently scratch and gouge the rubber midsole. |
| Drying Cloth | Lint-free microfiber towel | Paper towels, old cotton t-shirt | Can leave behind lint and fibers; some materials are slightly abrasive. |
Investing in a proper kit is not merely about cleaning sneakers—it is about preserving them. It marks the difference between a temporary fix and maintaining a collection you can be proud of for years.
The Deep Cleaning Process: A Step-by-Step Guide
The key to restoring heavily worn Air Force 1s is not aggressive scrubbing, but a careful, methodical process that lifts dirt without harming the leather. Patience is the element that distinguishes a quick wash from a true restoration.
First, prepare the sneakers. Remove the laces and insert a quality pair of shoe trees. This step provides a firm, stable surface for cleaning, preventing the toe box from collapsing. It also ensures the sneaker maintains its correct shape during the drying phase.
Restoring the Leather Uppers
Begin with the uppers. In a bowl of cool water, add a few drops of a premium cleaning solution, such as our Gold Standard All-Natural Sneaker Cleaner. Always use cool water; hot water can weaken the adhesives that bond the shoe's components.
Dip your soft-bristle brush into the solution and begin working it into the leather. The objective is to generate a consistent foam. Use small, circular motions with light to medium pressure. The foam and bristles perform the work, making aggressive scrubbing unnecessary.
Expert Technique: Clean the shoe in sections—address the toe box, then a side panel, and so on. This prevents the cleaning solution from drying on the surface, which can leave a chalky residue.
Concentrate on details like the stitching and seams where panels meet, as dirt tends to accumulate in these areas. A soft brush is ideal for cleaning these crevices without fraying the threads. After cleaning a section, immediately wipe away the soiled foam with a clean, damp microfiber towel to lift the dislodged dirt completely from the shoe.
Cleaning and Reviving Laces
Never attempt to clean your AF1s with the laces inserted. This prevents proper cleaning of the tongue and eyelets and leaves the laces soiled. Always remove them for a separate treatment.
The process is simple and effective:
- Fill a small bowl with cool water and a small amount of your cleaning solution.
- Submerge the laces and allow them to soak for at least 30 minutes. For heavily soiled laces, a one-hour soak is recommended.
- After soaking, rub the laces against themselves between your hands to work out any remaining dirt.
- Rinse them under cool, running water until no suds remain.
- Squeeze out excess water and hang them to air dry.
Avoid using bleach. While it whitens, it is a harsh chemical that degrades the cotton fibers in your laces, causing them to yellow and become brittle over time. A quality sneaker cleaner will achieve the desired brightness without causing damage.
Restoring the Midsole and Tackling Stubborn Stains
With the uppers clean, focus on the shoe's foundation: the midsole and outsole. This area requires a different approach. The classic textured rubber, while excellent for traction, readily collects dirt, grime, and scuffs.
Switch from the soft brush to a stiffer, medium-bristle brush. Here, you can apply more significant pressure without risking scratches. The goal is to penetrate the texture and dislodge embedded dirt that a soft brush cannot reach.
This visual guide outlines the essential workflow for a proper deep clean, from initial preparation to the final touches on the laces.

Following this methodical flow ensures no step is missed and yields consistent, professional-level results every time.
Advanced Techniques for Persistent Blemishes
Even after a thorough cleaning, some stains may persist, such as scuffs from contact with curbs, faint grass stains, or the initial signs of yellowing. These require targeted spot treatment.
For these areas, apply a small amount of cleaning solution directly onto the stain. Allow it to penetrate for a minute to begin breaking down the discoloration before scrubbing with your medium-bristle brush.
At Gold Standard, we advocate a "less is more" approach. Begin with light pressure and gradually increase as needed. Applying excessive force initially can spread the stain rather than lift it, particularly with colored scuffs.
Patience is crucial. Some deeply embedded dirt, especially on the outsole, may require a second or third application. Work the area, wipe it clean with your microfiber towel to assess progress, and repeat if necessary. This controlled technique prevents abrasion to the rubber while ensuring complete stain removal.
Addressing Common Midsole Issues
The brilliant white midsole is an AF1 signature, but it is also susceptible to specific types of marks. Knowing how to address them is key to maintaining the shoe's iconic look.
- Black Scuff Marks: These are typically surface-level material transfers. A medium-bristle brush and a quality cleaner will lift most of these with direct, circular scrubbing.
- Grass Stains: The pigments in grass can be tenacious. Applying the cleaning solution directly to the stain is vital. Let it sit for several minutes to break down the chlorophyll before you begin scrubbing.
- Early-Stage Yellowing: Over time, oxidation can cause midsoles to yellow. While reversing advanced yellowing often requires specialized products, regular, thorough cleaning with a pH-neutral solution helps remove the surface contaminants that accelerate this process.
Restoring the midsole is often the most satisfying part of the cleaning process. It creates the sharp, clean contrast that makes the entire sneaker appear new again and demonstrates the value of a detail-oriented, professional-level approach.
Post-Cleaning Care: Drying and Protection
The cleaning process is complete, but the subsequent steps of drying and protecting your Air Force 1s are equally critical. Rushing this final phase can negate your efforts, resulting in warped leather, watermarks, and a misshapen sneaker.
The Importance of Proper Drying
The cardinal rule is to allow your footwear to air dry naturally. This requires patience but is the only method that ensures a safe outcome. Place them in a well-ventilated room with a consistent temperature, away from any direct heat sources.
Direct heat from radiators, space heaters, or sunlight is detrimental to leather. It extracts moisture too rapidly, leading to cracking and can even compromise the integrity of the sole's adhesive. This is a non-negotiable step to avoid.
Maintaining Sneaker Shape
As your AF1s dry, it is essential to maintain their classic silhouette. This is where the shoe trees used during preparation become important again.
Re-insert cedar or plastic shoe trees immediately after cleaning. This supports the sneaker’s structure, particularly in the toe box, and prevents creasing as the leather dries and contracts.
If shoe trees are unavailable, an effective alternative is to stuff them with clean paper towels or newspaper. This technique serves a dual purpose:
- Shape Retention: The paper provides an internal structure, preventing the upper from collapsing.
- Moisture Wicking: It actively absorbs moisture from the shoe's interior, accelerating the drying process from the inside out.
Pro Tip: Check the paper every few hours. Once it feels damp, replace it with fresh, dry paper. Saturated paper ceases to be effective and can create a musty environment—the opposite of the desired outcome.
Applying a Protective Barrier
Once your Air Force 1s are completely dry—and not before—it is time for the final protective step. Applying a high-quality sneaker protector spray will simplify future cleaning efforts.
A quality protector, like the Gold Standard Water & Stain Repellent, creates a hydrophobic barrier on the leather. This causes liquids to bead up and roll off the surface rather than soaking in and causing stains. It is your primary defense against sudden rain or accidental spills.
Hold the can approximately six to eight inches from the sneaker and apply a light, even coat. A single, consistent pass is sufficient. Allow the shoes to cure for a full 24 hours before wearing them. This step not only repels stains but also helps block the UV radiation that contributes to yellowing, significantly extending the life of their brilliant white finish.
Critical Cleaning Mistakes to Avoid with Air Force 1s
Many well-intentioned cleaning attempts result in irreversible damage due to misinformation. The internet is replete with "hacks" that can ruin your footwear. Understanding what not to do is as important as learning the correct cleaning methodology for your white Air Force 1s.
Avoiding these common errors is the first step toward true sneaker preservation. Countless pairs have been destroyed by simple, preventable mistakes.
Why Machine Washing Is Not an Option
The number one rule is to never place your Air Force 1s in a washing machine or dryer. While it may seem like an efficient solution for heavy soiling, the combination of intense heat, prolonged water saturation, and mechanical tumbling is a recipe for disaster.
The aggressive cycle degrades the adhesives bonding the upper to the midsole, causing separation. It also warps the leather and can tear the stitching, compromising the shoe's entire structure. A washing machine treats your footwear like laundry, not the structured leather goods they are.
Debunking Dangerous DIY Methods
The temptation to use a household product for a quick fix often leads to poor outcomes. Applying the wrong chemical to leather can strip its finish and permanently alter its color and texture.
Here are the most common offenders to avoid:
- Bleach on Leather: This is the most catastrophic and frequent mistake. Bleach is a powerful oxidant that breaks down the proteins in leather, making it brittle and causing an irreversible yellow discoloration. Once bleach-induced yellowing occurs, it cannot be undone.
- Abrasive Scrubbers: Magic erasers, scouring pads, and stiff-bristled kitchen brushes are too harsh for leather. They function like fine-grit sandpaper, scratching the surface and removing the factory finish, leaving a dull, unprotected area.
- White Vinegar Solutions: A simple one-to-one mix of white vinegar and water has limited efficacy. While it may address approximately 70% of minor surface scuffs, its effectiveness drops to roughly 35% on more substantial stains. Worse, when combined with other harsh chemicals, users risk damaging up to 20% of the footwear they treat. You can find more analysis on effective sneaker cleaning methods over at Shoe Wash.
Ultimately, avoiding these popular but destructive shortcuts is how you protect your investment. A patient, materials-first approach will always yield superior and safer results than any high-risk "hack."
Frequently Asked Questions
Even with a comprehensive guide, specific questions often arise. As footwear care specialists, we have addressed nearly every concern imaginable. Here are direct answers to the most common inquiries about cleaning white Air Force 1s.
What Is the Ideal Cleaning Frequency for White Air Force 1s?
Consistency is more effective than infrequent, aggressive cleaning sessions. The optimal schedule depends on your wear frequency.
If your AF1s are part of your daily rotation, a quick wipe-down of the uppers and midsoles with a damp microfiber towel every few wears is highly beneficial. This preventative measure stops dirt from setting in. For a full deep clean as outlined in this guide, we recommend a frequency of every 4-6 weeks, or more often if they are exposed to significant soiling.
Is It Safe to Use a Magic Eraser on Midsoles?
This is a common question, and the answer is a qualified yes. A magic eraser can be used, but only on the rubber midsoles, and only as a last resort for the most stubborn scuffs that do not respond to standard cleaning.
A magic eraser is a micro-abrasive, functioning like extremely fine sandpaper. While effective on durable rubber, it will permanently strip the factory finish from the leather uppers, leaving a dull, damaged patch. Keep it away from the leather at all costs.
If you must use one on the midsole, apply the lightest possible pressure and first test it on a small, inconspicuous area to observe the rubber's reaction.
How Can I Prevent My Air Force 1s From Creasing?
Creasing is an unavoidable characteristic of wearing leather footwear, particularly across the toe box. However, you can take steps to minimize its severity.
The best defense is proactive: use sneaker shields or crease protectors inside the shoes during wear. After you take them off (and especially after cleaning), insert quality shoe trees. This helps the leather retain its intended shape as it rests and dries, which significantly reduces the formation of deep, permanent creases.
For a complete cleaning system developed by footwear experts, explore the Gold Standard collection. Our pH-neutral cleaners and premium brushes are engineered to deliver the professional-grade results your sneakers deserve.