
Restoring your Vans to their original condition is an achievable goal, often in less than 30 minutes. However, success is not determined by aggressive scrubbing, but by methodical preparation. This initial phase is non-negotiable for achieving a professional-level clean without causing material damage.
Your Essential Vans Cleaning Toolkit
A proper restoration begins before any cleaning solution is applied. Assembling the correct tools is not a suggestion; it is the fundamental step that distinguishes a successful cleaning from a costly, irreversible mistake. We have frequently observed footwear damaged by generic household cleaners or abrasive kitchen brushes, resulting in faded colors, compromised adhesives, or permanently damaged suede.
A master craftsman does not use a sledgehammer for detail work; the same principle applies to shoe care. Delicate materials like suede or canvas cannot be treated with arbitrary implements. The correct tools are engineered to work in concert with the shoe's materials, not against them.
Preparation is Everything
Before introducing any liquid, a few preliminary steps are critical. First, remove the laces and any insoles. This allows for comprehensive cleaning and prevents moisture from being trapped internally, which can lead to microbial growth and the structural breakdown of the shoe.
Next, perform a thorough dry-brushing—a step often overlooked. Using a quality brush, go over the entire shoe—uppers, midsoles, and outsole—to dislodge all loose dirt, dust, and particulate matter. This prevents the immediate conversion of dry debris into mud upon the application of a liquid cleaner, significantly increasing the efficacy of the subsequent cleaning process.
As footwear care specialists, we observe more damage from improper technique than from the dirt itself. A common error is driving grime deeper into canvas fibers or the suede nap with a wet cloth as a first step. A meticulous dry brush is your first and most effective line of defense.
To streamline the process, this guide will help you select the correct cleaning protocol based on your Vans' material composition.
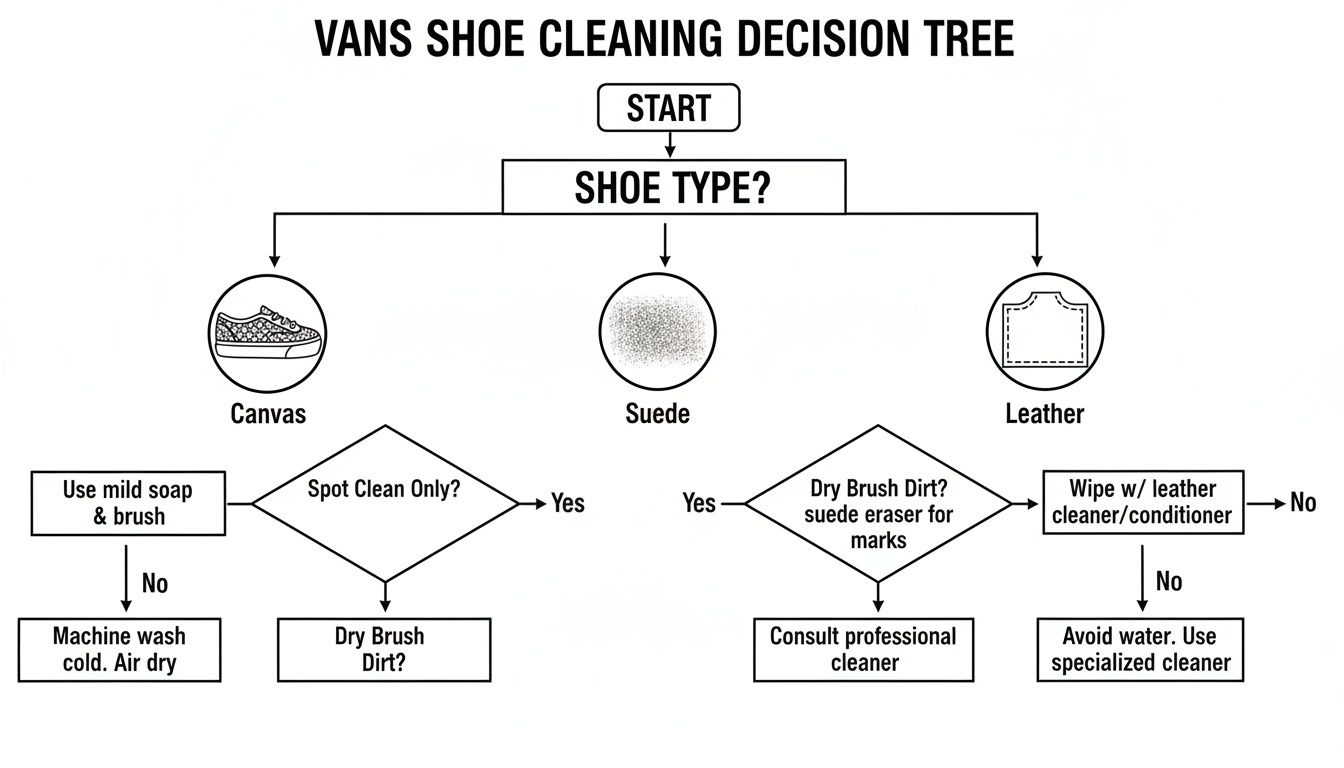
As the flowchart indicates, the first and most critical decision is identifying the material: canvas, suede, or leather.
The following table provides a quick reference for this purpose.
Vans Material Identification and Recommended Tools
This table will help you quickly identify your Vans' primary material and select the essential Gold Standard tools for the job.
| Vans Model / Material | Primary Characteristics | Essential Gold Standard Tool |
|---|---|---|
| Canvas (Authentic, Era) | Woven fabric texture, flexible, and relatively durable. | Premium Hog-Hair Brush & All-Natural Shoe Cleaner |
| Suede/Nubuck (Old Skool, Sk8-Hi) | Soft, fuzzy, or velvety texture. Very sensitive to water. | Soft-Bristle Brush & All-Natural Shoe Cleaner |
| Leather (Old Skool Leather) | Smooth or pebbled grain, can have a slight sheen. | Soft-Bristle Brush & All-Natural Shoe Cleaner |
| Rubber/Foxing (All Models) | The white rubber strip around the sole. | Premium Hog-Hair Brush & All-Natural Shoe Cleaner |
Correct material identification from the outset ensures you employ a method that cleans effectively without causing harm.
Selecting Professional-Grade Tools
The quality of your tools directly impacts your results. An old toothbrush, for example, has stiff synthetic bristles that can fray canvas or create micro-scratches on leather.
A professional toolkit should contain the following:
- A Medium-Bristle Brush: This is your primary tool for general cleaning on canvas and rubber sidewalls. A natural fiber brush, like the Gold Standard Premium Hog-Hair Brush, offers the ideal balance of strength to lift dirt and softness to protect the material.
- A Soft-Bristle Brush: This is indispensable for delicate materials. When working with premium suede, nubuck, or mesh, a soft brush allows you to clean without disturbing the material's unique texture.
- Microfiber Towel: An absorbent and gentle towel is required. A microfiber towel is optimal for blotting shoes dry and wiping away excess cleaner without leaving lint residue.
- Professional Shoe Cleaner: Always select a pH-neutral solution formulated specifically for footwear. Our Gold Standard All-Natural Shoe Cleaner is engineered to break down dirt and stains without harsh chemicals that can cause yellowing or weaken fabrics over time.
By starting with these methodical steps and the correct tools, you establish the foundation for a safe, effective clean that preserves the integrity of your Vans. This diligent preparation is what distinguishes amateur efforts from professional restoration and is the secret to extending the life of your footwear.
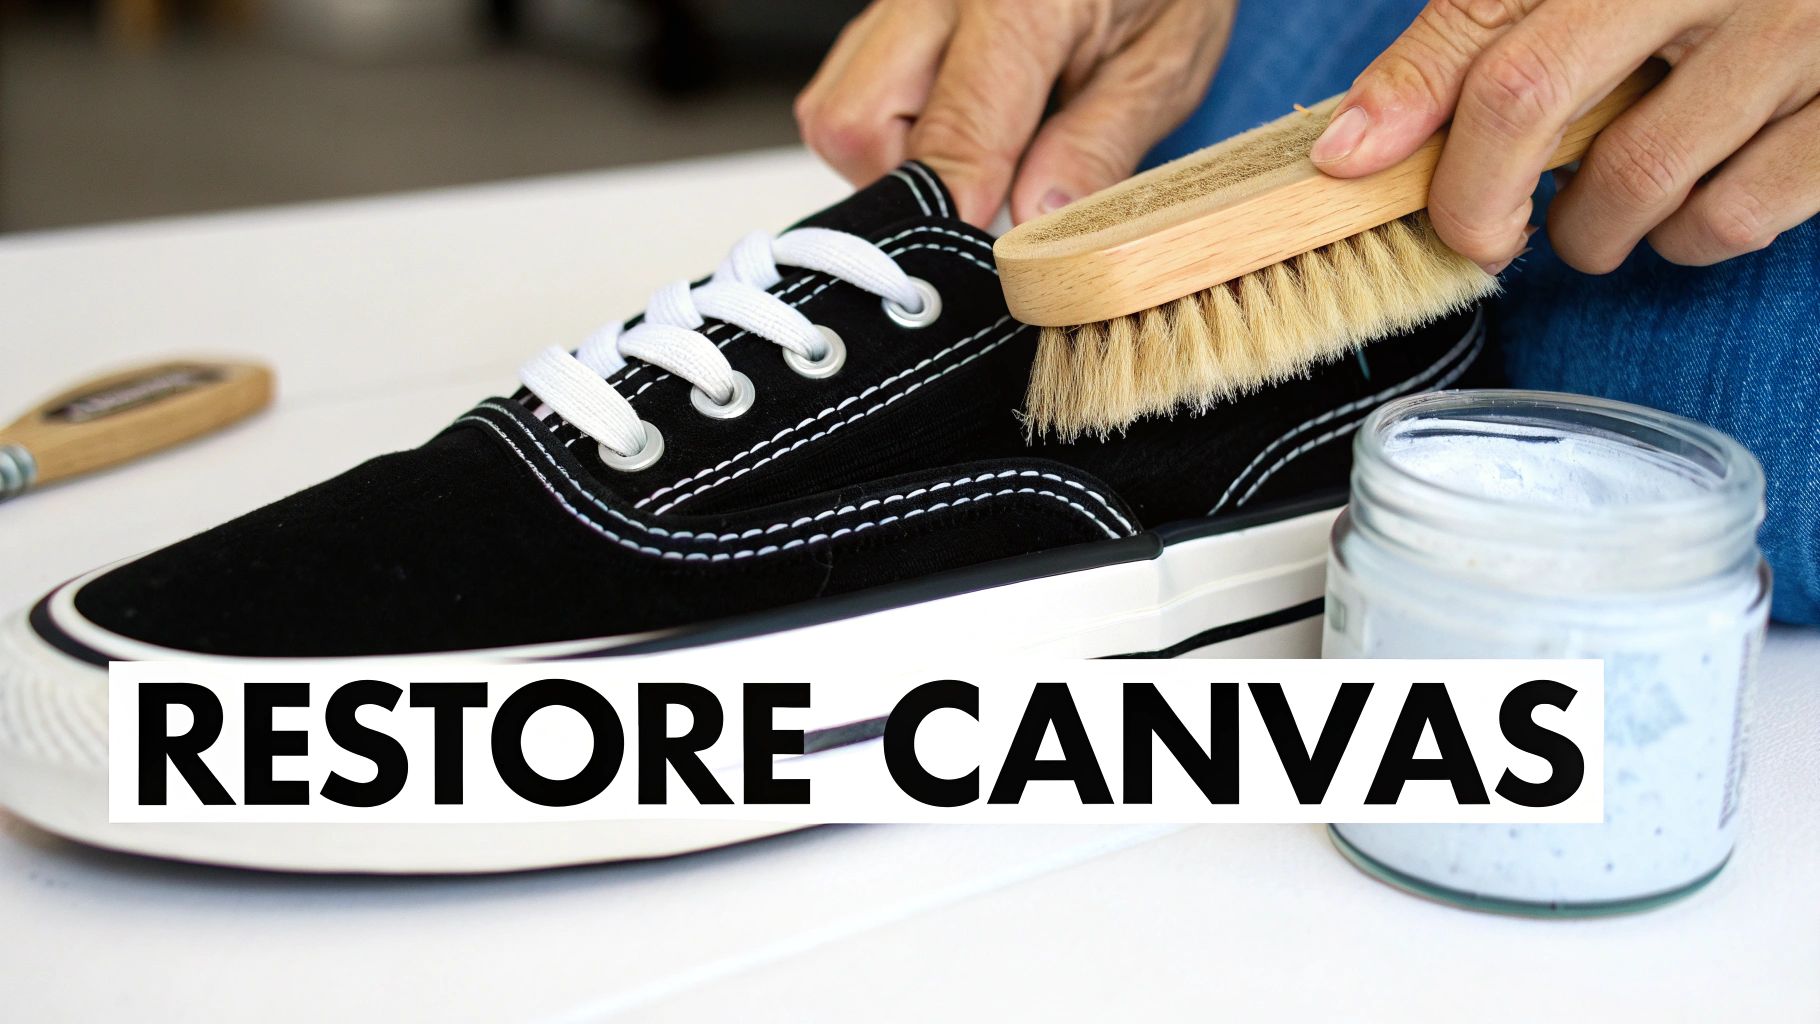
Restoring Classic Canvas Vans
Canvas is the original Vans material, forming the foundation of iconic models like the Old Skool and Authentic. It is durable and breathable, but its woven texture is a natural trap for dirt, dust, and grime that can embed deep within the fibers. Restoring them to pristine condition is a matter of intelligent cleaning, not increased force.
The common instinct is to use dish soap or laundry detergent, which is a significant error. Most household cleaners contain harsh chemicals, dyes, and surfactants that can worsen the shoe's appearance. They often cause yellowing as the canvas dries and leave behind a tacky residue that attracts more dirt.
A cleaner must be specifically formulated for footwear. A professional, pH-neutral formula like the Gold Standard All-Natural Shoe Cleaner is the correct choice. It is engineered to break down dirt at a molecular level, lifting it from the fabric without stripping color or damaging the canvas fibers.
The Correct Scrubbing Technique
Once you have mixed your cleaning solution with cool or lukewarm water, your technique is paramount. Many people employ aggressive back-and-forth scrubbing, which only frays the canvas and creates a fuzzy, worn appearance. The professional method involves a gentle but firm circular motion.
Dip a medium-bristle brush, like our Premium Hog-Hair Brush, into the solution and address one small section at a time. This circular action works the cleaner into the weave from all angles, lifting dirt out rather than merely displacing it. This is a controlled method for achieving a deep clean while preserving the fabric's original texture.
The most common mistake we see is oversaturation. Drenching canvas in water can cause color bleed and, more critically, compromises the adhesives holding the shoe together. A damp brush, not a soaking wet one, is the key to a controlled and effective clean.
Handling Deep-Set and Stubborn Stains
For tenacious stains—such as coffee or grass—that resist standard cleaning, a more targeted approach is required. Avoid harsh chemical spot treatments, which will likely leave a bleached area on your shoe.
A simple paste made from baking soda and water is a safer, more effective alternative.
- Create the Paste: Mix a small amount of baking soda with a few drops of water to form a thick, non-runny paste.
- Apply to the Stain: Use a finger or small brush to apply the paste directly onto the stain, working it gently into the fibers.
- Allow to Dry: Let the paste dry completely for approximately 15-20 minutes. As it dries, the baking soda absorbs and lifts the stain from the canvas.
- Remove the Paste: Once fully dry, use your dry brush to flake the paste away. The stain should lift with it. A final application of your cleaning solution will complete the process.
This technique combines gentle abrasion with the absorbent properties of baking soda to lift stains that surface scrubbing cannot remove.
Why You Must Avoid the Washing Machine
The temptation to use a washing machine is understandable, but it is arguably the single most destructive action you can take. The combination of prolonged water immersion, high heat, and mechanical tumbling is a recipe for catastrophic failure.
The heat and stress will degrade the adhesives bonding the rubber foxing to the canvas upper, causing sole separation—a form of damage that is nearly impossible to properly repair. Furthermore, laboratory tests indicate a single machine wash can weaken canvas fibers by up to 40%, drastically reducing the lifespan of your shoes. Hand-cleaning is the only method that ensures complete control and protects the material, color, and structural integrity of your footwear.
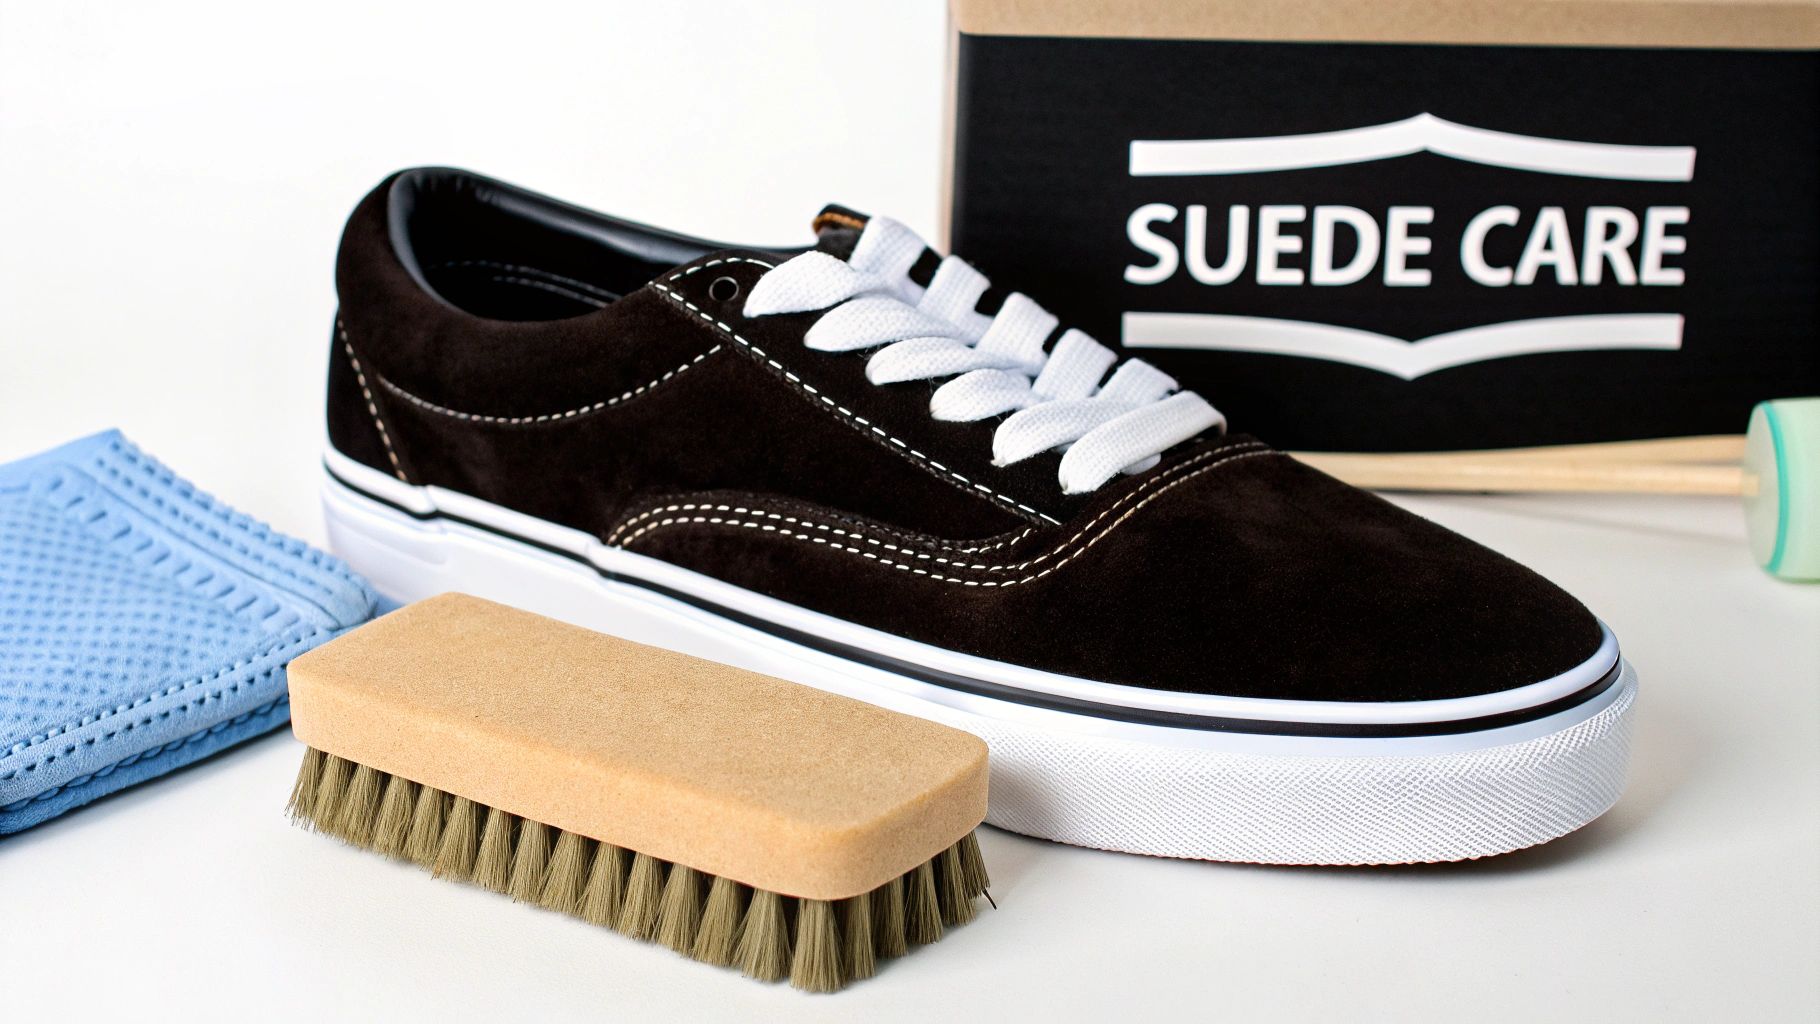
A Careful Approach to Suede and Nubuck
Suede and nubuck offer a distinct aesthetic, often featured on premium Pro models and special collaborations. Their velvety texture, known as the "nap," is their defining characteristic. However, this delicate surface is also their primary vulnerability—it is highly absorbent and does not tolerate cleaning errors.
Unlike canvas, these materials demand a delicate touch. The methodology for suede and nubuck care is almost entirely dry.
The primary rule for cleaning suede Vans: avoid water whenever possible. Water darkens the material, flattens the nap, and can leave permanent water spots upon drying. Aggressive techniques or improper tools will crush the fibers, creating shiny, bald patches that cannot be restored.
The Initial Dry-Cleaning Process
For everyday scuffs, dust, and light dirt, always begin with a dry process. Your first tool should be a dedicated suede eraser. This is not a standard pencil eraser; it is formulated to crumble during use, lifting grime from the suede's fibers rather than smearing it deeper.
Gently rub the eraser over the soiled areas. It will shed small particles, carrying the dirt away with them. This is a targeted treatment for surface-level contaminants.
After erasing, the nap will appear flattened and disordered. A proper suede brush is essential to restore it. Using the bristles (typically a combination of nylon and brass), gently brush the entire shoe in a single, consistent direction. This action lifts the nap, removes eraser residue, and restores a uniform, velvety appearance. Maintaining a unidirectional motion is key to a clean, even finish.
The most common mistake we see is people treating suede like canvas. They see a stain, panic, and reach for a wet cloth. This is a recipe for disaster. It immediately sets the stain, flattens the nap, and usually creates a larger, more obvious water spot. With suede, patience and dry tools are your greatest assets.
Tackling More Difficult Stains
For more stubborn stains, such as minor water spots or oil-based marks where dry methods are insufficient, a minimal amount of moisture may be introduced. This must be a controlled, targeted application, not a full wash.
Here is the professional protocol:
- Apply cleaner to the brush, not the shoe. Never spray or pour cleaner directly onto suede. Instead, apply a small amount of a specialized solution, like the Gold Standard All-Natural Shoe Cleaner, onto a soft-bristle brush.
- Generate a light foam. Dip the very tip of the brush in a small amount of water and work it into a light foam. The bristles should be damp, not dripping.
- Dab and blot; do not scrub. Gently dab the foamy brush onto the stain. Avoid aggressive circular scrubbing, which will spread the stain. The objective is to lift the stain out, not push it around.
- Blot immediately. Following the dabbing, press a clean, dry microfiber towel onto the spot to absorb the moisture and the loosened grime. Repeat this gentle process as needed.
This technique minimizes water exposure, preventing the suede from becoming saturated. Not all stains are identical, and different materials require distinct tactics. Here is a quick guide for common issues.
Common Vans Stains and Gold Standard Solutions
| Stain Type | Best for Canvas | Best for Suede/Nubuck | Best for Leather |
|---|---|---|---|
| Mud/Dirt | Gentle scrub with cleaner solution. | Dry brush first, then use a suede eraser. | Wipe with a damp cloth and leather cleaner. |
| Grass | Baking soda paste and spot treatment. | Suede eraser; minimal moisture if necessary. | Leather cleaner and a soft brush. |
| Oil/Grease | Cornstarch to absorb, then clean. | Cornstarch to absorb; specialized cleaner required. | Wipe immediately; use a dedicated leather cleaner. |
| Water Spots | Not typically an issue. | Dampen the entire shoe evenly with a brush, blot, and dry. | Wipe dry and apply conditioner. |
After any damp cleaning, allow your suede Vans to air-dry completely in a cool, shaded area away from direct heat.
Once they are fully dry, use the suede brush one final time. A final brushing will restore the nap's soft texture, which is critical for reviving its signature look and feel.
Cleaning Leather Accents and Rubber Sidewalls
It is the details that define a pair of Vans—the sharp contrast between the upper material, the leather Side Stripe, and the brilliant white rubber sidewalls. Over time, each of these components accumulates its own type of grime. Cleaning them correctly is what elevates a simple wipe-down to a professional-level restoration.
Leather requires a delicate approach that cleans and conditions simultaneously. The iconic waffle-patterned rubber, however, needs a more direct method to lift out impacted dirt. Mastering the techniques for both ensures a cohesive, factory-fresh appearance.
Reviving Leather Elements Safely
When cleaning leather accents like the Vans Side Stripe, the objective is to remove dirt without stripping away the material's natural oils. These oils are essential for maintaining softness and preventing the leather from drying out and cracking over time.
The best approach utilizes a soft-bristle brush and a small amount of a quality cleaner. Apply a small amount of Gold Standard All-Natural Shoe Cleaner onto the brush itself—never directly on the leather—and gently work it into the surface with small, circular motions. As soon as foam appears, wipe it away with a clean, damp microfiber towel.
The follow-up step is non-negotiable: condition the leather immediately after cleaning. A quality leather conditioner replenishes moisture, keeping the material supple and protecting it from future damage. This single extra step can significantly extend the life of any leather components on your Vans.
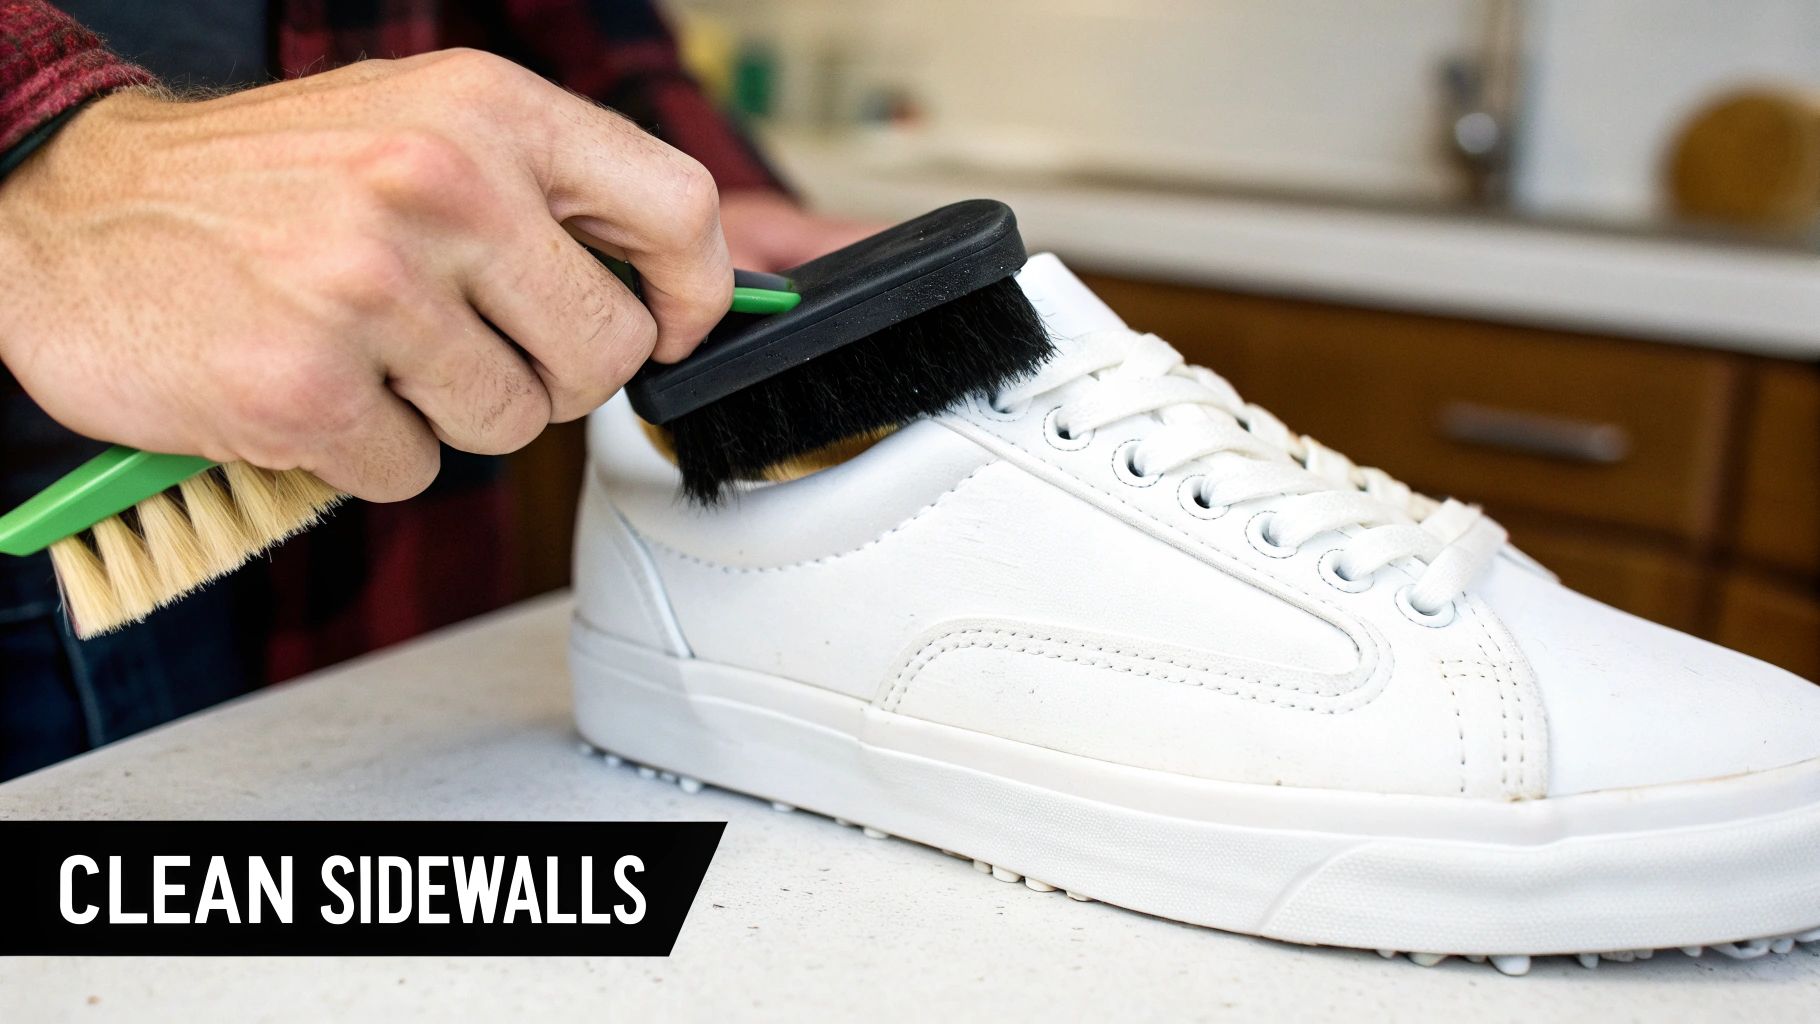
Restoring Brilliant White Rubber Sidewalls
Bright white sidewalls signify a fresh pair of shoes, but they are notoriously difficult to maintain. The textured rubber is a magnet for dirt, and a simple wipe often just smears the grime, leaving a dull, grayish tint.
Many people resort to chlorine bleach, which is a critical error. While it may seem like a quick solution, bleach is a harsh chemical that chemically burns the rubber. It causes permanent yellowing that makes the sidewalls appear old and brittle.
The most significant damage we see to rubber sidewalls comes from using household bleach. It's a shortcut that leads to irreversible chemical burns, turning the rubber a sickly yellow that no amount of scrubbing can fix. Always use a dedicated, pH-neutral cleaner.
The professional method is far safer and more effective. You will need a dedicated sole cleaner like our Gold Standard All-Natural Shoe Cleaner and a brush with stiff bristles. The Premium Hog-Hair Brush is ideal for this task; its bristles are tough enough to penetrate the rubber's texture without causing scratches.
Follow this procedure for a deep, lasting clean:
- Apply the Cleaner: Wet the brush, then apply a liberal amount of the cleaning solution directly onto the rubber sidewalls.
- Scrub Thoroughly: Use firm, circular motions to work the brush into the rubber. You will see a lather build, which is lifting the ground-in dirt and scuff marks to the surface.
- Wipe and Repeat: Use a microfiber towel to wipe away the dirty foam. For heavily soiled areas, a second application may be necessary to achieve a brilliant white finish.
This method is effective because it relies on the mechanical action of the brush combined with a powerful cleaner to physically lift dirt out of the rubber's pores, rather than on harsh chemicals. This is how you restore the sharp, clean contrast that defines your Vans—it is the definitive answer to how to clean Vans shoes for that out-of-the-box appearance.
Proper Drying and Long-Term Protection
You have completed the intensive cleaning phase. However, the final stage—drying and protection—is what solidifies your work and prevents regression. Mishandling this step can undo your efforts, leading to watermarks, material warping, and mildew.
The most common mistake is impatience. Using a hair dryer, placing shoes on a radiator, or leaving them in direct sunlight are all detrimental actions. High heat degrades the adhesives holding the shoe together, causing the sole to separate from the upper. It also makes the rubber brittle and can cause color fading.
The Only Way to Air-Dry
The only safe method is natural air-drying at room temperature. Select a location with good air circulation, away from direct heat or sunlight. Patience is the essential tool. Depending on ambient humidity and the shoe's saturation level, this can take anywhere from a few hours to a full day.
To accelerate the process and help your Vans maintain their shape, stuff them with clean, white paper towels or unprinted newspaper.
- It draws moisture from the interior. The paper acts as a wick, pulling dampness from the inside of the shoe.
- It maintains the shoe's structure. Packing them firmly—but not so tightly as to stretch them—prevents the canvas or suede from creasing or collapsing as it dries.
- For heavily saturated shoes, replace the paper. If the shoes were very wet, replacing the damp paper every few hours will expedite the drying process.
Ensure you do not use colored newspaper or magazines, as the ink can bleed onto the fabric and create new stains.
Lock It In with a Protective Barrier
Once your Vans are 100% dry—and they must be completely dry—it is time for protection. A high-quality protectant spray is a non-negotiable final step. It creates a hydrophobic barrier on the surface, causing liquids to bead up and roll off rather than being absorbed.
This single application makes a significant difference. It repels water, prevents dirt from embedding in the fibers, and simplifies future cleanings. It is a step that professionals never skip.
For correct application, follow these steps:
- Ensure ventilation. Always apply spray outdoors or in a well-ventilated area.
- Maintain distance. Hold the can approximately 6-8 inches from the shoe.
- Apply a light, even coat. Use a steady, sweeping motion. Do not saturate any single area.
- Allow it to cure. Let the shoes sit for several hours to allow the barrier to fully bond before wearing them.
A significant error is applying protectant to slightly damp shoes. The product is rendered ineffective. The barrier cannot bond to wet fibers, resulting in a patchy, useless shield that offers no real protection.
This final layer preserves your hard work. It is not merely about immediate appearance; it is about defending your Vans against future contaminants, ensuring they remain in pristine condition for longer.
Your Top Vans Care Questions, Answered
As footwear care specialists, we are frequently asked for advice on maintaining sneakers. When it comes to cleaning Vans, several questions consistently arise. Here are our answers, based on years of hands-on experience.
Can I Just Toss My Vans in the Washing Machine?
We understand the appeal of this shortcut. However, based on the damage we have consistently observed, we can never recommend it. A machine wash cycle is simply too aggressive for footwear construction.
The combination of prolonged water immersion, tumbling, and heat is catastrophic for the adhesives that bond the shoe together, leading directly to sole separation. Even on a gentle cycle, you risk warping the shoe's shape and fading its colors. For the integrity of your footwear, you must adhere to hand-cleaning—it is the only method that provides complete control.
How Do I Stop My White Vans From Turning Yellow?
This is a primary concern for owners of white footwear, and it is almost always preventable. Yellowing typically results from two main causes: using the wrong cleaning agent or improper drying.
The main culprit is chlorine bleach. While it seems like a logical choice for whitening, it induces a chemical reaction that permanently stains canvas and rubber yellow. Many standard household detergents are also problematic; they leave behind a soapy residue that oxidizes and turns yellow over time.
The best practice is to use a pH-neutral cleaner formulated for shoes. After cleaning, allow them to air-dry completely, but keep them out of direct sunlight. UV rays can cause discoloration on their own.
Here is a professional tip that is often overlooked: rinse thoroughly. Even a high-quality cleaner can leave trace residue that may yellow as it dries. A final wipe-down with a clean, water-dampened cloth is a critical last step.
What's the Safest Way to Clean Suede Vans?
Suede requires a distinct methodology. The key is to start dry and use as little moisture as possible. Water is the primary antagonist—it flattens the velvety nap and can leave permanent spots. Your essential tools are a quality suede eraser and a proper suede brush.
First, use the eraser to gently remove surface-level scuffs and dirt. Then, use the brush in small circles to lift the nap and restore its soft texture. For a more stubborn stain, apply a minimal amount of a professional suede cleaner onto the brush—never directly on the shoe. Dab the area gently, then immediately blot with a dry microfiber towel.
The guiding principle is simple: never saturate suede. A careful, targeted approach is the only way to clean it without permanently damaging the finish.
Can I Use a Magic Eraser on the Rubber Sidewalls?
Yes, but with caution. Magic erasers function as a fine abrasive, which makes them effective at removing tough scuffs from the durable rubber sidewalls (foxing).
The risk lies in allowing the eraser to contact the canvas or suede upper. Its abrasive texture can physically remove color from the fabric or fray the fibers, leaving a faded, damaged spot. If you choose to use one, confine its use strictly to the rubber components and work slowly and deliberately around the edges.
How Long Will My Vans Take to Dry?
Drying time depends on ambient humidity and the degree of saturation. As a general guideline, plan for at least 8-12 hours for them to air-dry at room temperature. If they required a deep clean, it could take a full 24 hours.
Do not rush the process. Using a hairdryer, placing them near a heat source, or leaving them in direct sun will damage the shoe's adhesives. To expedite drying and help them maintain their shape, stuff them with white paper towels. For very wet shoes, replace the paper every few hours. Patience is essential.
Your sneakers are an investment. Protecting them with professional-grade tools is the best way to ensure they last. The Gold Standard All-Natural Shoe Cleaner Kit provides everything you need to safely and effectively restore your entire collection. Don't settle for anything less than the best. Explore the complete kit and keep your shoes looking their best.