
Cleaning nubuck leather requires a specific, methodical approach. It is a delicate material that demands specialized tools—a dedicated brush and eraser for dry maintenance, and a pH-balanced foaming cleaner for deeper stains. Using water, household soaps, or harsh chemicals is a non-negotiable mistake. Adhering to the correct process is the only way to remove contaminants while preserving the material's signature velvety texture.
Understanding Nubuck: The Prerequisite to Proper Cleaning
Before any cleaning attempt, a clear understanding of the material is critical. Nubuck is a top-grain cattle leather that has been sanded or buffed on the grain side, or outside, to produce a slight nap of short protein fibers. This process yields a soft, velvet-like surface.
This luxurious finish comes at a cost: porosity. The fine nap that gives nubuck its characteristic feel also makes it highly absorbent to dirt, oils, and moisture. Though often confused with suede (which is made from the softer inner split of the hide), nubuck is technically more durable. Paradoxically, its absorbency makes it more susceptible to staining.
Why Common Cleaning Methods Cause Irreversible Damage
Field experience shows that most failed cleaning attempts stem from treating nubuck like standard smooth leather. This fundamental error leads to predictable and often permanent damage. The most common mistakes include:
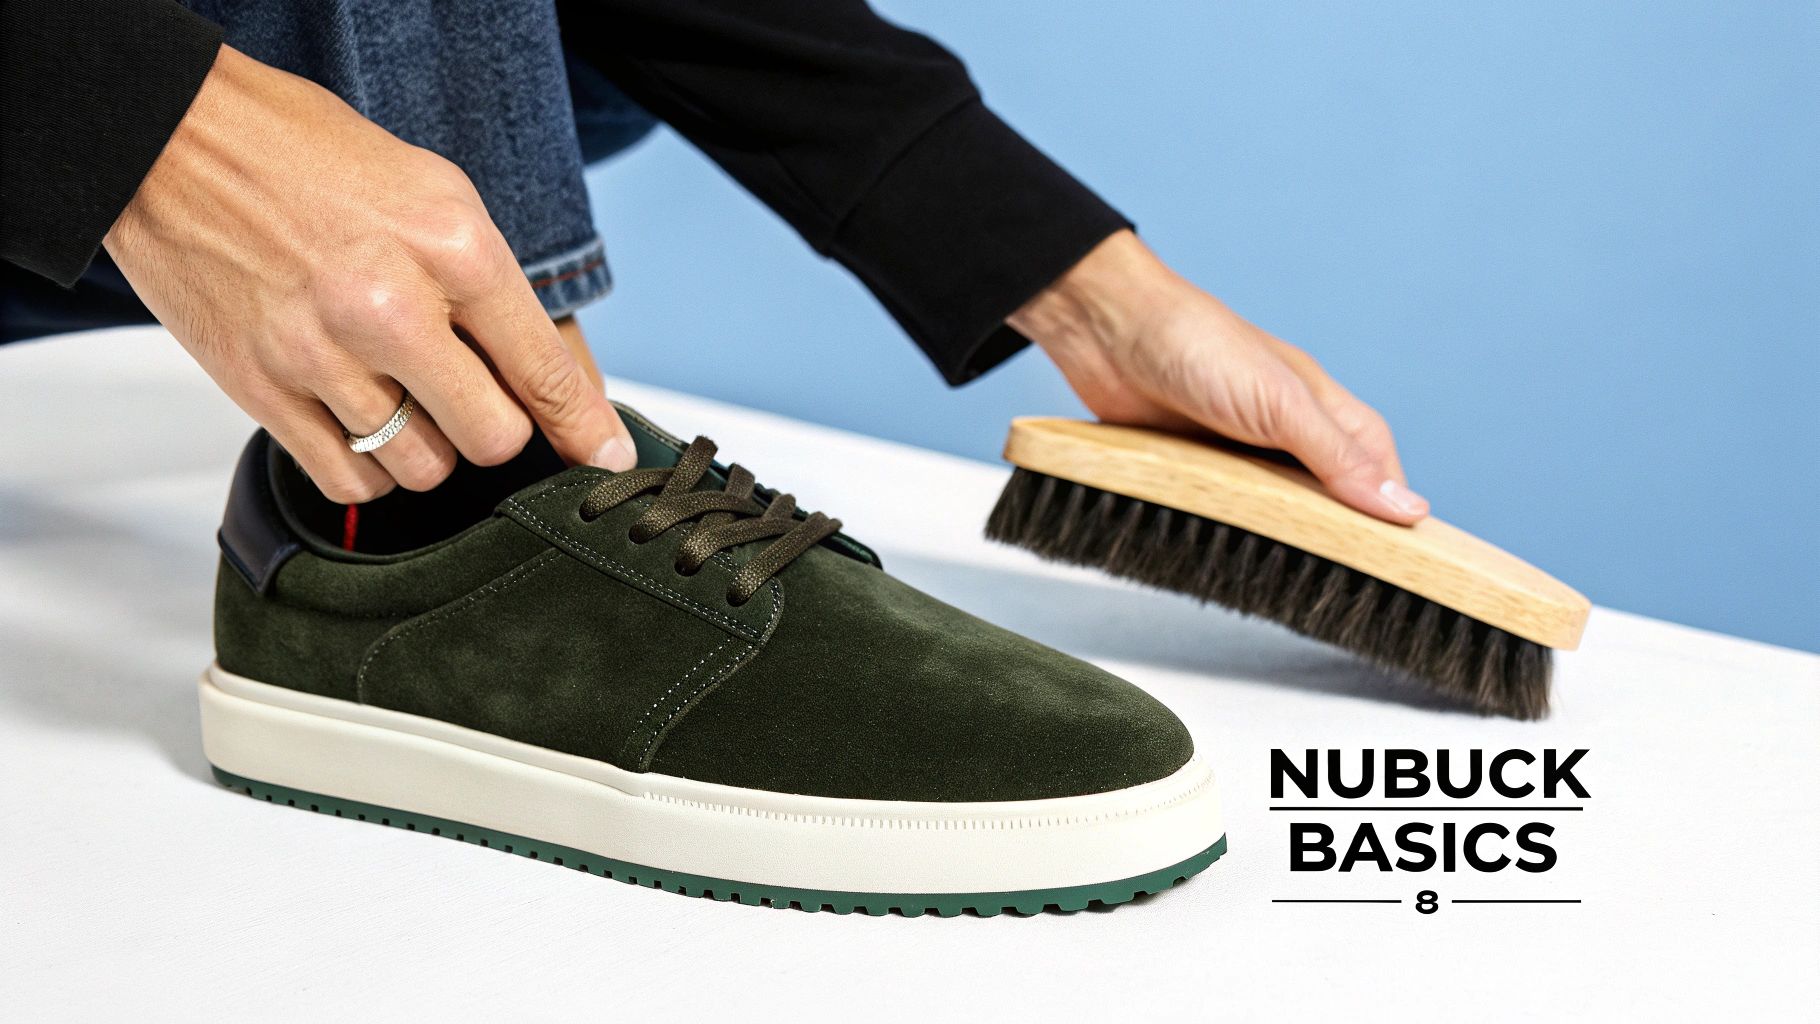
- Using the wrong brush: A standard shoe brush with stiff bristles will abrade and flatten the nap, permanently altering the texture and appearance of the leather.
- Applying harsh chemicals: Dish soap, detergents, and all-purpose cleaners are chemically incompatible with nubuck. Their alkaline pH strips the leather of its essential oils, leading to discoloration, stiffness, and eventual cracking.
- Oversaturating with water: Water is not a cleaning agent for nubuck. It absorbs unevenly, creating dark spots and tide marks as it dries, often making the footwear appear worse than before.
Internalizing these constraints is the first and most critical step. A successful restoration is built on respect for the material's properties; a costly mistake is not.
Based on industry data, improper cleaning techniques are responsible for an estimated 60% of nubuck footwear losing its signature nap within the first six months of ownership. On collector platforms, this type of damage can reduce resale value by up to 40%.
The Financial Stakes of Proper Care
The nubuck on your footwear is more than an aesthetic choice—it's an investment in a high-maintenance material that requires dedicated care. The global shoe care market was valued at $4.7 billion in 2023 and is projected to reach $7.3 billion by 2032, with nubuck-specific products representing a significant and growing segment.
For collectors and footwear enthusiasts, proper maintenance is non-negotiable. Investing in the correct products is not an expense; it is a measure to preserve the value of an asset. You can read the full research about the expanding leather care market to understand the industry's scale.
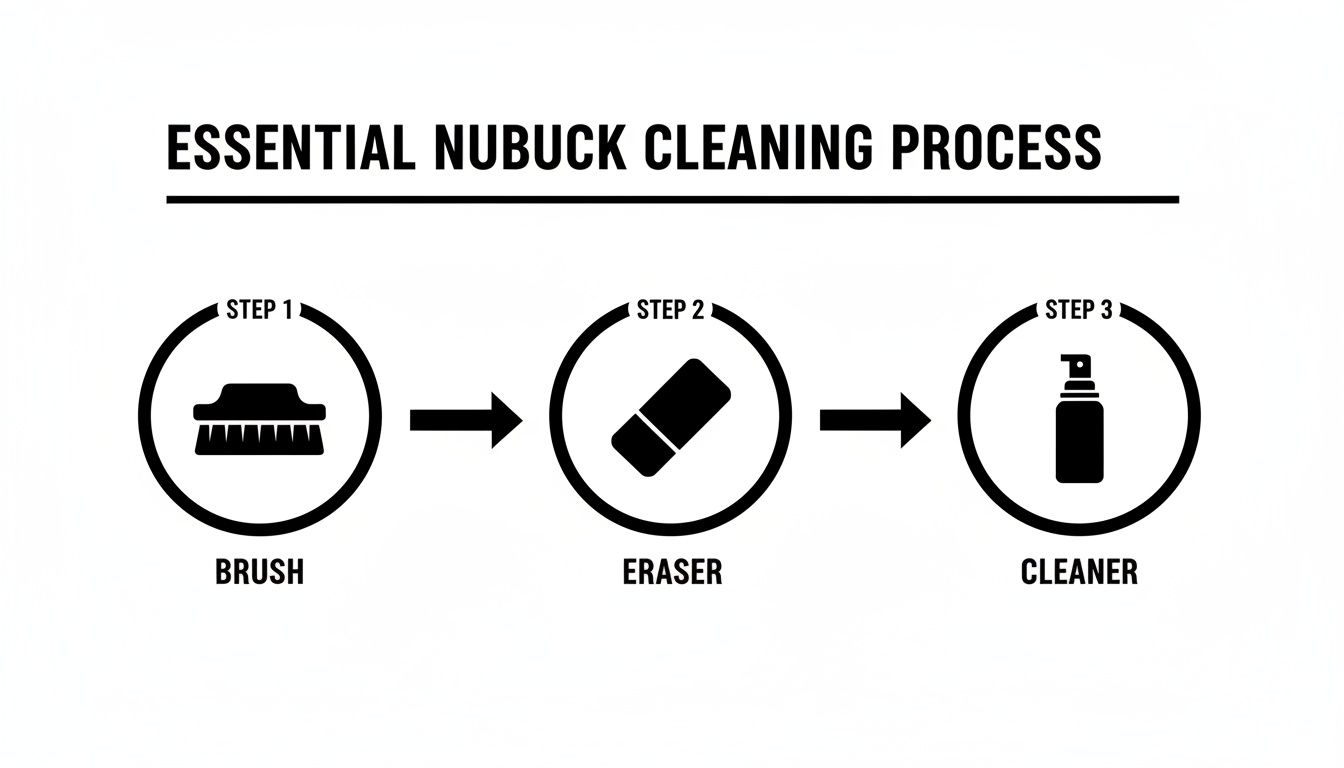
Assembling the Essential Nubuck Care Toolkit
Achieving a professional-level clean begins with the correct tools. The most common cause of irreversible damage to nubuck is the use of improper equipment—a generic brush, a household soap—turning a simple cleaning task into a costly error. Using the wrong tool is the fastest way to destroy the material's delicate nap.
This is the standard toolkit required to protect your investment. While our Gold Standard Ultimate Cleaning Kit contains all necessary components, the primary objective here is to explain the function of each tool. Understanding the purpose behind the equipment ensures consistent, high-quality results.
The Right Tool for the Job: A Comparative Breakdown
Not all cleaning tools are created equal. Applying a generic product to a specialized material like nubuck is functionally incorrect and will lead to poor outcomes. The following table specifies the necessary tools and explains why common substitutes are inadequate.
| Essential Tool | Primary Function | Avoid Using This Instead |
|---|---|---|
| Nubuck Brush | Gently lifts surface debris and restores the material's nap without causing abrasion. | A standard shoe brush. Its bristles are too stiff and will scratch and flatten the delicate protein fibers. |
| Nubuck Eraser | Creates controlled friction to lift dry scuffs, shiny spots, and minor stains from within the nap. | A pencil eraser. It is not designed for textiles and is likely to smear the stain or leave its own residue. |
| Foaming Cleaner | Lifts dirt to the surface without oversaturating the leather, thus preventing water spots and discoloration. | Dish soap or all-purpose cleaner. These are chemically too harsh, stripping essential oils and dyes, leading to a brittle, faded finish. |
These three items are non-negotiable components of a proper nubuck care kit. They are engineered to work with nubuck's unique texture, not against it, which is the defining factor between a restoration and a write-off.
The Dry Cleaning Essentials
The first phase of any cleaning process, before any liquid is introduced, must be a thorough dry clean. These tools are the foundation of your kit, designed for routine maintenance and to prepare the surface for deeper cleaning if required.
A Multi-Sided Nubuck Brush is the most valuable tool for this stage. Unlike a traditional polish brush, a quality nubuck brush features different surfaces for specific tasks: soft bristles for general dusting, and a firmer crepe or nylon section to reset the velvety nap. Many also include rubber nubs for addressing tougher, dried-on spots without aggressive action.
The next essential is the Nubuck Eraser. This is a dense block of rubber that crumbles with use, creating friction that lifts out scuffs, shiny patches caused by wear, and minor dry stains directly from the fibers—no liquids required.
With these two tools alone, you can effectively manage over 80% of common nubuck issues, such as daily dust accumulation, light scuffs, and surface dirt. This dry-first approach is critical; it removes loose particulates that would otherwise mix with a liquid cleaner to form a muddy paste, driving the soil deeper into the material.
Advancing to a Wet Clean
When a dry clean is insufficient, a liquid solution is the next step. This is where the risk of error is highest. The only safe and effective solution is a cleaner specifically formulated for nubuck.
Never use household cleaners. A product like dish soap has a high alkaline pH that will chemically strip the natural oils and dyes from the leather. Upon drying, the material will be left stiff, discolored, and brittle.
A gentle, pH-balanced foaming cleaner is the correct tool. The foam is the key functional component; it performs the cleaning action without oversaturating the material, which is the primary cause of water spots and tide marks. The foam lifts dirt and grime to the surface, allowing it to be wiped away with a microfiber towel rather than being pushed deeper into the leather. This provides the necessary balance of cleaning power and moisture control required for nubuck.
The Two-Phase Method for Cleaning Nubuck
For nubuck, a systematic approach is not merely a best practice—it is the only way to safeguard its delicate, velvety texture. The most common error is to immediately resort to aggressive cleaners. We utilize a proven, two-phase system that escalates treatment based on the level of soiling.
The guiding principle is to always begin with the most gentle technique first.
This process is divided into two distinct stages: The Dry Method for surface-level care, and The Wet Method for deeper, more significant cleaning tasks. Adhering to this sequence is non-negotiable for achieving professional results without damaging the leather.
Phase One: The Dry Method for Surface Maintenance
This is the mandatory starting point for every cleaning session. The Dry Method is the first line of defense against daily wear, designed to address dust, light dirt, and minor scuffs without using any liquid. This phase relies on a proper nubuck eraser and a specialized brush.
This method is ideal for routine maintenance, such as removing dust or reviving a nap that appears flat or shiny from use. Even in cases of dried, caked-on mud, the first action must be to use a brush to gently remove as much loose debris as possible before introducing a liquid cleaner.
The objective is to eliminate all surface-level contaminants. Bypassing this step is a classic mistake that transforms loose dust into a muddy paste when mixed with a cleaner, driving the grime deeper into the leather's pores.
Starting with a brush and eraser ensures the use of the least aggressive tool necessary for the job.
To execute this phase, use the soft bristles of your nubuck brush to gently sweep away dust from the entire shoe, working in a consistent direction to lift debris from the nap. For small scuffs or shiny spots, use the nubuck eraser. Apply gentle, firm pressure, rubbing back and forth over the mark. The eraser will crumble slightly as it works; this friction is what extracts the embedded grime from the fibers. After the mark is removed, use the brush again to clear away eraser particles and restore a uniform texture to the nap.
Phase Two: The Wet Method for Ingrained Stains
Only proceed to a wet clean if the dry method proves insufficient. This phase is reserved for stubborn, ingrained stains or widespread soiling. The critical factor here is control. A minimal amount of the correct cleaner must be used to avoid saturating the leather.
Industry data underscores the importance of proper maintenance. The global shoe care market is projected to grow from $4.47 billion in 2024 to $7.23 billion by 2032, driven by increased consumer awareness. This is logical, considering that nearly 75% of premium sneakers feature materials like nubuck or suede. Yet, an estimated 55% of owners report texture loss within a year due to improper cleaning methods. You can discover more insights about the leather care market on TechSci Research to understand why specialized products are essential.
A cardinal rule for wet cleaning: Never spot clean. Applying cleaner to a single area will almost certainly result in a water ring or tide mark upon drying. To achieve a uniform finish, you must clean the entire panel, or preferably, the entire shoe.
Using a premium foaming solution like the Gold Standard Cleaner is highly effective. The foam delivers the cleaning agents without waterlogging the leather, lifting dirt to the surface for easy removal.
Follow these steps precisely:
- Prepare Your Workspace: Lay down a towel to protect your surface. Confirm that you have already thoroughly dry-brushed the shoes to remove all loose debris.
- Apply the Cleaner: Shake the bottle well. Dispense a small amount of foam directly onto a soft-bristled brush—not directly onto the shoe. This provides maximum moisture control.
- Work in Sections: Gently scrub one small section at a time using a circular motion. A light lather will form as the foam lifts the dirt. Be patient and do not apply excessive force; let the cleaner perform the work.
- Blot and Lift: Immediately after scrubbing a section, use a clean, damp microfiber towel to blot and wipe away the foam and lifted soil. Do not rub; the goal is to absorb the moisture and grime.
- Ensure Uniformity: Proceed to the next section, slightly overlapping the previously cleaned area. This systematic, section-by-section process is the key to preventing discoloration and tide marks.
Once the entire shoe is cleaned, the drying process begins—an equally critical step that will be detailed next. Rushing this final stage can negate all previous work. This methodical approach is about treating the material correctly, resulting in footwear that looks and feels as intended.
Advanced Techniques for Tough Stains on Nubuck
Despite careful maintenance, accidental stains from substances like coffee, grease, or road salt are inevitable. These situations require targeted, stain-specific treatments. Acting quickly but methodically with the correct approach is key to a successful outcome.
Removing Oil and Grease Stains
Oil-based stains are among the most common and challenging issues for nubuck owners. Due to the leather's porosity, grease penetrates quickly, leaving a dark, persistent mark. The immediate impulse to scrub with a cleaner will only force the oil deeper into the material.
The correct first step is absorption.
- Act Immediately: The moment a spill occurs, gently blot any surface oil with a clean, dry microfiber cloth. Do not rub.
- Apply an Absorbent: Generously cover the entire stain with cornstarch or a dedicated leather absorbent powder. Allow it to sit for several hours; overnight is optimal. The powder's function is to draw the oil out of the nubuck's fibers.
- Brush Away: After the powder has had sufficient time to work, use your nubuck brush to gently sweep it away. The stain should be significantly lighter.
- Repeat if Necessary: For stubborn, deep-set grease, a second application of powder may be required.
Only after you have removed as much oil as possible using this dry method should you consider a spot treatment with a degreaser formulated for delicate leathers.
Correcting Water Spots and Tide Marks
This next technique may seem counterintuitive, but it is a professional method for correcting water damage. A single drop of water can dry into a dark, ringed spot. Attempting to clean only that spot will almost always worsen the problem.
The solution is to blend the stain by evenly dampening the entire panel of the shoe.
When addressing water spots, the objective is to create a single, uniform wet surface that will then dry evenly, thereby erasing the original tide mark. This is the most effective professional technique for this issue.
To execute this safely, lightly mist the entire shoe or panel with a fine spray of distilled water until the surface is evenly damp but not saturated. Use a soft, lint-free cloth or sponge to gently blend the moisture, focusing on the edges of the original spot.
Once dampened, insert high-quality shoe trees or paper towels to maintain the shoe's shape. Allow them to air dry completely, away from any direct heat source. Once dry, a light brushing with a nubuck brush will restore the nap, and the original spot should no longer be visible.
Erasing Salt Lines from Winter Wear
Winter slush often contains salt, which leaves white, crystalline lines on footwear as it dries. These stains are not merely cosmetic; salt leaches moisture from the leather, leaving it brittle and susceptible to cracking over time.
A simple solution of diluted white vinegar is highly effective for this problem. The mild acid in vinegar dissolves and lifts salt deposits without harming the leather.
- Prepare a solution of two parts cool water to one part white vinegar.
- Lightly dampen a clean microfiber cloth with the solution; it should be damp, not soaking wet.
- Gently blot and wipe the salt stains. The white lines should begin to dissolve.
- Follow up by wiping the area with a cloth dampened with plain water to rinse away any vinegar residue.
- Allow the shoes to air dry completely, then brush thoroughly to restore the nap.
This type of targeted approach to cleaning leather nubuck distinguishes a knowledgeable owner from one who acts on impulse. Understanding the cause of the stain allows you to deploy the correct, effective remedy.
Post-Cleaning Protocol: Drying, Restoration, and Protection
The cleaning process is not complete until the post-clean protocol is followed. The steps taken immediately after a deep clean are what determine a lasting, high-quality result. Neglecting this stage can lead to stiff, warped, or brittle leather, effectively undoing the cleaning work. The essential steps are proper drying, restoring the nap, and applying a protective layer.
The Art of Air Drying
Immediately following a wet clean, nubuck is at its most vulnerable. The fibers are saturated, and improper drying is a primary cause of permanent damage. The cardinal rule is: never apply direct heat.
Using a radiator, hairdryer, or direct sunlight will effectively "cook" the leather, causing the protein structures to shrink and crack. This damage is irreversible. Patience is the only correct approach.
Follow this procedure:
- Insert Shoe Trees: Immediately after cleaning, place cedar shoe trees inside the footwear. They absorb interior moisture while critically maintaining the shoe's original shape as it dries.
- Ensure Proper Ventilation: Place the shoes in a room with good air circulation, away from sunlight or heat sources. The drying process can take 24 to 48 hours.
- Do Not Disturb: Allow the shoes to dry naturally. Constant handling will not expedite the process and can interfere with the fibers as they settle.
Restoring the Signature Nubuck Nap
Once the shoes are 100% dry to the touch, the nap will likely appear flat and feel slightly stiff. This is normal. The next step is to use your nubuck brush to restore the texture.
Begin by using the soft bristles to gently sweep the entire shoe in a single direction. This encourages the fibers to loosen. Then, switch to small, circular motions across the entire surface. This lifts and separates the individual fibers, restoring the plush, uniform texture characteristic of nubuck.
This final brushing is not merely cosmetic. It "resets" the nap, eliminating matted areas where new dirt can become trapped, thereby simplifying future maintenance.
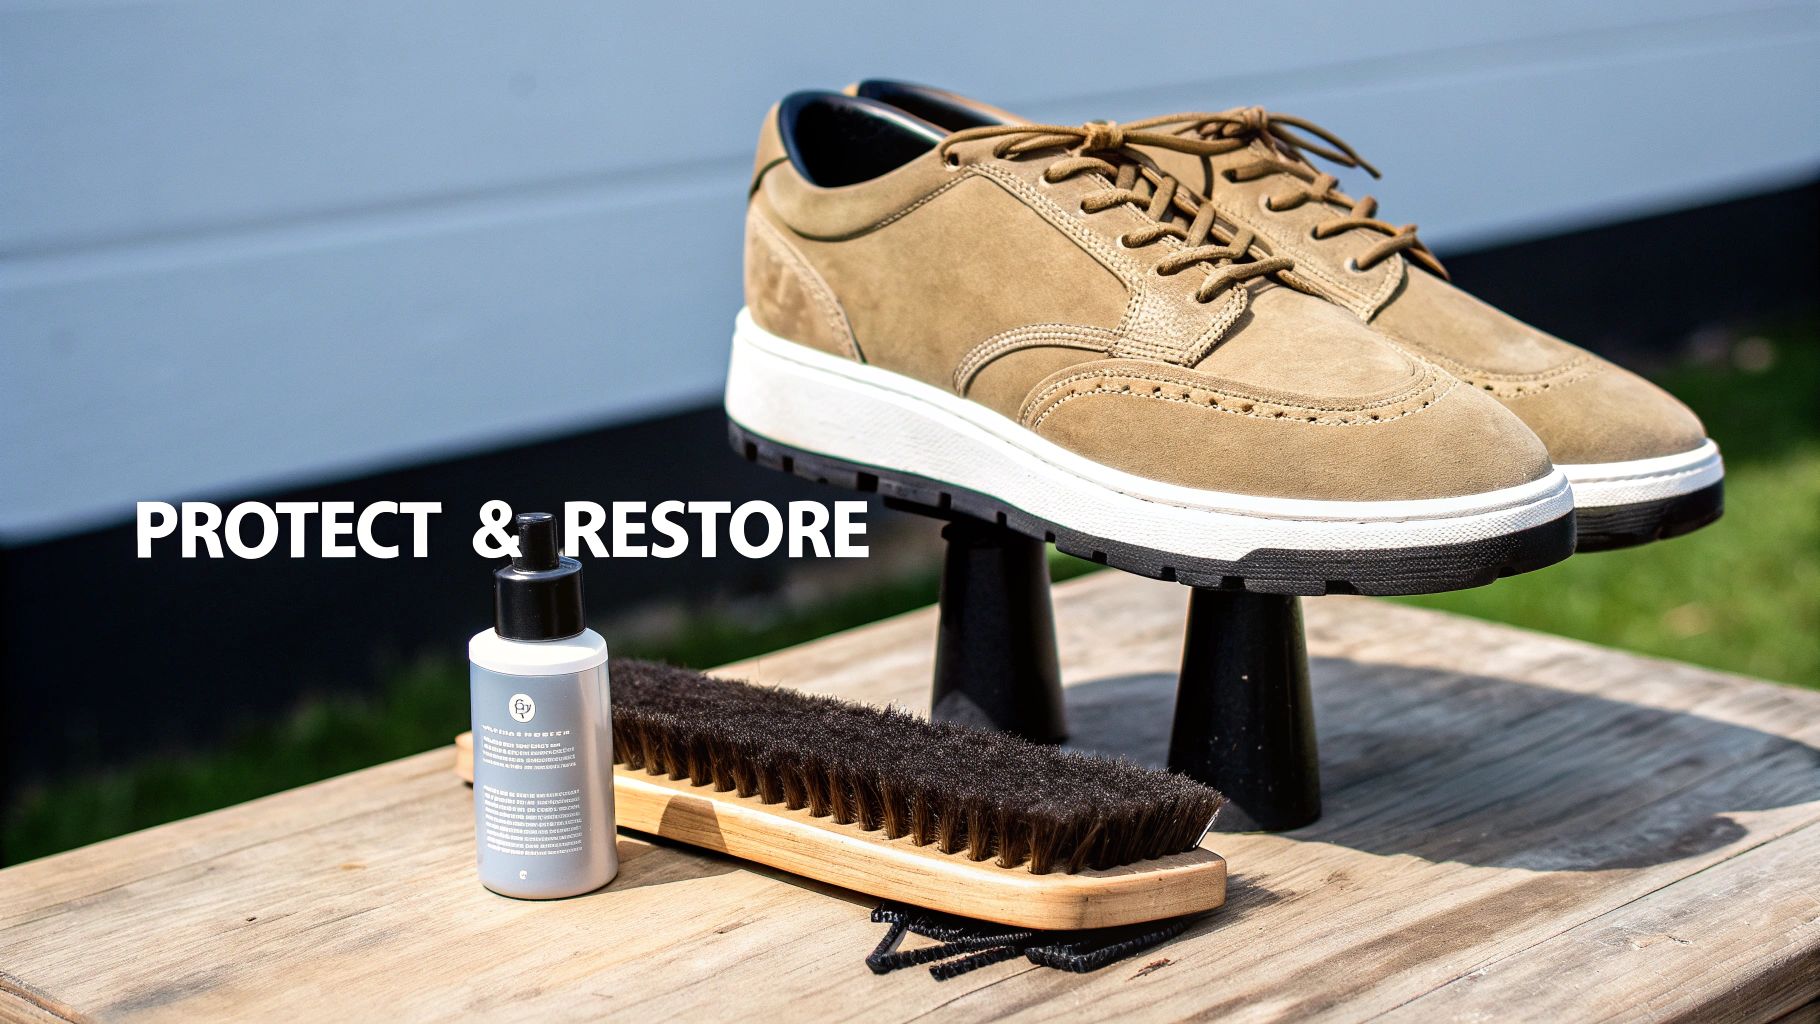
Applying an Invisible Protective Barrier
This final step is arguably the most critical. Having invested the effort to clean your nubuck, applying a protective spray is a non-negotiable measure to preserve the result.
The market for leather cleaners, which reached $800 million in 2025 and is projected to hit $1.2 billion by 2033, reflects a growing consumer demand for protective products. However, an estimated 70% of cleaning attempts using improper household products result in damage.
A high-quality nano-protector spray, such as our Gold Standard Water & Stain Repellent, creates a breathable, invisible barrier on the leather's surface. This causes liquids to bead up and roll off rather than being absorbed, providing time to wipe them away before a stain can set.
For proper application, hold the can approximately six inches from the shoe and apply a light, even coat over the entire surface. Allow it to dry for several hours, then apply a second coat for maximum protection. This final step extends the life of the clean and simplifies future maintenance.
Frequently Asked Questions About Nubuck Care
Even with detailed instructions, specific questions arise. The following addresses the most common inquiries from our community, providing expert clarification to ensure confident and effective footwear care.
Can a Suede Cleaner Be Used on Nubuck?
Generally, yes. Products formulated for suede are typically gentle enough for nubuck, as both are delicate, napped leathers. However, the materials are not identical. Nubuck is derived from the outer grain side of the hide, making it slightly more durable than suede, which comes from the softer inner layer.
For absolute certainty, it is best to use a high-quality, pH-balanced cleaner explicitly formulated for both materials. This ensures the formula is optimized for either texture, allowing you to clean with complete confidence.
What is the Recommended Cleaning Frequency for Nubuck?
The best approach is preventative. A quick, light brushing with a nubuck brush after every few wears is the most effective habit. This 30-second task prevents daily dust and dirt from embedding deep into the nap.
A full wet clean should be reserved for significant soiling events, such as spills or exposure to mud. The most impactful routine is protection.
The most effective strategy is to reapply a repellent spray every 4-6 weeks of consistent wear. A robust protective barrier is the primary defense against the need for frequent deep cleaning.
What is the Most Common Mistake in Nubuck Care?
Without question, it is being overly aggressive. This manifests in two ways: scrubbing too hard or using an incorrect cleaning agent. Scrubbing with excessive force can permanently crush and flatten the delicate nap, creating a "bald spot" and ruining the material's signature feel.
Equally damaging is the use of household cleaners like dish soap or all-purpose sprays. These contain harsh detergents that strip the leather of its natural oils, resulting in discoloration, a stiff texture, and eventual cracking. Always begin with the gentlest method and proceed with patience.
My Nubuck Shoes Got Soaked in the Rain. What Should I Do?
First, do not use a hairdryer, radiator, or any direct heat source. This is the fastest way to cause irreversible damage to wet leather, including shrinking, brittleness, and cracking.
Instead, follow this recovery protocol:
- Absorb Internal Moisture. Immediately stuff the shoes tightly with newspaper or paper towels to draw moisture from the interior.
- Maintain Shape. Insert cedar shoe trees. This is crucial for preventing the shoes from warping as they dry.
- Air Dry. Place them in a cool, well-ventilated area away from direct sunlight. The process is slow and may take over 24 hours. Do not rush it.
- Restore the Nap. Once completely dry, the nap will feel stiff. Use your nubuck brush to gently work over the entire surface, lifting the fibers and restoring their soft, uniform texture.
Your investment deserves professional-grade care. The Gold Standard Ultimate Sneaker Cleaner Kit provides all the specialized tools—from the pH-balanced foaming cleaner to the multi-sided brush—to safely and effectively handle any cleaning challenge. Elevate your shoe care routine at https://gold-standard-approved.myshopify.com.