
Before any cleaning can begin, the first and most critical step is material identification. Using the correct cleaning method for a specific material is the difference between restoration and irreversible damage. The approach that restores canvas sneakers will ruin suede boots.
Professional-level results are not achieved through aggressive scrubbing but through a precise, materials-first methodology. This guide provides that methodology.
The Foundation of Proper Shoe Care
Consider this a pre-cleaning diagnostic. Taking a moment to assess your footwear is a non-negotiable step for footwear preservation. Applying the wrong cleaner or using a brush with bristles too stiff for the material can cause discoloration, abrasion, cracking, or texture damage, escalating a simple cleaning task into a costly repair.
This initial assessment is not a superfluous step; it is fundamental. Understanding whether you are working with full-grain leather, synthetic mesh, delicate knit, or absorbent canvas ensures that every action you take contributes to the longevity of the footwear, rather than its detriment.
Assess Your Materials First
Effective shoe care begins with a single question: "What is the material composition?" Generic, one-size-fits-all advice is ineffective because it disregards the unique properties of each material.
- Suede & Nubuck: These are delicate leathers characterized by a textured nap. Their high porosity makes them extremely susceptible to moisture damage, which is why water-based cleaning methods should be avoided or used with extreme caution. A dry-cleaning approach is the professional standard.
- Leather: While durable, leather is a porous natural hide. It requires cleaners that lift surface contaminants without stripping its essential oils. Harsh household detergents will dehydrate the leather, leading to brittleness and cracking.
- Knit & Mesh: Common in modern athletic footwear, these textiles are engineered for breathability. However, their open-weave structure readily traps particulate matter. Aggressive scrubbing can easily cause permanent fraying and pilling.
- Canvas: This robust cotton fabric is prone to soiling but is resilient to cleaning. The primary challenges are preventing dye migration (color bleed) and avoiding tidelines—yellowish stains that appear during improper drying.
Assemble Your At-Home Shoe Cleaning Toolkit
An extensive collection of products is unnecessary for achieving professional-grade results. A curated set of high-quality, specialized tools is far more effective than an array of generic alternatives.
This is the essential toolkit for addressing the vast majority of footwear materials and conditions.
| Tool | Primary Use | Gold Standard Recommendation |
|---|---|---|
| Soft Bristle Brush | Delicate materials like suede, nubuck, and premium knit textiles. | For gentle dry brushing or applying light foam cleaners without damaging sensitive surfaces. |
| Medium Bristle Brush | General cleaning on midsoles, leather, and canvas. | The workhorse brush for most standard sneaker cleaning applications. |
| Stiff Bristle Brush | Durable outsoles and heavily soiled, non-delicate materials. | Use to dislodge caked-on mud and deeply embedded grime from rubber and synthetic compounds. |
| pH-Balanced Cleaner | Safely lifting dirt from all materials without chemical damage. | Our Premium Shoe Cleaning Solution is engineered for this purpose. |
| Microfiber Towel | Drying and buffing without leaving lint or causing abrasion. | A clean, highly absorbent towel is essential for a residue-free finish. |
Investing in a proper set of brushes and a chemically sound, pH-balanced cleaner is not an expense—it is a crucial step in maintaining the value and condition of your footwear.
At Gold Standard, our core principle is simple: the right tool for the right material is paramount. An inexpensive, generic brush can inflict permanent micro-scratches on premium leather, whereas a properly formulated cleaner will lift contaminants without resorting to harsh, damaging chemicals.
This approach is gaining traction globally. The shoe care market is projected to exceed $7 billion by 2032, indicating a significant consumer shift towards understanding that proper maintenance is a sound investment. Protecting footwear with specialized solutions is now standard practice. You can explore more insights on the growing shoe care market to see how consumer priorities are evolving.
Cleaning Modern Sneakers The Right Way
Modern athletic footwear often features a complex assembly of materials. A single shoe can incorporate smooth leather panels, breathable mesh, delicate knit textiles, and dense rubber midsoles. This multi-material construction renders a one-size-fits-all cleaning method ineffective and potentially damaging.
To properly restore sneakers, a precise, zone-by-zone approach is required. This involves selecting the correct brush for a woven upper versus a leather overlay and creating a cleaning lather that lifts dirt without oversaturating the fabric. Mastering this is the difference between a successful refresh and permanent material degradation.
This diagram illustrates the critical preparation sequence that must be completed before any cleaning solution is applied. Proper execution at this stage is foundational to a successful outcome.
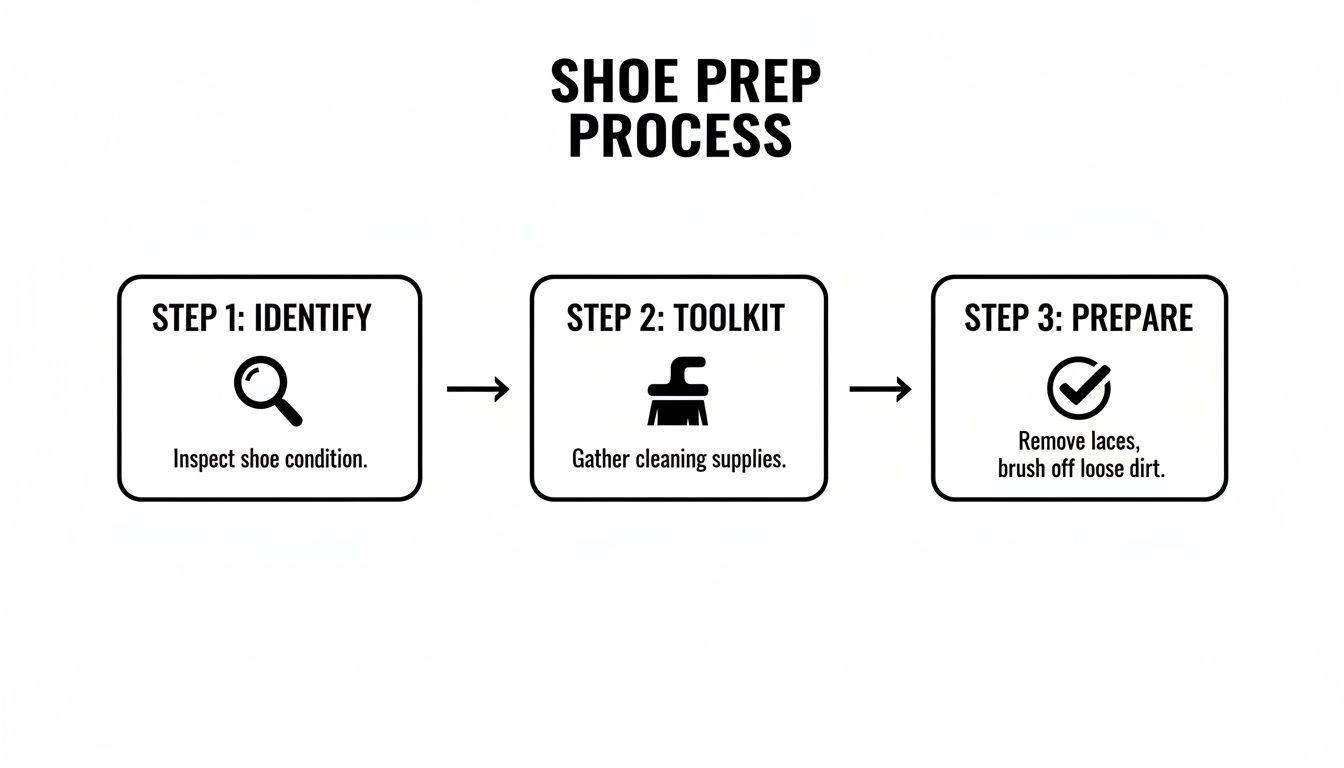
Do not bypass this sequence. Identifying the material, selecting the appropriate tools, and preparing the shoe are the most effective ways to prevent common and costly cleaning errors.
Handling Delicate Knit and Mesh Uppers
Textiles like Primeknit, Flyknit, and other engineered meshes offer superior breathability but their open-weave structure is highly susceptible to trapping dirt and dust. An aggressive cleaning approach is the fastest way to induce pilling, fraying, or structural tears.
A gentle technique is mandatory. First, remove the laces and insoles for separate cleaning; this also provides unobstructed access to the shoe's interior and exterior. Next, use a soft-bristle brush to dry brush the entire upper, dislodging any loose surface debris. This preliminary step prevents dry particulates from turning into mud once a liquid cleaner is introduced.
Moisture control is critical during the washing phase.
- Add a few drops of a quality, pH-balanced shoe cleaner to a bowl of cool water.
- Dip your soft-bristle brush into the solution, then tap away any excess liquid. The brush should be damp, not saturated.
- Agitate the brush in small, circular motions across the knit or mesh. A light foam will form, which works to lift dirt from the fibers.
- Immediately wipe away the foam and lifted grime with a clean microfiber towel. Do not allow the soapy mixture to air-dry on the fabric.
Expert Insight: The objective is to clean the surface, not to waterlog the shoe's structure. Excessive water can lead to staining, particularly on light-colored knits, and can compromise the integrity of the adhesives bonding the upper to the midsole. Control is paramount.
Addressing Leather and Synthetic Panels
Many sneakers utilize leather or synthetic panels for structural support and aesthetics. These surfaces can tolerate more friction than delicate knits, but a careful approach is still necessary to avoid scuffs and abrasion.
For these non-porous surfaces, a medium-stiffness brush is the optimal tool. Its bristles are firm enough to scrub away grime without marring the finish. The process remains the same: generate a foam, work it into the panels, and wipe it clean with a microfiber towel immediately. This technique is particularly effective for removing dirt from textured or tumbled leather.
For stubborn scuffs on synthetic panels, moderate pressure can be applied, but always test on an inconspicuous area first. Allow the cleaning solution and the brush's mechanical action to do the work, not brute force.
Restoring Midsoles and Outsoles
Cleaning the midsole often yields the most dramatic visual improvement. Materials like EVA foam, polyurethane, and rubber are durable but readily show scuffs, stains, and grime, which can make the entire shoe appear worn.
This is the appropriate application for your stiff-bristle brush. Its robust bristles are designed to agitate dirt from the textured surfaces of midsoles and the deep grooves of outsoles.
- For General Grime: Apply your cleaning solution directly to the stiff brush and scrub the midsole and outsole vigorously. You will observe immediate removal of surface dirt.
- For Tough Scuffs: For persistent black scuffs on white midsoles, apply a small amount of cleaning solution directly to the mark and allow it to sit for a minute before scrubbing.
- For Yellowing Soles: Translucent or "icy" soles are prone to yellowing due to oxidation. A deep clean will remove surface dirt, but reversing deep-set yellowing typically requires specialized de-oxidizing agents that are beyond the scope of a standard cleaning.
Cleaning the outsole is a matter of both aesthetics and function. Caked-on mud and debris in the tread pattern reduce traction. Use your stiff brush, and a small pick if necessary, to clear these grooves. This is a critical maintenance step for any performance footwear, as a clean sole is a functional sole.
Mastering Leather and Suede Care
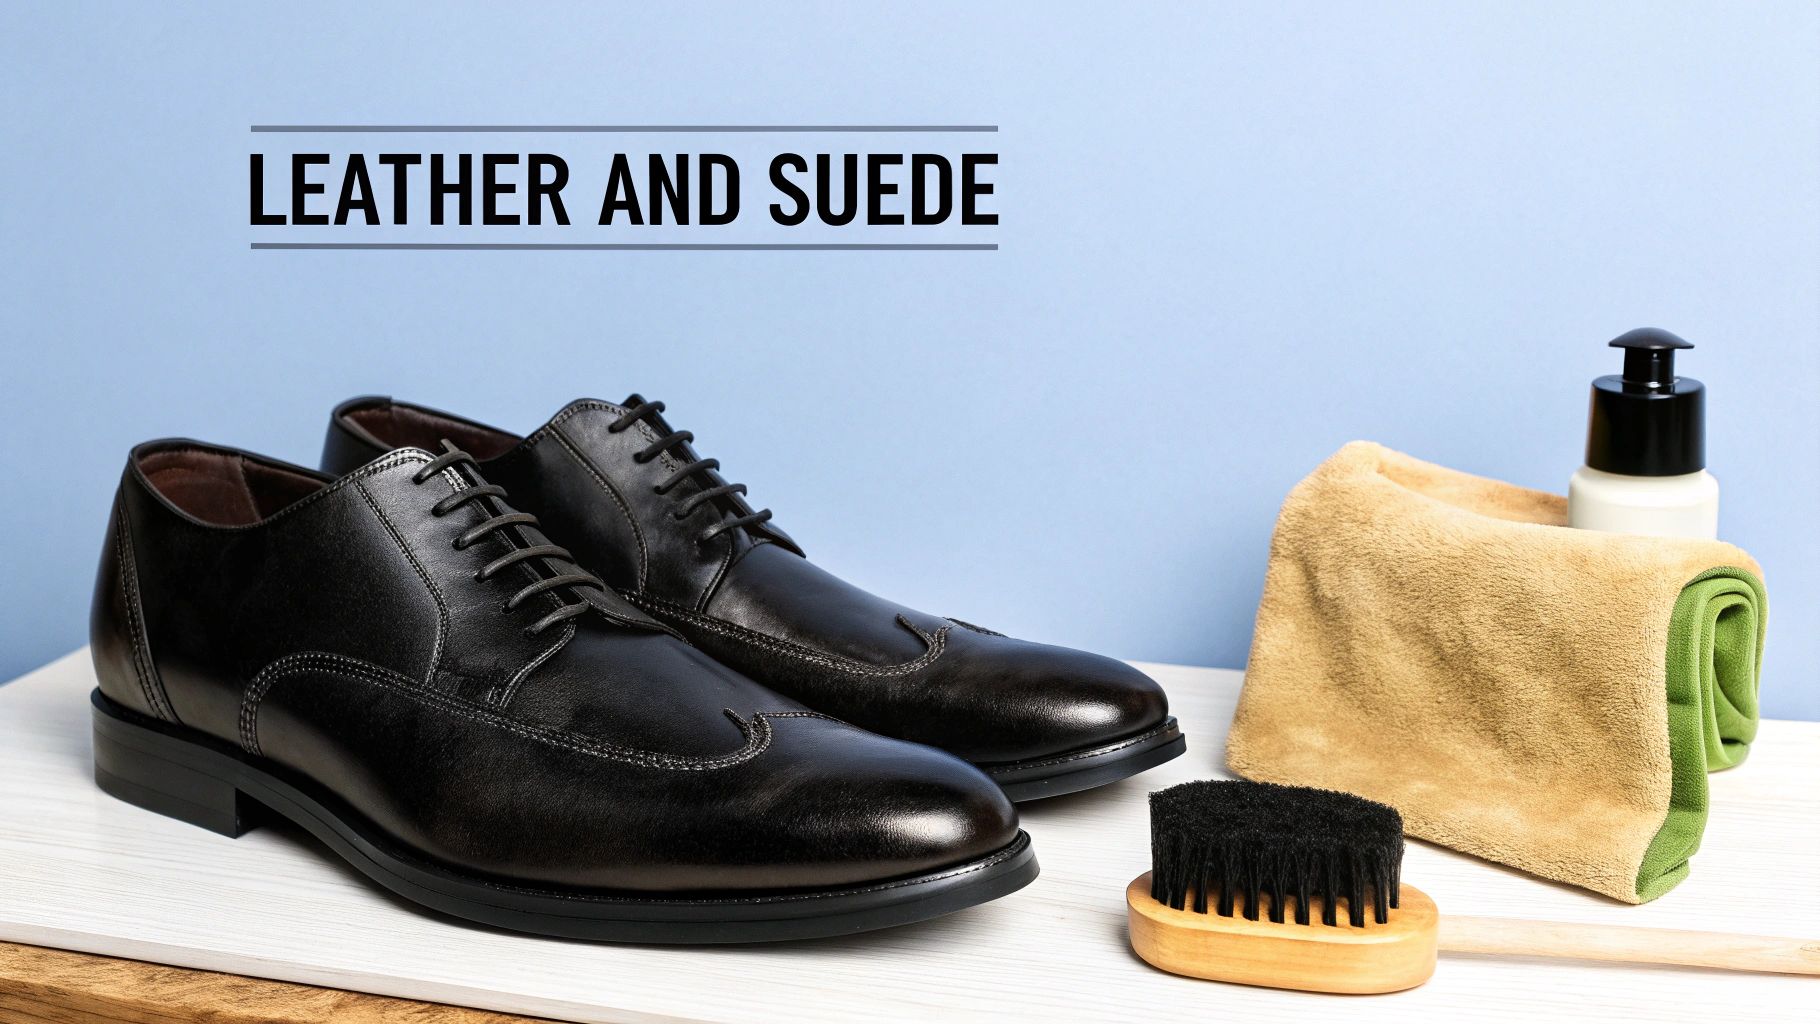
Unlike the resilient synthetics found on most sneakers, leather and suede are natural materials that demand a specific care regimen. Improper treatment can result in permanent damage, such as cracking, discoloration, or a flattened nap that ruins the material's intended finish.
This section provides field-tested methods for these premium materials. When maintained correctly, high-quality leather and suede do not simply endure; they develop a unique patina and character over time.
The Art of Cleaning Leather Footwear
The goal of cleaning leather is not merely to remove dirt, but to clean, condition, and protect the hide. Avoid harsh household chemicals like dish soap or all-purpose sprays; their aggressive surfactants will strip the essential oils from the leather, leaving it dehydrated, brittle, and susceptible to cracking.
Begin by preparing the shoe. Remove the laces and insert shoe trees to create a firm, stable surface. Then, use a horsehair brush to dry brush the entire shoe, removing any loose dirt and dust before they can be ground into the leather during wet cleaning.
Next, use a cleaner formulated specifically for fine leather. These products are pH-balanced to clean effectively without causing chemical damage.
- Apply a small amount of a quality leather cleaner onto a damp microfiber cloth.
- Work the cleaner into the leather using small, gentle circular motions, paying close attention to creases and seams where dirt accumulates.
- Immediately after cleaning a section, use a separate, clean, damp cloth to wipe away all residue. Do not allow the cleaner to dry on the surface.
This method lifts grime without oversaturating the leather with moisture.
Conditioning: The Secret to Longevity
Cleaning is only the first part of the process. After the leather is clean and has completely air-dried, you must replenish the natural oils that were removed. This is the role of a high-quality leather conditioner. It functions as a moisturizer, keeping the hide supple, preventing cracks, and restoring its natural luster.
Apply a pea-sized amount of conditioner to a soft cloth and work it into the leather in small circles. Allow it to penetrate for 15-20 minutes, then buff off any excess with a clean horsehair brush. The improvement in color and richness will be immediately apparent.
Pro Tip: For a high-gloss finish on dress shoes, a quality wax polish is the final step. Apply a thin layer with a dauber brush, let it dry to a haze, and then buff vigorously with a horsehair brush. The friction-generated heat melts the wax, creating a smooth, mirror-like shine.
Bringing Suede and Nubuck Back to Life
Suede and its close relative, nubuck, are defined by a delicate, fibrous nap that is highly intolerant of moisture. The cardinal rule is to avoid water whenever possible. Saturating suede can lead to water spots, color bleeding, and a matted texture that is nearly impossible to restore. The proper approach is akin to dry cleaning.
Your essential tools are a dedicated suede eraser and a suede brush (those featuring a combination of nylon and brass bristles are particularly effective).
- Start with the Eraser: Gently rub the suede eraser over any scuffs, stains, or shiny spots. The eraser will crumble as it works, lifting the embedded dirt out of the nap.
- Brush to Restore: After using the eraser, employ the suede brush to sweep away the eraser debris and lift the nap. Always brush in a consistent direction to achieve a uniform, velvety finish.
For tougher, non-oily stains, a minimal amount of liquid may be used. A specialized suede cleaner, like the Gold Standard Premium Shoe Cleaning Solution, generates a gentle foam. Apply the foam to a soft brush, scrub the affected area lightly, and immediately blot the area dry with a microfiber towel. After it is completely dry, brush again to restore the texture.
Consumers are increasingly aware that a single product is insufficient for a diverse footwear collection. Consequently, the global shoe cleaning kits market is projected to grow from USD 5.16 billion to USD 7.79 billion by 2031. This trend is driven by the understanding that protecting a footwear investment requires material-specific tools. You can explore more data on the shoe care market trends here, which confirms our long-held belief: the right product is indispensable.
Conquering Canvas and Common Fabrics
Canvas is a utilitarian staple in the footwear industry. It is durable, versatile, and used in everything from classic high-tops to casual slip-ons. However, its woven texture is an effective trap for dirt, grime, and stains that can quickly degrade the appearance of the footwear.
A common misconception is that cleaning canvas simply requires more aggressive scrubbing. This is incorrect. The proper technique involves lifting embedded dirt without causing color bleed or leaving behind the yellow tidelines that form during improper drying. A methodical approach is essential.
First Things First: Pre-Treat Those Stains
Before a full wash, any concentrated stains must be addressed directly. A coffee drip or grass stain, if left untreated, can become a permanent blemish. The most effective course of action is to apply a dedicated cleaner directly to the spot as a pre-treatment.
We recommend a product like the Gold Standard Premium Shoe Cleaning Solution. Its pH-balanced formula is engineered to break down tough stains without the harsh chemicals found in laundry detergents, which are known to strip color from dyed canvas.
- Apply a few drops of the solution directly onto the stain.
- Using a medium-bristle brush, gently work the solution into the fabric in small, circular motions.
- Allow the solution to sit for several minutes to penetrate the fibers and break down the stain before proceeding with the main wash.
By spot-treating first, you isolate and address the problem area, preventing the stain from spreading during the full cleaning process.
The most significant error we observe with canvas footwear is machine washing. The high heat and intense tumbling action can destroy the shoe's structure, melt the adhesives that bond the sole, and cause the canvas to fray. Hand-washing is the only method that provides the necessary control for a safe and effective result.
The Hand-Washing Method: Your Go-To for Canvas
For canvas footwear, hand-washing is the superior method for at-home cleaning. It allows for precise control over the amount of water and cleaner used, which is critical for preventing oversaturation and color bleed.
Begin by removing the laces and insoles for separate cleaning. Prepare your cleaning station with a bowl of cool water and your shoe cleaner.
Dip your medium-bristle brush into the water, then add a few drops of the cleaning solution. Begin working the brush in circles over the entire canvas upper to build a light, consistent foam. It is this foam that lifts and suspends the dirt particles.
Pay extra attention to high-contact areas like the toe cap and around the eyelets, where dirt accumulation is most common. Once the entire shoe is foamed, you are ready for the most critical step.
How to Rinse and Dodge Those Dreaded Water Lines
This is the stage where most cleaning attempts fail. The faint yellow or brownish lines that appear on canvas shoes after drying are called tidelines. They form when dirt and soap residue are not fully rinsed away and are wicked to the surface as the water evaporates.
A thorough rinse is the only way to prevent this.
- Take a clean microfiber towel, dip it in fresh, cool water, and use it to wipe away all foam and residue from the shoe's surface.
- Rinse the towel frequently in clean water. Using a dirty towel will only redeposit grime onto the shoe.
- Once all residue is removed, pat the shoe down with a dry section of the towel to absorb as much excess moisture as possible.
This meticulous rinsing process is essential for a clean, uniform finish. Complete removal of all cleaning residue ensures that no tidelines will form as the shoes dry.
The Critical Steps After You Clean
The scrubbing is complete, but the job is not finished. The post-cleaning phase is where many well-intentioned efforts go wrong. Improper handling at this stage can negate a perfect cleaning job. The final steps—drying and protecting—are what elevate a simple wash to a professional-level restoration.
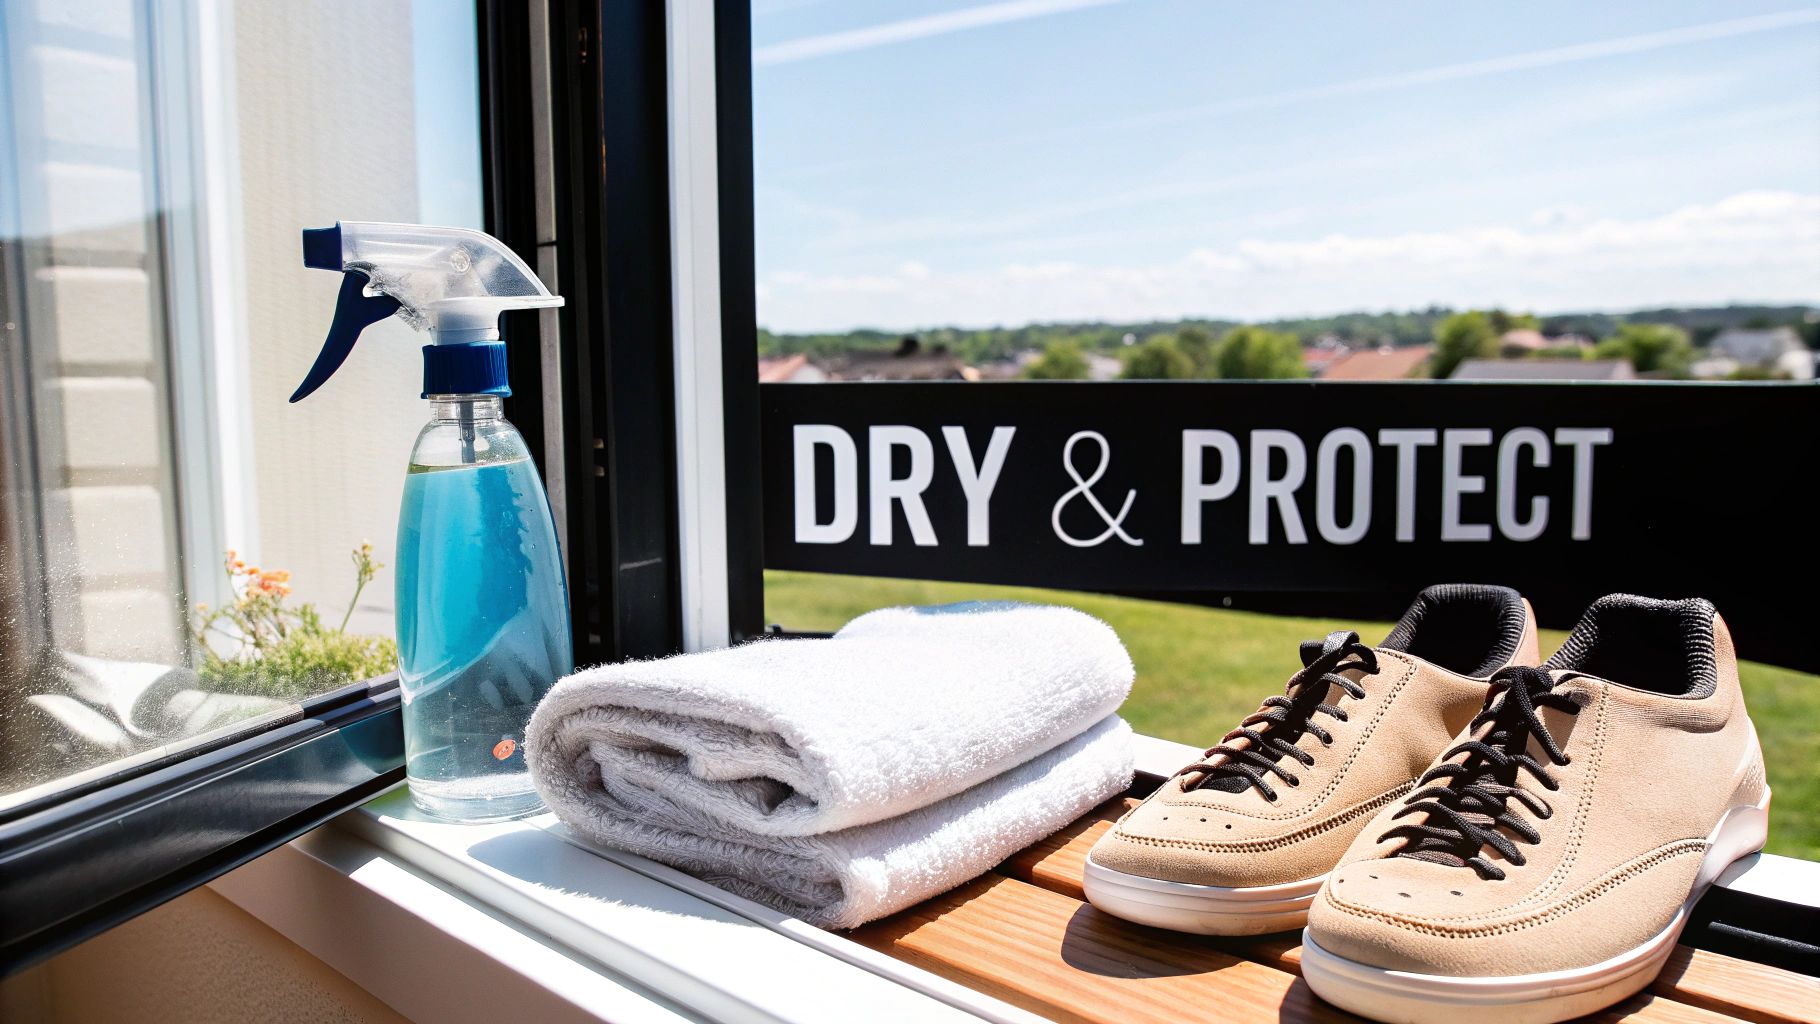
These are not optional additions; they are integral to preserving the material integrity, maintaining the shoe’s structure, and simplifying all future cleaning.
Proper Drying Techniques
Patience is the governing principle. The most common mistake is attempting to accelerate the drying process with direct heat.
Never use a hairdryer, place shoes on a radiator, or leave them in direct, intense sunlight. High heat is detrimental. It can warp synthetic midsoles, shrink delicate textiles like knit and canvas, and compromise the integrity of the adhesives used in the shoe's construction. It is a shortcut that leads directly to a reduced lifespan for your footwear.
The only correct method is to air-dry them in a well-ventilated area, away from direct sunlight. To safely accelerate the process and help them maintain their shape:
- Stuff them: Pack the shoes with newspaper or paper towels. This classic technique effectively draws moisture from the interior lining.
- Use shoe trees: For leather footwear or more structured sneakers, cedar shoe trees are the superior choice. They absorb moisture, neutralize odors, and perfectly maintain the shoe's intended shape as it dries.
Footwear is at its most vulnerable state when wet. Forced, rapid drying places extreme stress on every seam, glue bond, and fiber. Slow, natural air-drying is the only method that guarantees the shoe will return to its original form without damage.
The Power of Proactive Protection
Once your shoes are 100% dry to the touch, it is time for the final, preventative step. This is analogous to waxing a car after washing it. You are applying an invisible barrier that will significantly reduce future maintenance.
A high-quality protectant spray is a vital tool. It creates a hydrophobic barrier on the material's surface, causing liquids to bead up and roll off rather than being absorbed. It is the most effective defense against unexpected rain, spills, and environmental contaminants.
Applying a Protectant Spray
The application is simple, but precision is key.
- Ensure you are in a well-ventilated area, preferably outdoors. Hold the aerosol can approximately 6-8 inches from the shoe.
- Apply a light, even coat using a steady, sweeping motion to prevent saturation in any single area.
- Allow the shoes to air dry for at least several hours; overnight is optimal. This allows the protective barrier to fully cure and bond with the material.
This two-minute procedure can prevent hours of future cleaning. A protected shoe is easier to maintain, more resistant to deep-set stains, and retains its clean appearance for longer. It is the final, essential component of a comprehensive at-home shoe care regimen.
Your Top Shoe Care Questions, Answered
Through years of experience, we've encountered every conceivable question regarding shoe care. Certain inquiries arise repeatedly, highlighting common myths and procedural errors that prevent people from achieving optimal results.
We have compiled the most frequent questions from our community to provide clear, expert-driven answers.
Can I Just Toss My Sneakers in The Washing Machine?
We strongly advise against it. While it may seem like a convenient solution, machine washing is one of the most destructive things you can do to modern footwear. The combination of intense agitation and high heat is catastrophic for shoe construction.
The tumbling action can weaken the critical adhesives bonding the upper to the sole, potentially causing delamination. It can also permanently warp the shape of the midsole and ruin delicate materials like leather, suede, and engineered knits.
Manual cleaning, using material-specific tools and techniques, is always the safest and most effective method for preserving your footwear.
How Often Should I Actually Clean My Shoes?
There is no universal schedule; frequency depends on wear patterns and lifestyle. The key is consistent maintenance rather than infrequent, intensive cleaning sessions.
- Daily Wear: For shoes worn frequently, a quick wipe-down or spot-cleaning every 1-2 weeks is recommended. This prevents the accumulation of dirt that can lead to more difficult cleaning later.
- Post-Incident: After exposure to rain, mud, or a spill, clean the shoes as soon as possible. The faster a contaminant is addressed, the lower the likelihood of permanent staining.
- Collection Pieces: For valuable or special-occasion footwear, we recommend cleaning them after each wear before returning them to storage. This ensures that any unnoticed soil does not have time to set.
The principle is this: regular, light maintenance is far more beneficial for the long-term health of your shoes than an aggressive, deep clean every six months. Consistency is key.
What's The Biggest Mistake People Make When Cleaning Shoes?
Without question, it is using the wrong cleaning solution. It is a common error to use household cleaners like dish soap, all-purpose sprays, or bleach under the assumption that "cleaner is cleaner." This is a critical mistake.
These products contain harsh chemicals that are highly damaging to shoe materials. They will strip the natural oils from leather, causing it to become dry, brittle, and cracked. On suede, they will mat the nap and can cause severe discoloration, ruining the material's texture.
Using a pH-balanced solution specifically formulated for footwear is the only way to ensure you are cleaning your shoes without causing progressive, irreversible damage.
Do I Really Need All Those Different Brushes?
Yes, they are essential. Using a single brush for all applications is akin to painting a detailed work of art with a wide house-painting brush. Each brush is a specialized tool, and matching the brush to the material is non-negotiable for achieving superior results without causing harm.
Consider their specific functions:
A soft-bristle brush is for delicate uppers—premium leather, suede, knit textiles. It cleans gently without abrading or fraying the material.
A medium-stiffness brush is the multi-purpose tool. It is ideal for more durable materials like canvas or for general cleaning on leather panels.
A stiff-bristle brush is reserved exclusively for the most durable components: the outsoles and midsoles. It possesses the necessary rigidity to dislodge caked-on dirt and grime from rubber and tread patterns.
Ready to elevate your shoe care regimen with tools engineered by experts? The Gold Standard Premium Shoe Cleaning Kit provides everything required—from our pH-balanced solution to a full set of material-specific brushes—to achieve professional results at home. Invest in your footwear and shop the collection now.